If your door handle’s loose, you can usually fix it quickly by tightening obvious screws, but sometimes the problem’s hidden inside the rose, spindle, or latch assembly and needs a few tools and a systematic check. Start with the visible fasteners, then remove trim to inspect set screws, spindle engagement, and screw length; if those aren’t the issue, there are a few simple replacement parts and adjustments that’ll usually restore firm operation.
Key Takeaways
- Remove the decorative rose or escutcheon to expose and inspect the mounting and set screws.
- Tighten all visible mounting and grub (set) screws using the correct-size screwdriver or hex key.
- Replace stripped or missing screws and add small washers for a snug, wobble-free fit.
- Inspect the spindle and internal latch for wear; replace a bent or worn spindle and weak springs.
- Reassemble and test the handle, then lubricate moving parts and schedule inspections every 3–6 months.
Common Causes of a Wobbly Door Handle
Although a loose door handle looks minor, it usually stems from a few specific failures you can diagnose quickly. You’ll first inspect mounting screws: stripped, backed-out, or missing fasteners are the typical culprit across door handle types. Next, check the spindle and set-screw connections; wear or improper engagement lets the handle wobble under torque. Examine rose or escutcheon plates for cracked plastic or warped metal—common materials like zinc die-cast, brass, and stainless respond differently to stress and corrosion. Internal latch assemblies can loosen if retaining clips fail or if bore holes are oversized. Less common, but possible, are worn spline fittings or threaded holes damaged by overtightening. You’ll prioritize fastener integrity, part wear, and material-specific failure modes to pinpoint repair steps.
Tools and Materials You’ll Need
- Phillips and flathead screwdrivers; hex key set
- Spare screws, machine/wood variants; small washer pack
- Replacement spindle or mounting screws compatible with handle materials
Keep a magnetic tray for fasteners and a flashlight for cavity inspection. Use a torque-limited driver if available to avoid striping screw heads. Select stainless or brass replacements to match corrosion resistance of the original handle materials. Label parts as you remove them for accurate reassembly.
How to Tighten a Loose Knob or Lever
Start by inspecting the mounting screws on both sides of the knob or lever to identify any that are loose or missing. If the handle uses set (grub) screws, use the correct-size hex or flat driver to snug them without stripping the head. Tighten incrementally and test the handle after each adjustment to guarantee proper alignment and smooth operation.
Inspect Mounting Screws
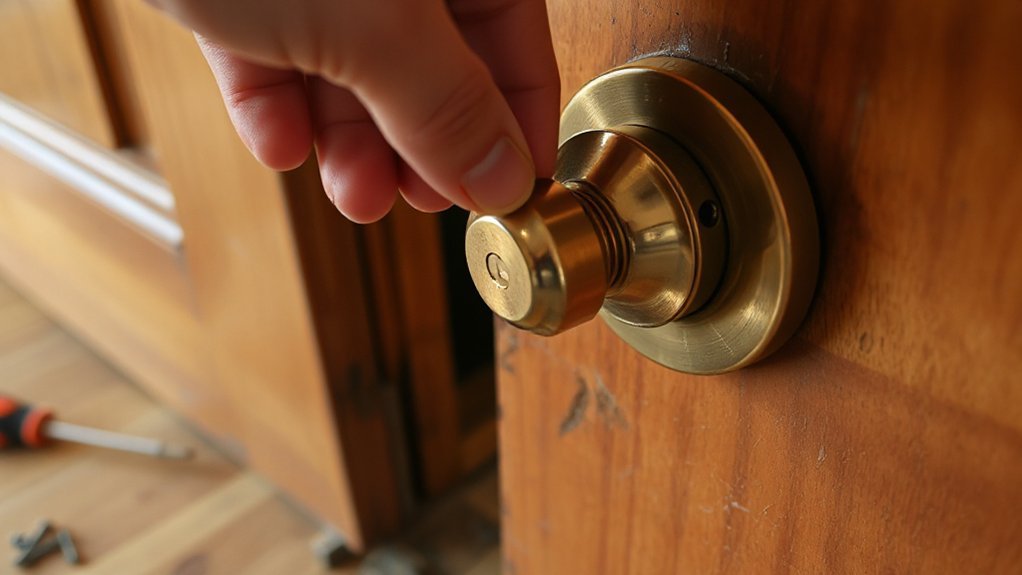
Before you tighten anything, remove the decorative rose or escutcheon to expose the mounting screws so you can see which fasteners are loose or stripped. Inspect the screw heads and threads, identify screw types (flathead, Phillips, machine, or wood) and assess damage. Note mounting techniques used: countersunk, through-bolt, or surface-mounted, since each affects repair approach. Replace any stripped screws with the proper type and length; stainless or zinc-plated are best for durability. If the hole is enlarged, repair before reinstallation.
- Check head condition and thread engagement.
- Verify screw length reaches the strike or backing plate.
- Match screw types to original mounting technique for secure fit.
Document what you change so future maintenance is straightforward.
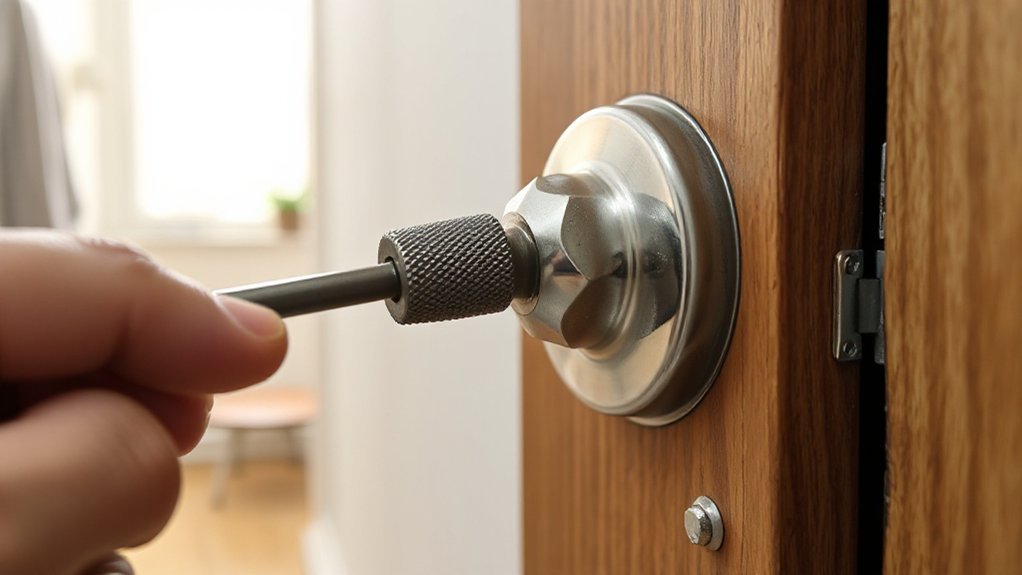
Tighten Set or Grub Screws
Once the mounting screws are secure, tighten the small set (grub) screws that clamp the knob or lever to the spindle; these screws are usually recessed on the knob base or under a decorative cap and control rotational play. Locate the set screws—inspect the knob skirt, lever neck, or remove the cap with a thin blade. Use the correct driver: typically a 2.5–3 mm hex key or a small flathead. Apply firm, controlled torque; stop as soon as the knob stops slipping. Over-tightening can strip the threads or deform the spindle. If screws are rounded, replace them with equivalent set or grub screws of identical thread and length. Reinstall caps and cycle the handle; verify no rotational play and smooth return.
Fixing Internal Mechanism Problems
Now check the internal mechanism to find the real cause of wobble. Start by tightening any mounting screws and confirm the spindle is fully engaged in the handle and latch. If the handle still binds or returns poorly, inspect the spindle and springs for wear or damage and replace faulty parts.
Tighten Mounting Screws
Start by removing the decorative trim or rose to expose the mounting screws holding the handle to the door; you’ll usually find two or three fasteners that secure the spindle and latch assembly. Use the correct screwdriver or hex key, and tighten each screw in a crisscross pattern to distribute clamping force evenly. Don’t overtighten—stop when the handle stops wobbling and the trim sits flush.
- Verify screws are the original length and type to prevent stripped holes.
- If threads spin, inject a drop of threadlocker or use a longer screw for improved grip.
- Recheck handle operation and alignment after tightening; confirm no binding during rotation.
This is routine door maintenance that addresses most loose-handle complaints quickly and reliably.
Inspect Spindle and Springs
While the mounting screws fix external wobble, inspect the spindle and internal springs to diagnose persistent looseness or intermittent latch problems. Remove the handle rosettes, extract the spindle, and examine its flats and square ends for wear or distortion. If the spindle shows rounding, replace it to restore precise spindle alignment; a worn spindle allows play even with tight screws. Next, check spring tension by compressing and releasing the return springs; they should snap the lever back without lag. Replace weak or broken springs; swap both sides if matched springs aren’t available. Reinstall the spindle ensuring it seats fully in the latch mechanism and verify smooth rotation and positive latch engagement. Test multiple cycles to confirm resolved looseness and consistent spring tension.
Replacing Worn Screws, Spindles, and Strike Plates
If your door handle keeps loosening despite tightening, worn fasteners, a degraded spindle, or a bent strike plate are usually to blame and should be inspected and replaced as needed. You’ll remove the handle, check screw threads for rounding, and inspect the spindle for wear or play. Replace stripped screws with machine or wood screws of correct length and diameter; use thread-locker for vibration-prone doors. When replacing spindles, match profile and length, seat firmly in the mechanism, and test operation before reassembly. For strike plates, align and replace bent plates; consider relocating to solid jamb material if screw purchase is poor. Key tasks:
If a handle keeps loosening, inspect/replace stripped screws, worn spindles, and misaligned or bent strike plates.
- Inspect and replace stripped screws; tighten to spec.
- Replace and test spindles; avoid loose tolerances.
- Replace or reposition strike plates for secure engagement.
Preventive Maintenance to Keep Handles Secure
Because regular inspection prevents most failures, make preventive maintenance a short, scheduled routine you perform every 3–6 months. Check alignment, torque, and wear systematically: inspect screws, spindle, latch, and strike plate for play or corrosion. Use a torque screwdriver to confirm fasteners are snug to manufacturer specs; avoid over-tightening. Lubricate moving parts with a dry graphite or PTFE lubricant to reduce friction and prevent grit buildup. Replace any stripped screws with appropriate-size, corrosion-resistant fasteners and fit longer screws into the frame where needed to guarantee secure fittings. Test operation under load and adjust strike plate alignment so the latch seats fully. Document each check and any corrective action to create a maintenance log for ongoing handle maintenance.
Conclusion
You’ve checked screws, removed the rose or escutcheon, and inspected the spindle and latch; now finish confidently. Tighten or replace any stripped screws, seat the spindle fully in the latch, and swap worn spindles or strike plates with matching parts. Reassemble and operate the handle to verify smooth, non-wobbly motion. If wobble persists, replace the entire latchset. Perform quick quarterly checks and tighten fasteners to prevent recurrence and maintain secure, reliable operation.