You should clean your refrigerator coils every 6–12 months to keep the unit efficient and prevent overheating. Start by unplugging the fridge, pulling it away from the wall, and removing any grills or kickplates. Use a vacuum with a brush attachment to lift loose dust, then a coil brush to dislodge stubborn dirt and vacuum again. Wipe accessible surfaces, let everything dry, reassemble, and plug the fridge back in—here’s how to do each step safely and effectively.
Key Takeaways
- Unplug the refrigerator or switch off its circuit breaker to eliminate electrical shock risk before starting.
- Inspect coils monthly and clean at least every six months, more often if you have pets or visible dust buildup.
- Vacuum loose dust with a brush attachment, then use a stiff coil brush to loosen stuck debris and re-vacuum.
- Wear gloves, safety glasses, and an N95 or dust mask; avoid bending or damaging coil fins while cleaning.
- Reattach covers, slide the fridge back, plug in, and verify normal operation after drying and reassembly.
When to Clean Refrigerator Coils

You should check and clean your refrigerator coils at least twice a year—more often if you have pets, a dusty home, or run the fridge constantly. Set a simple frequency schedule: spring and fall are ideal, with an extra check if the appliance runs hotter or louder. Inspect coils monthly for visible dust, pet hair, or lint buildup; heavy buildup calls for immediate cleaning. Note cleaning benefits: improved cooling efficiency, lower energy bills, extended compressor life, fewer repairs. If you move the fridge or notice reduced performance, clean coils right away. Record dates and observations so your schedule stays consistent and you catch problems early. Regular, scheduled checks keep the fridge efficient and reliable.
Tools and Supplies You’ll Need
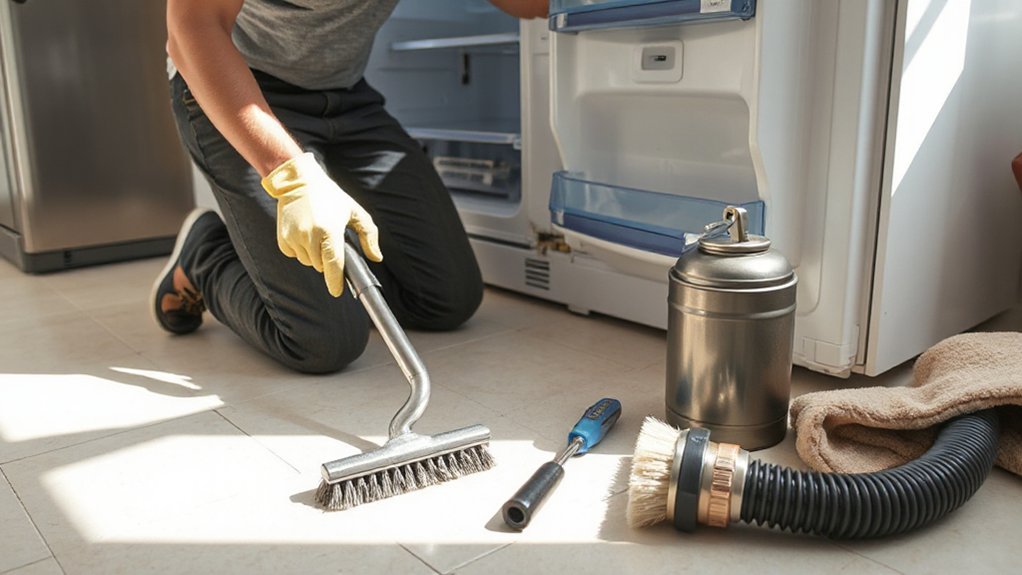
You’ll want a few simple tools on hand: a vacuum with a brush attachment and a skinny coil-cleaning brush to reach between the fins. Wear protective gloves and a mask to keep dust and debris off your hands and out of your lungs. Having these items ready makes the job faster and safer.
Vacuum With Brush
Grab a vacuum with a brush attachment and a crevice tool to reach the coils and surrounding nooks; a handheld or canister vacuum works best because it gives you control and suction power. Use the right vacuum attachments: a stiff-bristled brush head pulls compacted dust, while a softer brush prevents damage on delicate fins. Keep a long crevice tool or narrow nozzle for tight gaps behind and beneath the fridge. Choose brush types that match coil condition—stiffer for heavy buildup, softer for light dust. Check that your vacuum has good airflow and an accessible dustbin or bag so suction stays strong. Unplug the fridge before starting, work methodically from top to bottom, and empty the canister when it fills to maintain performance.
Coil-Cleaning Brush
A coil-cleaning brush is the single most useful tool for loosening stuck dust and debris from condenser coils; pick one with stiff, closely spaced nylon bristles and a long, flexible handle so you can push between fins without bending them. You’ll use it after loosening large particles that a vacuum can’t reach. Choose a brush sized for the coil types on your fridge—top-mounted, bottom-mounted, or external—so you can reach crevices and follow contours. Work gently along the fins to avoid damage, then vacuum loosened debris. A proper brush speeds the job and improves heat transfer, reducing compressor strain. Match your brushing to recommended cleaning frequency for your environment: every 3–6 months for typical homes, more often for dusty areas.
Protective Gloves & Mask
One pair of sturdy gloves and a simple dust mask will keep you safe while cleaning coils. You’ll use protective gloves to avoid cuts from fins and to keep grease off your skin. Wear a safety mask to prevent inhaling dust, mold, or insulation fibers disturbed during cleaning. Together they make the task safer and faster.
- Choose nitrile or leather protective gloves for durability and grip.
- Use a disposable safety mask (N95 preferred) to filter fine particles.
- Keep spare gloves and masks on hand for replacement if they get contaminated.
Put them on before you move the fridge or touch coils. Replace items as needed and discard disposable masks after heavy dust exposure.
Safety Precautions Before You Start
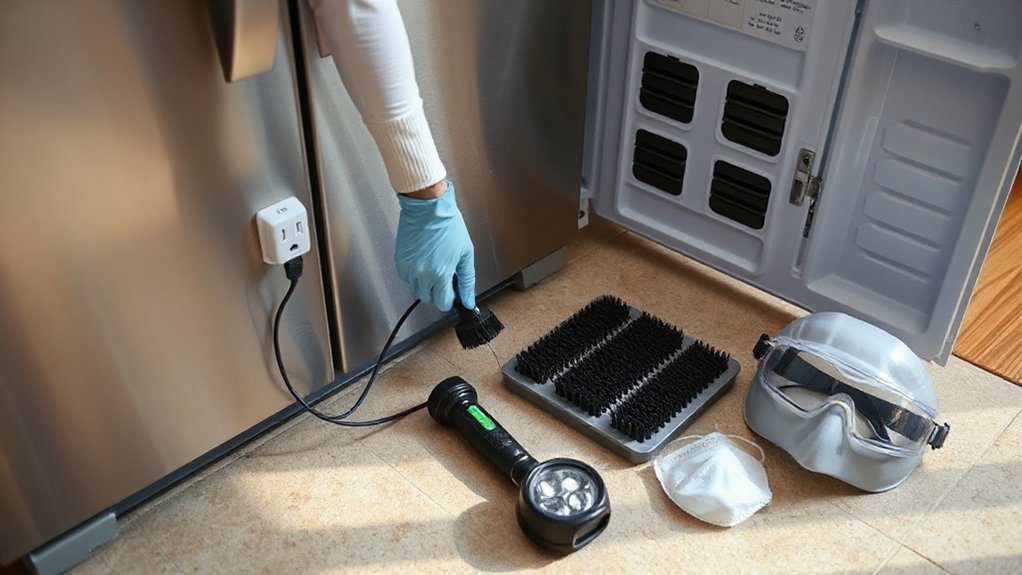
Before you do anything, unplug the fridge and switch off the circuit to remove any risk of electric shock. Put on gloves and safety glasses to protect your hands and eyes from dust, sharp fins, and cleaning debris. If you use a vacuum or compressed air, keep your face turned away and work slowly to avoid kicking up particles.
Unplug and Power off
Start by unplugging the fridge or switching off its dedicated circuit at the breaker to cut power completely; don’t rely on the appliance’s controls alone. When unplugging refrigerator units, you’re preventing shocks, short circuits, and accidental compressor starts — basic power safety you can’t skip.
- Confirm the plug is removed or the breaker is labeled and off.
- Test by trying to turn the fridge on briefly; nothing should power up.
- Leave the circuit off while you clean coils and move the appliance.
Keep kids and pets away while you work. Don’t tug cords; pull the plug straight out. If you can’t access the plug or breaker, get a qualified electrician. Proper unplugging refrigerator technique is the simplest safety step before you begin cleaning coils.
Wear Protective Gear
Wear snug gloves, safety glasses, and a dust mask to protect your hands, eyes, and lungs while you clean refrigerator coils. You’ll also want safety goggles if you prefer full eye coverage; they seal better against dust and debris. Put on protective clothing—long sleeves and closed-toe shoes—to keep skin and feet safe from sharp fins, chemical cleaners, and loose grime. Avoid loose garments or jewelry that can get caught. If you’re working in a tight space, consider knee pads or a foam mat to reduce strain. Make sure your gloves fit well so you maintain dexterity when using brushes or a vacuum. Check that your dust mask rating suits the job, and replace any damaged gear before you start.
Step-by-Step Cleaning Process
Set aside about 30–60 minutes and clear the area so you can work safely and efficiently: unplug the fridge, pull it away from the wall, and remove any kick plates or grille covers that block the coils. You’ll follow simple cleaning techniques and keep maintenance frequency in mind — clean coils every 6–12 months or more if pets or dust are heavy.
- Vacuum loose dust using a brush attachment, moving along coil fins and motor housing.
- Use a coil brush to dislodge stuck debris, then vacuum again to remove loosened dirt.
- Wipe accessible surfaces with a damp cloth and mild detergent, dry fully before reassembly.
Reattach covers, slide the fridge back, plug in, and check operation. Store tools for the next scheduled maintenance.
Troubleshooting Common Coil Issues
If your fridge’s cooling or efficiency seems off after cleaning the coils, don’t panic—troubleshooting common coil issues can quickly pinpoint problems so you can fix them or know when to call a pro. First, check for visible damage: bent fins, corrosion, or disconnected tubing reduce heat transfer. Use a fin comb for minor bends; replace severely corroded coils. Next, confirm airflow: verify vents and condenser fan spin freely and aren’t obstructed. Listen for unusual noises from the compressor or fan motor—these suggest mechanical failure, not just dirt. Verify electrical connections and thermostat settings; faulty sensors can mimic coil problems. Keep a log of symptoms and recent coil maintenance tips you tried. If cleaning and simple adjustments don’t help, contact a certified technician.
Tips to Keep Coils Cleaner Longer
Because keeping coils cleaner longer saves energy and prevents breakdowns, adopt a few simple habits you can maintain: Start with preventive maintenance and schedule regular checks so small issues don’t become big repairs. Clean around the fridge weekly to reduce dust buildup. Keep airflow clear by leaving a few inches of space from the wall and avoiding storage of boxes behind the unit.
- Vacuum accessible coils every 3–6 months and use a coil brush for stubborn dust.
- Replace filters and check door seals during your regular checks to reduce strain on coils.
- Keep pets brushed and off the fridge to cut hair accumulation; consider a washable mat behind the unit to catch debris.
Stick to these routines and you’ll extend coil life and efficiency.
Conclusion
You’ve finished the job right: unplug, vacuum, brush, wipe and dry, then plug back in. Regular cleaning keeps your fridge efficient, lowers energy use and prevents costly repairs. Check coils every 6–12 months—or more often if you have pets. If you spot bent fins, leaks or persistent heat, call a pro. Keep the area clear and vacuum more often to make future cleanings quicker and easier.