You’ll keep your air fryer working efficiently and safely by following a consistent cleaning routine that targets grease, crumbs, and odors. Start by unplugging and cooling the unit, then remove and wash the basket and pan with warm, soapy water or in the dishwasher. Wipe the interior and heating element gently, and use targeted soaking or a baking soda paste for stubborn buildup. There’s more to learn about deodorizing and preventative steps.
Key Takeaways
- Unplug, cool completely, then remove the basket and pan before cleaning to prevent burns and electrical damage.
- Wash removable parts in warm, soapy water or the dishwasher; soak to loosen stubborn residue.
- Wipe interior and heating element gently with a damp cloth and soft brush; avoid excess moisture.
- Use non-abrasive cleaners: dish soap, baking soda paste, or diluted vinegar for deodorizing and stuck-on grease.
- Dry all components thoroughly, reassemble, and run a short empty cycle if odors persist before cooking.
Why Regular Air Fryer Cleaning Matters
Because grease, food particles, and moisture build up quickly during repeated cycles, you should clean your air fryer regularly to preserve performance and safety. You’ll prevent residue that impedes heating elements, reduces airflow, and raises internal temperatures unpredictably. Regular cleaning limits odour transfer between foods and preserves air quality in the surrounding space by reducing particulate and volatile emissions. Systematic removal of carbonized deposits also decreases fire risk and electrical load on the unit. You’ll extend appliance longevity by minimizing corrosion, gasket degradation, and motor strain. Follow scheduled inspections of baskets, trays, heating elements, and vents; document deposits and perform targeted cleaning when deposits exceed manufacturer’s thresholds. Consistent maintenance guarantees predictable cooking times, energy efficiency, and safer operation.
Daily Quick-Clean Steps
You should wipe the air fryer exterior daily with a damp, soft cloth to remove grease and prevent residue buildup. After each use, remove the basket and wash it with warm, soapy water or place it in the dishwasher if the manufacturer allows. Let components dry fully before reassembling to maintain performance and safety.
Wipe Exterior Daily
A quick daily wipe of the air fryer’s exterior prevents grease buildup and keeps controls responsive. You’ll perform a brief, systematic inspection: unplug the unit and verify it’s cool. Use a microfiber cloth slightly dampened with mild detergent solution; avoid abrasive pads or excess water that could enter vents. Wipe the exterior surface in linear passes, paying particular attention to control buttons, display edges, and handle seams. Follow with a dry microfiber pass to remove streaks and residual moisture. For stainless finishes, use a directionally applied polish designed for appliances, sparingly. Document any discoloration, sticky residue, or damaged seals for further attention. This daily maintenance minimizes long-term degradation and maintains safe electrical operation without dismantling or accessing internal components.
Clean Basket After Use
After wiping the exterior, move on to the basket so residue doesn’t harden and affect future cooking. You’ll remove the basket and tray, let them cool briefly, then shake out loose crumbs into the trash. Inspect for cooking residue and scrape gently with a non-abrasive tool. Rinse under warm running water at moderate pressure to dislodge fats. Apply a small amount of liquid dish soap with a soft brush, working in concentric strokes to reach perforations. Rinse thoroughly until suds are gone, then dry with a lint-free towel or air-dry inverted on a rack. Reassemble only when fully dry. Regular basket maintenance prevents odor, uneven heating, and premature wear; perform this quick-clean after every use to maintain performance.
How to Deep Clean the Basket and Pan
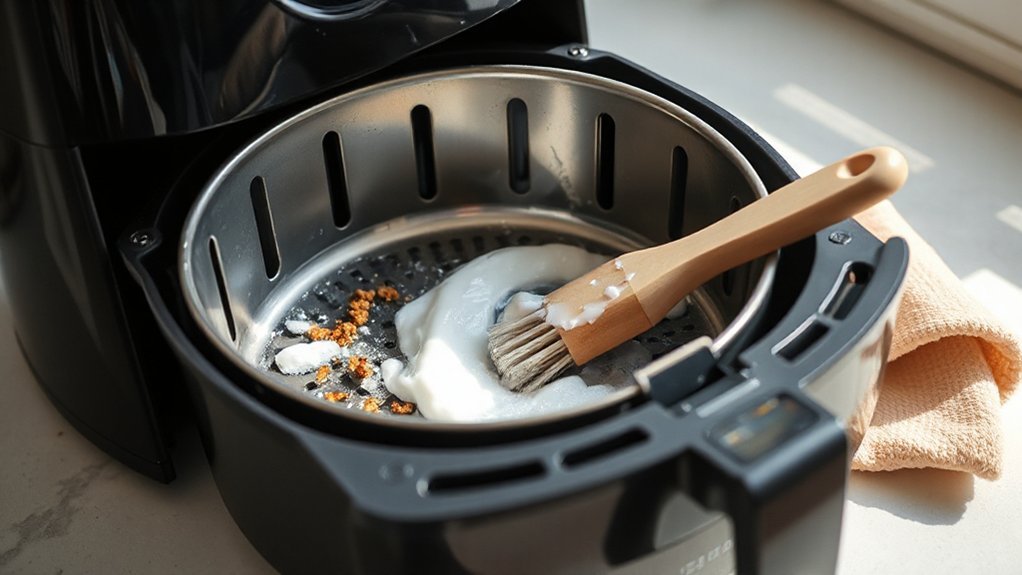
Start by removing the basket and pan and inspecting for stuck-on residue; you’ll address this with soaking and targeted scrubbing. Use a measured soak in warm, soapy water or a baking soda paste to loosen grime, then scrub with a nonabrasive brush or pad to protect the coating. Finish by deodorizing and sanitizing—rinse thoroughly, wipe with a diluted vinegar or mild bleach solution if needed, then dry completely before reassembly.
Remove Stuck-On Residue
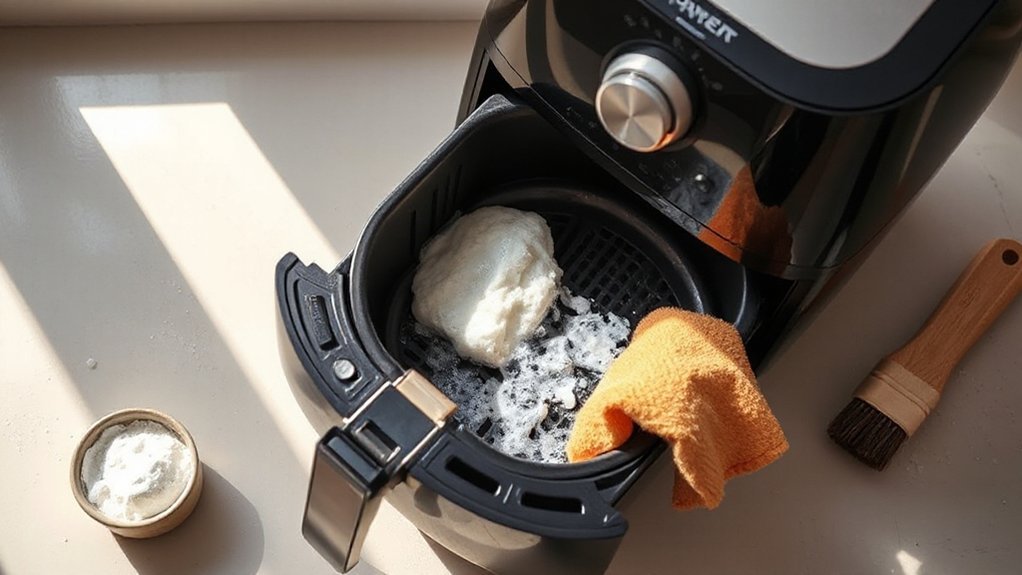
When grease or carbonized food won’t lift with routine washing, soak the basket and pan to loosen residue before scrubbing; this prevents surface damage and reduces elbow grease. Fill a basin with hot water and a degreasing detergent, submerge components for 20–30 minutes, then drain. Use a nonabrasive pad and a nylon brush to dislodge stuck on food, working in the direction of the coating’s grain to avoid abrasion. For persistent spots, apply a paste of baking soda and water, let it dwell 10–15 minutes, then agitate with cleaning tools designed for nonstick surfaces. Rinse thoroughly, inspect for remaining deposits, and repeat targeted soaking if needed. Dry completely before reassembly to prevent corrosion and guarantee proper operation.
Deodorize and Sanitize
Though deodorizing and sanitizing may seem like two separate steps, you’ll treat them as a single controlled process to remove odors and kill microbes without damaging the basket or pan. First, detach basket and pan; inspect for remaining food particles. Prepare a solution of warm water and mild dish detergent for initial wash; rinse and dry. For odor removal and neutralization of persistent air fryer scents, mix one part white vinegar to two parts water, or use a 3% hydrogen peroxide solution—apply, soak 10–15 minutes, then scrub with a nonabrasive pad. Sanitize by wiping with a 70% isopropyl alcohol solution or a diluted bleach solution (1 tablespoon bleach per gallon water), then rinse thoroughly. Air-dry completely before reassembly to prevent microbial regrowth.
Removing Stuck-On Grease and Food
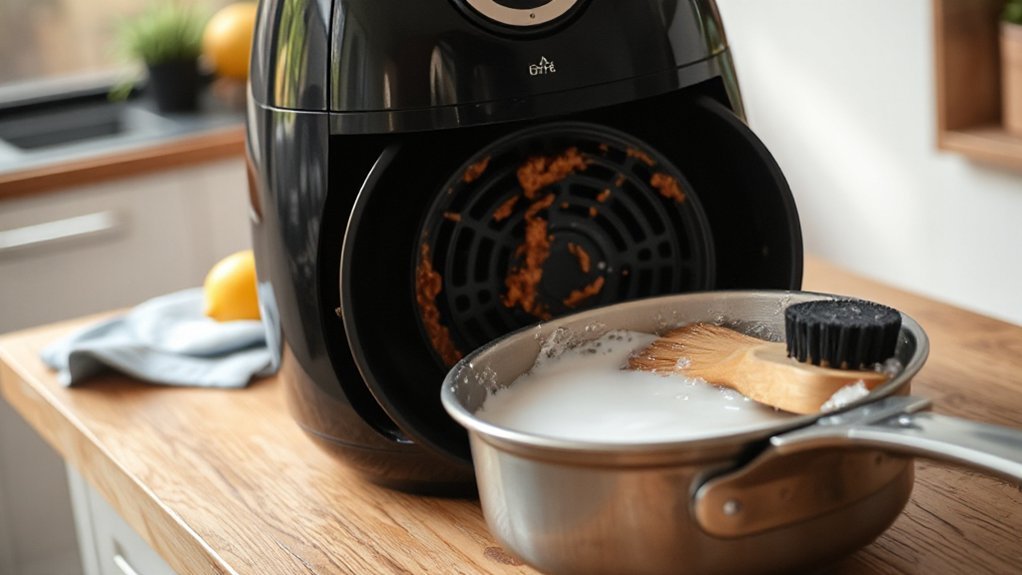
Because grease hardens and food chars in tight crevices, you’ll need a systematic approach to remove stuck-on residue without damaging nonstick coatings or heating elements. Begin by unplugging and cooling the unit, then remove the basket and tray. Apply a mild degreasing solution (diluted dish soap or a 50/50 vinegar-water spray) and let it dwell 10–15 minutes to soften deposits. Use a nonabrasive nylon brush or sponge to dislodge particles, working along seams and air-flow slots; avoid metal scouring pads. For persistent spots, create a baking soda paste, apply, wait 20 minutes, then agitate gently. Rinse components thoroughly and dry before reassembly. Regularly apply grease removal techniques and implement food residue prevention—wipe spills promptly and use liners for future cycles.
Cleaning the Heating Element and Interior
After you’ve removed and cleaned the basket and tray, turn your attention to the interior and heating element to remove airborne grease and debris that can affect performance. First disconnect power and allow the unit to cool fully. Use a soft brush or compressed air to dislodge particles from the heating element; brush gently along coil runs to avoid bending. For interior cleaning, wipe walls and ceiling with a lint-free cloth dampened with a mild detergent solution, avoiding excess moisture near vents and electrical components. Rinse the cloth and repeat until residues are gone. Inspect gaskets, vents, and fan housing for buildup; remove with a small brush or swab. Reassemble only after all components are dry to complete heating element maintenance and interior cleaning.
Safe Cleaning Methods for Nonstick Coatings
When cleaning nonstick coatings, use gentle, nonabrasive methods to preserve the surface and its release properties; never use metal scrapers, steel wool, or harsh scouring pads that can abrade the coating. You’ll implement nonstick safety by allowing parts to cool, removing loose debris with a soft brush, and soaking removable trays in warm, soapy water for 10–15 minutes. Use a soft sponge or microfiber cloth and a mild dish detergent; rinse thoroughly and dry with a lint-free towel. For stubborn residue, apply a paste of baking soda and water, let it sit 10 minutes, then wipe gently—do not scrub aggressively. For coating maintenance, avoid aerosol degreasers, high-alkaline cleaners, or abrasive powders that degrade the finish.
How to Deodorize Your Air Fryer
If your air fryer retains lingering odors from strong foods, you can neutralize them with targeted cleaning and simple deodorizing agents; start by removing and washing all removable parts, then tackle the interior and heating element with odor-absorbing techniques. First, dry parts thoroughly to prevent moisture entrapment. Use a soft brush to dislodge residues near the fan and heating element, then wipe with a damp microfiber cloth. Employ controlled deodorizing methods: place an odor absorber (activated charcoal pouch or coffee grounds in a breathable container) inside the cooled chamber for several hours. For persistent smells, heat the unit briefly with the absorber in place to accelerate volatilization, then ventilate. Store the fryer with door ajar or a desiccant to maintain air fryer freshness.
When to Use Vinegar, Baking Soda, or Dish Soap
Neutralizing odors often requires different cleaning chemistries, so choose vinegar, baking soda, or dish soap based on the contaminant and surface. Use diluted white vinegar (1:1 with water) for mineral deposits and light grease; its acidity provides vinegar benefits by breaking bonds and deodorizing without abrasive action. Apply with a spray bottle, let sit 10 minutes, then wipe and air-dry. Use baking soda for baked-on residue and persistent odors: make a paste with water, apply to stubborn areas, let sit 15–30 minutes, then scrub with a nonabrasive pad. Use dish soap for routine cleaning of baskets and trays; its surfactants emulsify fresh grease and rinse clean. Always test coatings, avoid abrasives on nonstick surfaces, and rinse thoroughly after treatment.
Preventive Tips to Reduce Grease Buildup
Because grease accumulates fastest on hot, exposed surfaces, you should adopt routine habits that limit airborne splatter and pooled oil before it hardens. Use controlled portioning and trim excess fat from proteins to reduce rendered oil. Choose low-splash coatings and apply minimal oil with a calibrated spray or brush rather than pouring. Position food to allow airflow and use perforated liners sparingly; avoid covering vents. Preheat briefly to stabilize internal temperatures and shorten cook times, which reduces aerosolized grease. Empty drip trays and wipe accessible cavities after each use to prevent accumulation. Implement consistent cooking techniques: quantify oil volume per recipe, document successful settings, and standardize rack placement. These procedural controls are practical grease prevention measures that minimize cleaning frequency and effort.
Troubleshooting Common Cleaning Problems
When you encounter persistent residue, stubborn grease, or lingering odors after routine cleaning, diagnose the root cause systematically before escalating to harsher methods. You’ll apply targeted cleaning techniques and troubleshooting tips to isolate issues: inspect seals, heating elements, and ventilation for trapped debris or damaged coatings that trap oils. Test small areas with degreaser, baking soda paste, and steam to identify what removes buildup without harming finishes.
- Inspect components: remove basket, tray, and filters; look for warped nonstick, clogged vents, or residue in corners.
- Test cleaners: apply a controlled degreaser, then rinse and dry; document effectiveness to refine cleaning techniques.
- Address odors: sanitize with vinegar steam, then run an empty cycle to ventilate per troubleshooting tips.
Conclusion
Regularly cleaning your air fryer preserves performance, prevents odors, and reduces fire risk. Unplug and cool the unit, then remove and wash the basket and pan with warm, soapy water or run them through the dishwasher. Soak and gently scrub stubborn residue with a non‑abrasive brush. Wipe the interior and heating element carefully with a damp cloth, avoiding excess moisture. Dry all parts thoroughly before reassembly. Follow preventive steps—wipe after each use and avoid aerosol sprays—to minimize future buildup.