

If you want your blender to work well and last, you should clean it right after use and know which parts can be handled safely. You’ll rinse and disassemble, use the motor briefly with soap for quick cleans, and perform deeper steps for stuck-on residue, odors, and seals—plus when to replace components. Keep going to learn the exact sequence and safety tips that make the job fast and thorough.
Key Takeaways
- Rinse and disassemble jar, lid, gasket, and blade immediately after use to remove loose debris.
- Fill the jar halfway with warm water and a drop of dish soap, run blender 20–30 seconds, then rinse.
- For stubborn stains or odors, soak jar with warm water, baking soda, or diluted white vinegar for 30–60 minutes.
- Clean blade assembly with a stiff brush while unplugged, inspect for damage, and dry parts thoroughly before reassembly.
- Wipe the motor base with a damp cloth (never immerse), and sanitize removable parts by boiling or using EPA-approved disinfectant.
Everyday Quick-Clean Routine
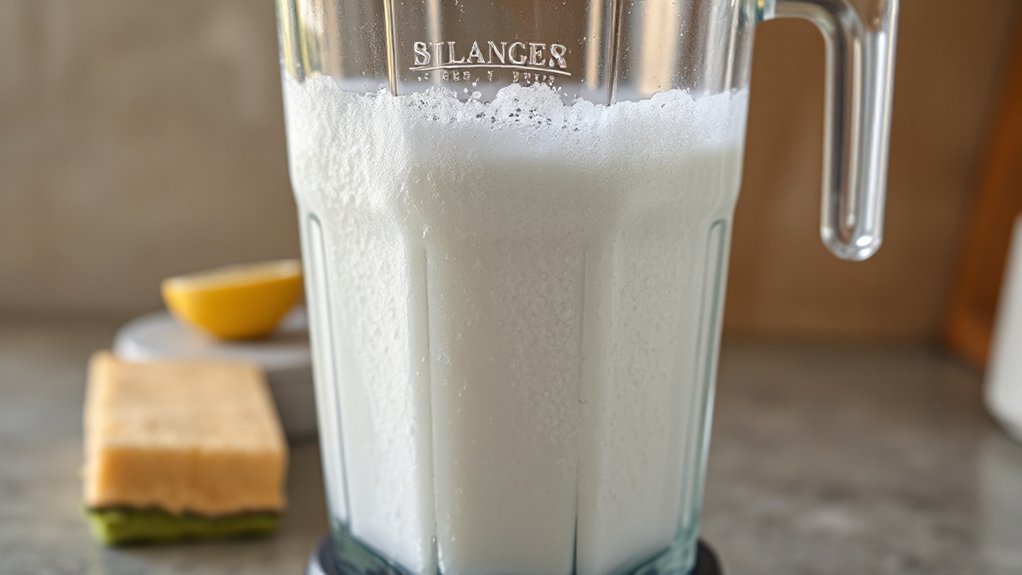
If you blend daily, rinse and clean your blender right after use to prevent residue from drying and odors from forming. You’ll disassemble the jar, lid, and blade assembly, rinse under warm running water, and shake out solids. For routine blender maintenance tips, fill the jar halfway with warm water, add a drop of dish soap, and run the motor for 20–30 seconds; that removes most debris from blades and seals. Rinse thoroughly, inspect seals and crevices, and air-dry inverted on a rack. Wipe the base with a damp cloth—never immerse it. Reassemble only when all parts are dry. Those quick cleaning tricks keep performance efficient, reduce wear on gaskets, and cut down on odors without complex procedures.
Deep Cleaning for Stubborn Residue

When routine rinses and quick-soap cycles don’t remove built-up oils, stains, or dried food, you’ll need a focused deep-clean to restore performance and hygiene. Disassemble the jar, lid, gasket, and collar (leave blade handling for the next section). Scrape loose debris, then fill the jar with warm water and a few drops of dish soap plus 1–2 tablespoons of baking soda for grease-cutting action. Allow deep soaking for 30–60 minutes to loosen stubborn stains and residues. Agitate with a long-handled brush, focusing on corners and the gasket channel. Rinse thoroughly with hot water and inspect under bright light; repeat soaking for persistent discoloration. Sanitize by filling the jar with diluted white vinegar, letting it sit five minutes, then rinse and air-dry.
Cleaning the Blade Assembly Safely
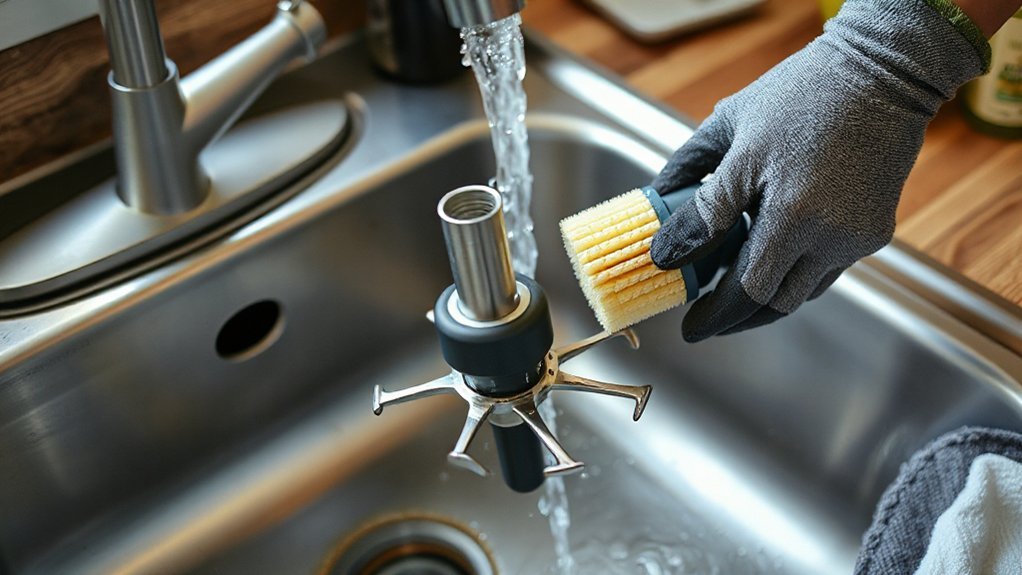
Before you touch the blade assembly, unplug the blender and remove the jar, gasket, and blade unit to prevent accidental starts. Use a stiff brush and soapy water or a small scrub pad to clean each blade edge and the housing, keeping your fingers clear of sharp parts. Rinse thoroughly, dry with a cloth or air-dry on a rack, then reassemble only when everything is completely dry.
Unplug and Disassemble First
Step 1: unplug the blender and remove the jar, lid, and blade assembly so you can clean the cutting components safely. Before touching blades, confirm power is disconnected and the unit is cool; those safety precautions prevent shocks and burns. Work on a stable surface with good lighting. Use disassembly tips: consult the manual for model-specific steps, rotate and lift adapters as instructed, and keep small parts in a container to avoid loss. Wear cut-resistant gloves if available. Inspect gaskets, screws, and seals for wear; note orientation for reassembly. Never force stuck components — apply penetrating oil sparingly and let it sit, then retry. Keep electrical base away from water throughout the process.
Safe Blade Cleaning Techniques
Blade safety matters: handle the blade assembly with cut-resistant gloves or a folded kitchen towel and keep your other hand clear of the edges while you work. You’ll disconnect the base, remove the gasket, and inspect for debris. Use a stiff nylon brush and a small bottle brush as cleaning tools; avoid metal scrapers. Run warm, soapy water over the blades, scrub hub crevices, rinse thoroughly, and dry immediately to prevent corrosion. If parts are dishwasher-safe per manufacturer, use top rack only. Reassemble only when completely dry and gasket seats correctly. Store blades safely, blade-side down or protected. If you notice chips, dullness, or wobble, replace the assembly—don’t risk a compromised blade.
- Fear of cuts stops sloppy habits.
- Relief comes from the right tools.
- Confidence grows with routine checks.
Washing and Caring for the Pitcher or Jar
Wash the pitcher or jar immediately after use to prevent residue from hardening and staining. Rinse with warm water to remove loose debris, then add a drop of dish detergent and fill halfway with warm water. Secure the pitcher and run the blender on low for 15–30 seconds to dislodge stuck particles, then empty and rinse thoroughly. For manual scrubbing, use a nonabrasive brush to protect finishes common to pitcher materials (glass, Tritan, BPA‑free plastic). Avoid steel wool or harsh pads that cause scratches and harbor bacteria. For odors or stains, soak in a solution of baking soda and warm water or dilute white vinegar for 10–20 minutes, then rinse. Dry inverted on a rack; store assembled jars upright to prevent contamination.
Cleaning the Lid, Cap, and Gasket
Remove the lid, cap, and gasket before washing to get full access to trapped food and liquid. Inspect the gasket for cracks, stretching, or embedded residue and set a damaged gasket aside for replacement. Clean each piece with warm soapy water or a soft brush, rinsing thoroughly and air-drying before reassembly.
Remove Parts for Washing
Start by detaching the pitcher lid, the small pour cap, and the rubber gasket before you begin soaking or scrubbing; these pieces trap food and liquid and must be cleaned separately to prevent odor and mold. Remove each blender parts component carefully, noting how pieces fit for reassembly. Rinse under warm water to dislodge residue, then apply a mild detergent with a soft brush. Use targeted washing techniques: soak caps briefly if oily, scrub gasket crevices, and avoid abrasive pads that damage seals. Dry parts completely on a clean towel to inhibit microbial growth. Reassemble only when fully dry. Follow manufacturer guidance for dishwasher-safe items to prevent warping or seal damage.
- Relief: you’ll stop smells before they start
- Confidence: correct reassembly avoids leaks
- Efficiency: fast, repeatable routine
Inspect and Clean Gasket
Before you reassemble the blender, inspect the lid, pour cap, and rubber gasket for cracks, compressed edges, or embedded debris and clean them thoroughly to preserve the seal. You’ll perform a focused gasket inspection: remove the gasket and hold it up to light to spot hairline tears, deformation, or hardening. Use a soft brush and mild detergent to dislodge trapped particles; avoid abrasive pads that can score the rubber. Rinse with warm water and dry completely to prevent mold. Check the lid and pour cap seating surfaces for residue and sanitize if needed. For gasket maintenance, replace any gasket that shows permanent compression or damage — typically every 6–12 months or sooner with heavy use — to maintain leak-free operation.
Removing Odors and Stains Naturally
If your blender retains odors or stubborn stains, you can neutralize smells and lift discoloration using simple, non-toxic ingredients you likely have on hand. Use a baking soda paste (2 tbsp baking soda + water) to scrub stains from the jar, gasket, and blade base; rinse thoroughly. For lingering smells, run a vinegar solution (1:1 white vinegar and water) on low speed for 30–60 seconds, then rinse. Citrus peels and coffee grounds both absorb and mask odors: grind a few citrus peels with water briefly, or place used coffee grounds in the jar, let sit for 15–30 minutes, then discard and rinse. Dry components fully before reassembly to prevent new odors or staining.
- Relief: your blender smells fresh again.
- Confidence: stains disappear.
- Ease: no harsh chemicals.
Sanitizing and Disinfecting Your Blender
Sanitize your blender after deep cleaning to kill bacteria and viruses that plain washing can miss; focus on removable parts and any crevices where food residue hides. Use two principal sanitizing methods: heat and chemical. For heat, submerge dishwasher‑safe parts in boiling water for 5–10 minutes or run a high‑temperature dishwasher cycle. For chemical, apply EPA‑approved disinfecting solutions or a 1 tablespoon bleach per gallon water mix; soak parts for the manufacturer‑recommended contact time, rinse thoroughly, and air dry. Clean the base with a cloth dampened in disinfecting solution—never immerse it. For hard-to-reach crevices, use a brush or cotton swab dipped in solution. After sanitizing, reassemble only when all parts are completely dry to prevent microbial regrowth.
When and How to Replace Parts
Now that you’ve cleaned and sanitized the blender, inspect components regularly for wear and damage so you can replace parts before they fail. You should follow a clear replacement schedule: blades and gaskets often need checking every 6–12 months, seals after heavy use, and the jar if cracked. Verify part compatibility with your model number before ordering; mismatched parts cause leaks or motor strain. When replacing, power down, disassemble per the manual, and use OEM or certified equivalents. Keep discarded parts for warranty proof until replacements function. Properly timed replacements prevent contamination and mechanical failure, protecting food safety and extending appliance life.
- Relief when a stubborn leak stops
- Confidence in every blend
- Frustration avoided by timely action
Common Cleaning Mistakes to Avoid
Because improper cleaning can damage components or create food-safety hazards, you should avoid a few common mistakes that people often make. Don’t immerse the base in water; moisture can short electrical components and void warranties. Avoid abrasive cleaning products on plastic and rubber parts; they scratch seals and create bacterial harborage. Don’t run the motor with an empty jar—doing so stresses bearings. Never tighten the blade assembly while hot; thermal expansion can warp threads. Skip soaking metal blades in bleach; it promotes corrosion. Don’t neglect gasket inspection during cleaning—damaged seals cause leaks and contamination. For maintenance tips, follow manufacturer torque and replacement intervals, use approved cleaning products, and document service dates. These practices preserve function and food safety.
Conclusion
You’ve got a reliable routine now: rinse and run a soapy cycle after use, disassemble and deep-clean when residue builds, and always inspect seals and crevices before drying. Clean blades carefully to avoid cuts, treat odors with baking soda or vinegar, and sanitize periodically. Replace worn gaskets, blades, or lids to keep performance and safety at their best. Avoid immersing the base; wipe it. Follow these steps consistently to extend your blender’s life and guarantee safe, hygienic operation.