

You can keep your dishwasher running safely and efficiently with a few simple, methodical steps, and you’ll want to start by cutting power and water to avoid surprises. I’ll walk you through removing and cleaning the filter, checking the drain and spray arms, wiping seals and the door, and running a maintenance cycle so grime and odors don’t build up — but first, make sure you’ve got the right tools and know where the power switch and shutoff are.
Key Takeaways
- Empty the dishwasher, turn off power and water, then remove racks and utensil holders for full access.
- Remove and wash the filter assembly under warm water with a soft brush to clear food and grease.
- Clear the drain, air gap, and drain hose of debris; inspect for kinks or blockages.
- Soak and rinse spray arms, unclog jets with toothpicks, and confirm they spin freely.
- Wipe door, seals, and gasket with mild soap or vinegar solution, then run an empty hot-cycle with vinegar or dishwasher cleaner.
Why Regular Dishwasher Cleaning Matters
Because you run your dishwasher often, residue, food particles, and hard‑water scale can build up and reduce cleaning performance, create odors, and clog drains. You’ll notice dishes come out spotted or with stuck-on debris when efficiency drops; addressing buildup preserves dishwasher efficiency and prevents malfunctions. Regular cleaning removes trapped food and mineral deposits that stress pumps, heaters, and seals, lowering repair risk and energy use. Adopt simple maintenance habits: scrape dishes, clear the filter, wipe door seals, and run a cleaning cycle monthly. Always disconnect power before deep access and avoid harsh abrasives that damage components. These steps keep your appliance hygienic, perform reliably, and extend service life while protecting you from leaks, electrical faults, and costly breakdowns.
Tools and Household Supplies You’ll Need
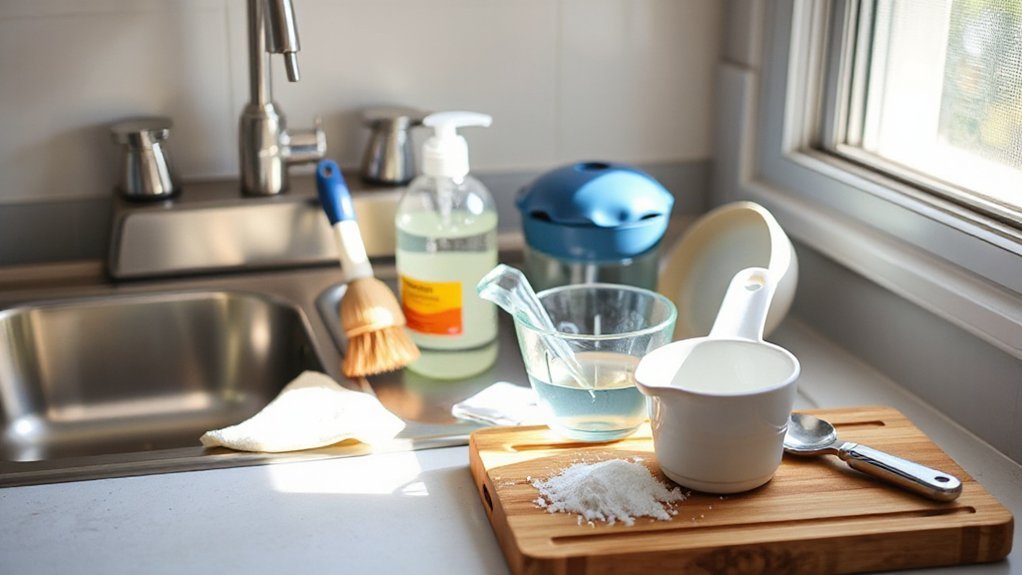
You’ll need a few basic supplies—white vinegar, baking soda, mild dish soap, and a dishwasher-safe cleaner—to remove grease, mineral buildup, and odors safely. Gather tools like a soft-bristled brush, toothpicks or a small screwdriver for unclogging spray arms and drain holes, and a microfiber cloth for drying and inspecting seals. Wear gloves and work with good ventilation to protect your skin and avoid inhaling fumes.
Essential Cleaning Supplies
Gathering the right supplies before you start will make the job faster, safer, and more effective. You’ll want a short checklist of reliable items so you don’t interrupt the process. Use recommended dishwasher detergents only for regular cycles; for deeper cleaning, select non-foaming, appliance-safe cleaners. Keep cleaning tools dedicated to the dishwasher to avoid cross-contamination. Wear gloves and eye protection when using acidic cleaners, and ventilate the area.
- Microfiber cloths and soft brushes for wiping seals, spray arms, and interiors.
- A non-abrasive sponge and toothpick or small nylon brush for crevices and drain holes.
- Appliance-safe descaler or white vinegar (used per instructions) for mineral buildup.
- Rubber gloves and safety glasses to protect skin and eyes from cleaners.
Tools for Maintenance
Start with a compact toolkit so you can address common issues without improvising mid-job. Include a soft-bristle brush, old toothbrush, microfibre cloths, a small bucket, and a flexible crevice tool for spray arms and tight seals. Add needle-nose pliers, a nut driver set, and a flashlight to inspect and remove debris safely. Keep food-safe distilled white vinegar, baking soda, and a mild dish soap for approved cleaning techniques, plus rubber gloves and eye protection. Have a silicone-safe scraper for gasket buildup and replacement clips or zip ties for loose racks. Store a simple multimeter and replacement fuse if your unit has electrical faults. Label tools and follow manufacturer specs to avoid damage or injury.
How to Safely Disconnect Power and Prepare the Machine
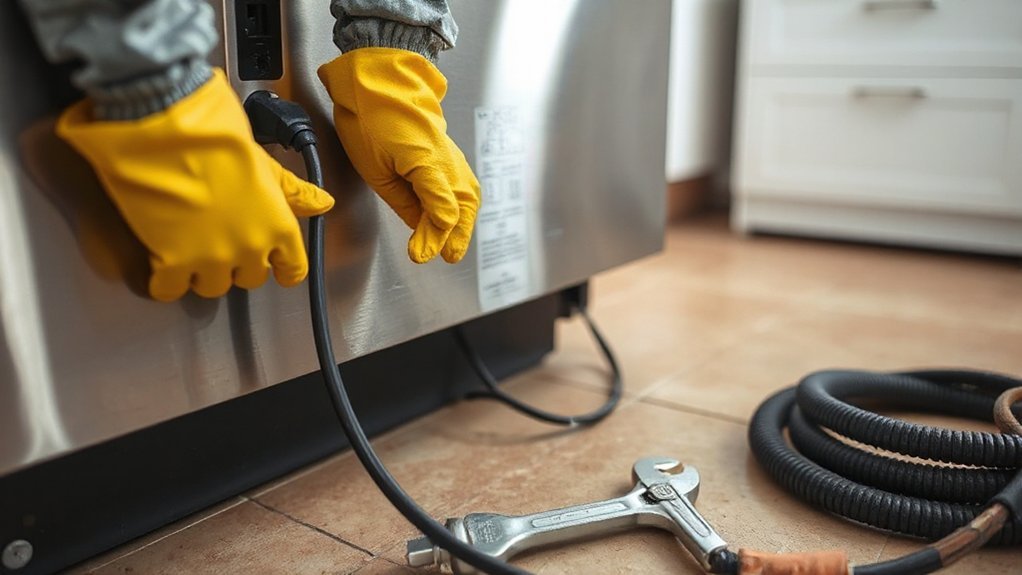
Before you do any cleaning, cut power to the dishwasher and confirm it’s off—either switch off the dedicated circuit breaker or unplug the unit from its outlet—and lock or tag the breaker to prevent accidental reset. You’ll follow safety precautions for power disconnection and to avoid injury.
- Turn off the breaker and test by pressing the dishwasher power button; it should remain unresponsive.
- If the unit uses a plug, unplug it and inspect the cord for damage; replace if frayed.
- Shut off the water supply valve under the sink to prevent leaks while you work.
- Wear gloves and eye protection, and keep children and pets away from the area.
Confirm tags remain in place until cleaning is complete and power is restored.
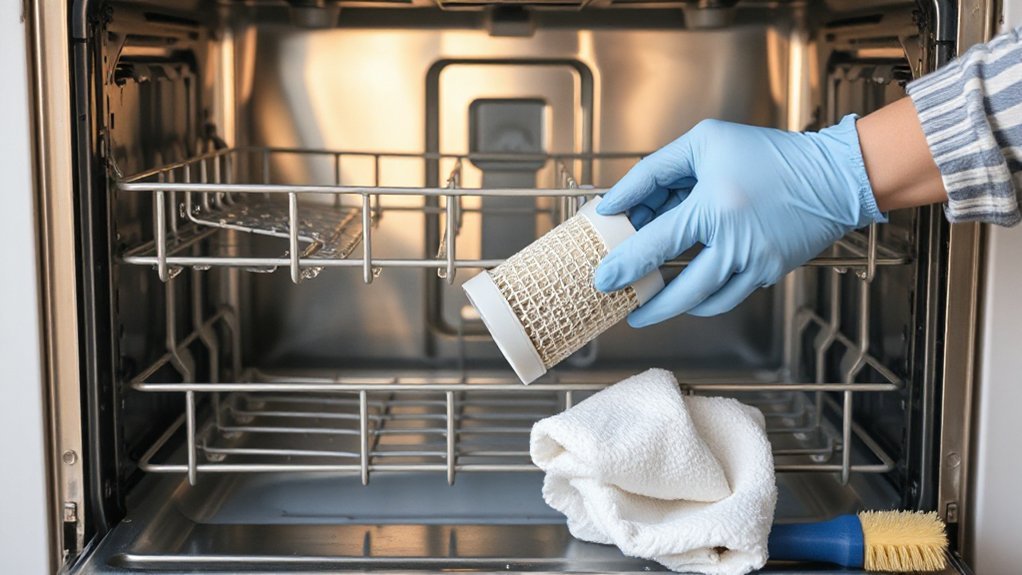
Removing and Cleaning the Filter
Start by locating the filter at the bottom of the tub and make sure the dishwasher is powered off and cool. Twist or lift the filter assembly out, then disassemble any removable screens or mesh components according to the manufacturer’s instructions. Rinse each part under warm water, scrub stubborn debris with a soft brush, and reassemble and reseat the filter securely before restoring power.
Locate and Access Filter
1 clear step: open the dishwasher door, slide out the bottom rack, and look at the center or rear floor of the tub to find the round or rectangular filter assembly; you’ll usually see a removable mesh or perforated plastic piece secured by a twist collar or tab that you can lift out once released. Use gloves and a flashlight for clear filter location and safe filter access. Don’t force parts.
- Inspect the filter housing for clips, arrows, or a twist lock before touching.
- Clear loose debris from around the housing so nothing falls into the sump.
- Note how the collar or tab aligns — take a photo if unsure.
- Keep small parts and screws on a tray to prevent loss or accidental drops into the drain.
Remove and Disassemble
With gloves on and the dishwasher powered off, turn the filter collar counterclockwise (or release its tab) and lift the mesh insert straight up to remove it—keep a towel underneath to catch drips and small parts. Next, remove any secondary cylindrical or flat filters by disengaging clips or twisting per the manual; these disassembly techniques prevent damage to plastic tabs. Place parts on the towel in the order removed. Visually inspect each element for cracks, buildup, or warped seals. Use a soft brush to dislodge debris while maintaining structural integrity. Check the filter housing and surrounding sump for trapped items or sharp fragments. If you find broken components, note them for replacement and avoid running the dishwasher until component inspection confirms safe reassembly.
Clean and Reassemble Parts
Now that the filter and any secondary pieces are out and inspected, you’re ready to clean them before reassembly. Use safe cleaning techniques: wear gloves, avoid harsh brushes on rubber seals, and work over a sink to catch debris. Rinse screens under warm running water and use a soft brush and mild detergent for stuck-on grime. Inspect o‑rings and spray-arm holes; clear blockages with a toothpick or compressed air.
- Rinse filter components, removing trapped food and residue.
- Soak stubborn parts in warm, soapy water for 10–15 minutes.
- Dry all pieces thoroughly and inspect seals for damage before reassembly.
- Reinstall parts following manufacturer reassembly tips, ensuring proper alignment and secure locking.
Clearing and Inspecting the Drain and Air Gap
Start by turning off power to the dishwasher and shutting off the water supply, then remove and inspect the drain basket and filter for food debris, grease, and limescale that can block flow. Check the drain hose for kinks and disconnect it at the sink or pump end, catching water and debris in a bowl. Use a flexible brush or wire to clear visible buildup; avoid harsh snagging that could damage the hose. Inspect the air gap at the sink: remove the cover, clear crumbs and gunk, and run water while observing for proper flow—bubbling or backflow indicates a drain blockage. Reassemble parts securely, restore water and power, and run a short drain-only cycle to verify clearance and leak-free connections.
Cleaning Spray Arms and Nozzles
After you’ve confirmed the drain and air gap are clear, move on to the spray arms and nozzles, since clogged jets will reduce cleaning performance even if drainage is fine. Remove racks per your manual, then lift out upper and lower spray arms. Inspect for cracks, food buildup, and stuck bearings; replace if damaged. For spray arm maintenance, soak arms in warm soapy water to loosen deposits.
After clearing the drain and air gap, remove racks and soak spray arms to clear clogged jets and debris.
- Use a toothpick or soft brush for nozzle cleaning; clear each jet individually to avoid enlarging holes.
- Rinse arms thoroughly and spin them by hand to confirm free rotation.
- Reinstall securely, aligning clips and seals to prevent leaks.
- Run a short rinse cycle to verify spray coverage and watertight fit.
Wiping the Door, Gasket, and Exterior Surfaces
Wipe the inner and outer door surfaces with a mild detergent solution to remove splatters and food residue without damaging the finish. Gently pull back the rubber gasket and use a soft cloth or toothbrush to clear trapped grime and check for mold or tears. Finish by drying and treating the exterior with a cleaner suited to the appliance’s finish, and always unplug or switch off power before cleaning near controls.
Door Surface Cleaning
1 key area you shouldn’t skip is the door: clean the exterior, inner panel, and gasket to prevent grime build-up and maintain a proper seal. For effective door maintenance, unplug the dishwasher or switch its breaker, then use a soft microfiber cloth and mild detergent to remove fingerprints, food residue, and detergent film. Rinse with a damp cloth and dry to guarantee surface protection and prevent streaks. Avoid abrasive pads or bleach on stainless finishes.
- Check hinges and latch for debris; wipe with a damp cloth and dry thoroughly.
- Clean control panel gently, avoiding excessive moisture near buttons.
- Wipe inner panel edges and door pockets to dislodge trapped particles.
- Finish by applying a small amount of appliance-safe polish to the exterior.
Gasket Grime Removal
Anyone can miss the gasket when cleaning, but you should give it focused attention because trapped grime can cause leaks and odors. First, unplug or switch off power to the dishwasher to prevent accidental cycles. Open the door and inspect the rubber gasket for cracks, food, and mold. Use a soft cloth or interdental brush with warm water and mild dish soap to lift debris; avoid harsh abrasives that damage the seal. For stubborn spots, apply a 50/50 white vinegar-water solution, let it sit 1–2 minutes, then wipe and dry thoroughly. Regular gasket maintenance improves seal life and helps grime prevention. Finish by running a short rinse cycle to flush loosened particles and restore safe operation.
Exterior Finish Care
Start by turning off power to the dishwasher and opening the door so you can work safely; then use a soft microfiber cloth dampened with warm, soapy water to clean the door, visible gasket areas, and exterior panels, avoiding abrasive pads that can scratch finishes. Wipe along seams and around the gasket, lift edges gently to remove trapped debris, and dry promptly to prevent watermarks. For stainless steel fronts, wipe with the grain and finish with a dry cloth to avoid streaks. For plastic surfaces, use mild detergent only.
- Inspect gasket for cuts or deformation and replace if compromised.
- Remove smudges with isopropyl alcohol on a cloth for stubborn spots.
- Lubricate gasket lightly with silicone grease if it’s stiff.
- Reconnect power and verify door seals correctly.
Deodorizing and Deep-Cleaning the Interior
Before you begin, turn off power to the dishwasher and remove racks and utensil holders so you can access all surfaces; don’t run cleaning chemicals with the appliance live. Inspect the sump, spray arms, door gasket and drain for debris, food particles and mold. Wear gloves and a mask if you’re sensitive to spores. Use a soft brush and a mild detergent to dislodge buildup; avoid abrasive tools that can damage coatings. For odors, apply recommended odor eliminators to affected areas and let them sit per product instructions. Follow with a vinegar rinse: pour one cup white vinegar into the bottom, let it stand a few minutes, then wipe interior surfaces with a microfiber cloth. Dry fully and leave door ajar to ventilate.
Reassembling and Running a Maintenance Cycle
Once the interior is clean and dry, reassemble components carefully to prevent leaks and restore proper function. Check seals, spray arms, filter, and racks as you put everything back; you’re reassembling parts in the reverse order you removed them. Tighten fittings by hand, avoid over-torquing, and confirm spray arms rotate freely. Close the door gently and plug the unit in.
- Inspect gaskets for cracks and seat them evenly before replacing the lower rack.
- Reinstall the filter and verify it locks; a loose filter can clog drains.
- Reattach spray arms and spin manually to verify clearance.
- Run an empty maintenance cycle on hot with a dishwasher cleaner or white vinegar.
Monitor the first cycle for leaks and unusual noises; stop and recheck if you detect either.
Tips to Keep Your Dishwasher Clean Longer
If you want your dishwasher to stay clean longer, adopt a few simple habits: scrape plates before loading, run the garbage disposal before starting the machine, and use the correct detergent and cycle for the soil level. Empty filters and wipe seals weekly to prevent odors and buildup; handle filters carefully and follow manufacturer instructions to avoid damage. Schedule preventive maintenance every 3–6 months: check spray arms for clogs, tighten loose fittings, and descale if you have hard water. Perform regular inspections of hoses and door gaskets for cracks or leaks, and replace worn parts promptly to prevent water damage. Run a hot-water sanitize cycle occasionally and avoid overloading to guarantee proper cleaning and safe operation.
Conclusion
You’ve now got a straightforward, safe routine to keep your dishwasher running well. Turn off power and water, remove and rinse the filter, clear the drain and spray arms, and wipe the door, gasket, and exterior with a mild detergent. Finish by reassembling parts and running an empty maintenance cycle with vinegar or a cleaner to deodorize. Follow these steps regularly, check seals and spray arms for blockages, and you’ll reduce odors, clogs, and repair needs.