

You’ll get consistent rice by choosing the right grain, measuring precisely, and controlling water, time, and heat. Rinse or soak when needed, then use the correct method—stovetop, rice cooker, Instant Pot, or oven—to control texture. Follow a few calibrated ratios and rest times, and you’ll avoid mush or undercook… Want the exact ratios and step-by-step actions?
Key Takeaways
- Choose the appropriate rice variety and matching water ratio (e.g., long-grain 1:1.5, short-grain 1:1.25, brown 1:2.25).
- Rinse rice under cool running water until rinse water runs clear, and soak if recipe recommends to improve texture.
- Use a heavy-bottomed pot or rice cooker, bring to a simmer, cover tightly, reduce heat, and avoid lifting the lid.
- Turn off heat, let rice rest covered for 10–15 minutes, then gently fluff with a fork before serving.
- Cool cooked rice quickly, refrigerate within two hours, and reheat once to 74°C with a splash of water.
Types of Rice and How to Choose

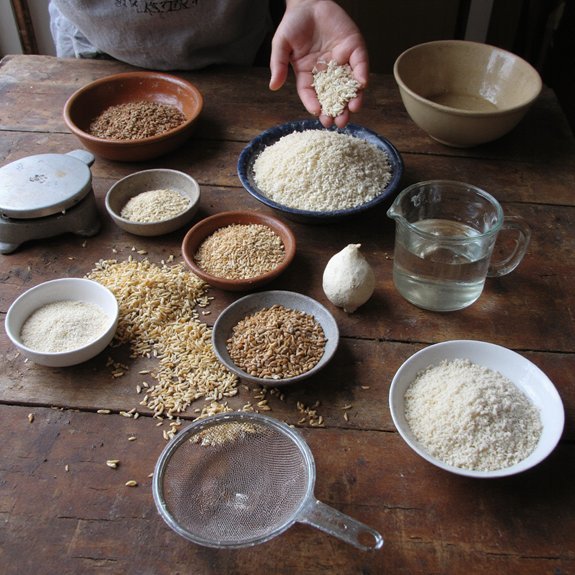
When you pick rice, match grain type and starch profile to the dish: long-grain (high amylose) yields separate, fluffy grains for pilafs; medium-grain balances stickiness and creaminess for paella; short-grain (high amylopectin) gives the cohesive, creamy texture needed for risotto and sushi. You’ll evaluate rice varieties by kernel length, surface polishing, and bran presence. Choose long grain options—jasmine rice or basmati rice—for volatile aromatics and distinct kernels; they suit frying and pilaf applications. Medium grain performs where controlled adhesion matters; think paella and certain risottos that demand some cohesion. Short grain (arborio rice) and sushi types prioritize amylopectin-driven viscosity for desired creaminess. Brown rice and wild rice deliver different nutritional benefits and textural profiles; brown retains bran, increasing fiber and micronutrients, while wild rice offers protein density and firm chew. Align cooking preferences with ingredient interaction and desired mouthfeel, then select variety that optimizes texture and nutrient profile.
Measuring Rice and Water Accurately
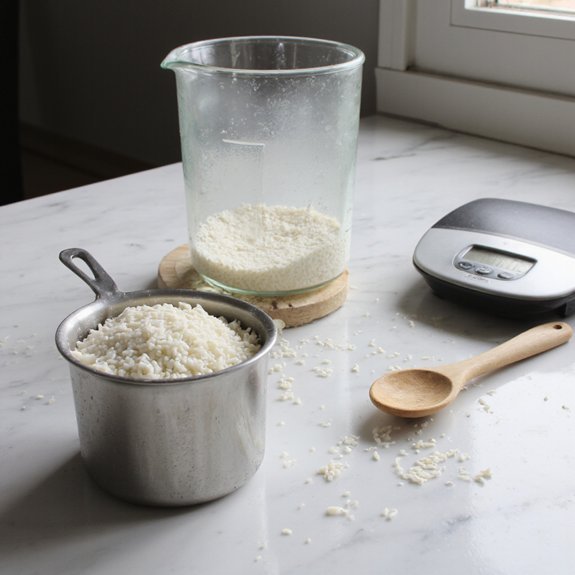
You’ll match rice-to-water ratios to the rice variety to achieve consistent texture. Use calibrated measuring cups, a digital kitchen scale, and marked cookware to control both volume and mass. Measure rice by weight when possible and set water as a percentage or ratio (for example ~1:1.5 long-grain, ~1:1.25 short-grain), adjusting for your cooker.
Rice-to-Water Ratios
Although varieties absorb water differently, the final texture comes down to an exact rice-to-water ratio and precise measuring. For standard long grain rice use 1:1.5 (rice:water) by volume; for standard short grain rice use 1:1.25. Brown rice demands more—1:2.25. Parboiled or converted rice typically needs 1:1.25. Wild rice blends require about 1:3. Adjust ratios by grain age: older, drier rice needs roughly 5–10% more water. For pilafs or risottos, reduce initial liquid and incorporate incremental additions to reach target moisture. When you scale recipes, maintain ratios rather than fixed volumes. Note that soaking reduces required water—subtract soaked absorption (around 0.1–0.2 parts). Record precise ratios for each supplier and batch to iterate toward consistent, innovative outcomes. You’ll refine targets by logging results and tweaking variables.
Measuring Tools and Techniques
Use a digital kitchen scale and metric measures for repeatable results: weigh rice in grams rather than relying on volumetric cups, tare the bowl, and record batch weight; measure cooking water by mass (1 g water = 1 ml) on the same scale to preserve exact rice:water ratios. You’ll standardize hydration across varieties, batches and equipment. Calibrate digital scales periodically and use small containers to reduce error. If you use measuring cups, convert their volumes to grams for your specific rice type; note that cup measures vary by cereal density and packing. Log measurements and outcomes so you can iterate. For scaled recipes, use ratios and proportional scaling, not eyeballing. Adopt precise tools and metrics to create reproducible, optimized rice textures every cook time.
Rinsing and Soaking: When and Why
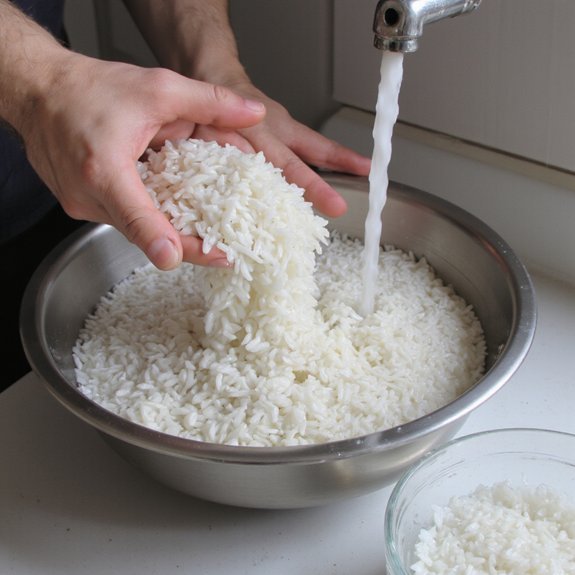
Rinsing removes surface starch, dust, and loose bran that cause clumping and gummy texture, so you should rinse most white and specialty rices under cool running water until the rinse runs clear; soaking hydrates kernels, shortens and evens cooking, and reduces chance of ruptured grains, so soak long-grain and aromatic rices 15–30 minutes, basmati 20–30 minutes for elongation, and brown or aged whole-grain rices 30 minutes to several hours (or overnight) depending on age and desired texture. Apply rinsing benefits by agitating rice in a mesh sieve or bowl until water clarifies; this reduces surface starch and improves separation. Optimize soaking duration to the cultivar and your workflow: brief soaks (15–30 minutes) for texture control, extended soaks for whole grains to reduce cooking variability and mechanical splitting. You’ll accelerate hydration at cool temperatures to preserve starch structure, and drain thoroughly to maintain target rice-to-water ratios before proceeding.
Stovetop Method for Perfect Rice
When you cook rice on the stovetop, pick a heavy-bottomed pot with a tight-fitting lid and measure rice and water precisely: about 1:1.25–1.5 (rice:water) for most white long-grain and aromatic varieties, 1:1.75–2 for brown or whole-grain rice. Use a calibrated scale for repeatability. Rinse to remove surface starch unless you purposely want stickier grains; soak brown rice 20–45 minutes for uniform hydration. Bring to a vigorous simmer over medium-high heat, then immediately reduce to the lowest possible flame and seal. Time white long-grain 12–15 minutes, brown 35–45 minutes; avoid lifting the lid. After cooking, isolate the pot off heat and let rice rest, sealed, for 10–15 minutes to finish steaming rice and stabilize internal steam pressure. Fluff gently with a fork or rice paddle to separate grains and achieve a consistent fluffy texture. Adjust water by 5–10% next batch if you want firmer or softer results. Every time.
Rice Cooker and Instant Pot Techniques
Two electric methods—rice cookers and Instant Pots—provide controlled heat ramps and timed cycles that remove much of the judgement from stovetop cooking. You select a program, measure grain-to-water ratios, and let automated profiles manage soak, boil, and pressure phases. For innovation-minded cooks, apply rice cooker tips: use precise weighing, calibrate water added for altitude, and employ a brief post-cook steam phase to equalize moisture. For Instant Pot users, optimize instant pot settings: choose Pressure Cook or Rice presets based on grain type, set natural release for whole grains, and use quick release for short-grain sushi to limit overcooking. Always pre-rinse to remove surface starch; consider a 10–15 minute rest after cycle completion inside the sealed appliance to stabilize internal moisture gradients. You’ll reproduce consistent texture by standardizing grain mass, liquid volume, and cycle selection across batches, then iterating incremental adjustments. Document each run to refine your process efficiently.
Oven-Baked Rice for Even Results
Because the oven provides uniform radiant heat, you’ll get consistent, even-cooked rice across the whole vessel with minimal attention. Use a covered ovenproof dish, calibrated oven, and precise water-to-rice ratio; this scales reliably. Preheat to 375°F (190°C); combine rinsed rice, measured water, a pinch salt, and a touch oil; seal tightly. Bake undisturbed; resist opening to preserve steam. Typical baking times range 25–35 minutes for white, 45–55 for brown; adjust for grain size. Rest covered 10 minutes before fluffing with a fork. These oven techniques free you from stovetop variability and enable batch processing with reproducible texture.
| Grain | Temp (°F/°C) | Bake Time |
|---|---|---|
| Long-grain white | 375 / 190 | 25–35 min |
| Short-grain | 375 / 190 | 30–40 min |
| Brown | 375 / 190 | 45–55 min |
Implement sensors or timers and log baking times and humidity; iterate ratios for target firmness and innovation-driven optimization. Document results; standardize protocols across kitchens. Monitor oven performance.
Troubleshooting Common Rice Problems
If your rice turns out wrong, diagnose systematically: identify the symptom (undercooked, mushy, gummy, scorched, or uneven), confirm grain type and precise water-to-rice ratio, check heat source and vessel sealing, and verify timing and calibration of your stove or oven. Start by isolating variables: use rice batch and measured water, the method. For undercooked rice, increase contact time or raise simmer intensity; confirm residual water level before concluding doneness. For overcooked rice or mushy, reduce water input and shorten cook duration, or employ a rapid steam-release to halt gelatinization. For sticky rice or gummy residues, switch rinse protocol and adjust soak time to modulate surface starch. For burnt rice, evaluate hot spots and vessel conductivity; rescue by transferring top layers. For uneven texture, standardize heat distribution and lid seal integrity. Monitor texture and iterate ratios until you’ll achieve fluffy rice with controlled flavor absorption and zero residual water.
Flavoring and Finishing Touches
You’ll layer herbs and aromatics at specific stages—during toasting, simmering, or finishing—to control extraction and aroma. You’ll add measured fats (butter, neutral oil) and small quantities of acid (vinegar, lemon) after cooking to modify mouthfeel and brightness. You’ll finish by adjusting moisture, fluffing, and applying final garnishes to achieve the precise texture you want.
Herbs and Aromatics
When you want pronounced aromatics, add whole spices and hardy herbs (bay, peppercorns, thyme, star anise) at the start so they’ll infuse the cooking liquid; delicate herbs (cilantro, parsley, basil) should be added off-heat or just before serving to preserve volatile oils. Design herb blends to match rice variety and cuisine: match weightier, resinous herbs to long-grain basmati and lighter, citrusy blends to jasmine. For technical control, weigh herbs precisely, time additions, and use steeping baskets or sachets to avoid particulates. Pilot small aromatic infusions to quantify extraction: note minutes, temperature, herb mass per cup of rice. Finish by gently folding in chopped delicate herbs, monitoring aroma retention. Document iterations and standardize ratios for reproducible, innovative results. Calibrate for scale, shelf-life, and storage consistency.
Fats, Acids, and Texture
After adding aromatics, balance and finish rice by controlling fats, acids, and texture to shape mouthfeel and flavor brightness. You’ll use fats strategically: a measured amount of oil or butter coats starch granules, limits clumping, and amplifies perceived richness; that’s fats’ role. Add oil early for separated grains, butter at end for silkiness. Acids adjust perception: vinegar, lemon, or tamarind brighten and lift heavy dishes; that’s acid effects. Apply acids sparingly, tasting iteratively. For texture, manipulate hydration, agitation, and resting time to target chew, creaminess, or fluff. Use brief steaming to set structure, or aggressive stirring to promote starch release for risotto-style cream. Combine fat and acid deliberately—fat softens acids while acid cuts fat—so you can engineer a precise, purposeful finish and repeat consistently.
Storage and Reheating Best Practices
Two rules govern safe rice storage: cool rapidly and get it below 5°C within two hours. You should spread cooked rice in a thin layer on a tray, or transfer it into shallow, airtight containers and refrigerate immediately. For rice storage, label containers with time and use within 24 hours for peak safety; discard after 48 hours. Avoid leaving rice at room temperature; Bacillus cereus spores germinate in the danger zone.
For rice reheating, reheat only once and confirm internal temperature reaches 74°C. Use a covered pan, microwave with stirring, or steam to rehydrate and heat evenly. Add a small splash of water to restore texture; monitor residual moisture to prevent drying. For innovation, consider rapid cooling systems, vacuum sealing, or blast chill techniques to extend safe storage while preserving structure. Follow precise timing and temperature controls; they’ll minimize risk and maximize repeatable quality and reduce waste now.