

You’ll start by picking embroidery floss, scissors, and a way to secure the strands, then choose colors and measure each piece to fit the wrist. You’ll learn a few simple knots—forward and backward—that form stripes and chevrons, and you can add beads or charms once the pattern’s set. I’ll show step‑by‑step how to tie, finish securely, and care for your bracelet so it lasts—next, we’ll make your first knot.
Key Takeaways
- Choose 2–8 strands of embroidery floss, each cut to 2.5–4× wrist circumference plus 3–4 inches for knots and closures.
- Secure the top with tape, clipboard, or safety pin, arranging strands in the color order you want.
- Learn and practice forward and backward knots (two knots per stitch) for even tension and neat rows.
- Follow simple patterns: diagonal stripes (left-to-right forward knots) or chevron (mirror halves, work inward).
- Finish with a braided or sliding-knot closure, trim ends, and seal with glue or clear nail polish to prevent fraying.
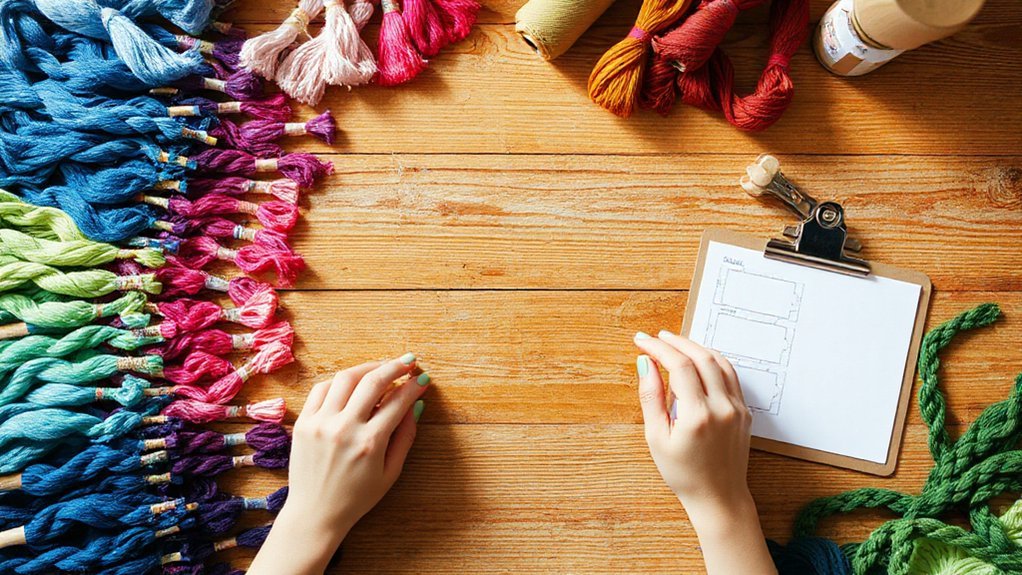
Materials and Tools You’ll Need

Before you tie your first knot, gather the essentials so you can work smoothly: embroidery floss or craft thread in a few colors, sharp scissors, a clipboard or tape to secure the bracelet while you work, and a ruler or tape measure to get the right length. Next, sort your materials: decide how many strands you’ll use and lay them in order. Check different thread types—cotton floss, perle, or nylon—so you know how they knot and wear. Assemble necessary tools: a safety pin or clipboard, tape, scissors, and a needle if you’ll finish ends neatly. Cut strands with extra length for knots, label bundles if you’re making multiples, and keep a small tray for stray threads. You’re ready to start knotting.
Choosing Colors and Patterns
Start by using the color wheel to pick harmonious or complementary shades that match the vibe you want. Next, plan patterns with strong contrast so knots and shapes stand out, and test a small sample before committing. Finally, consider yarn texture and thickness—smooth cotton gives crisp lines while fuzzy or variegated yarns add softness and blended color.
Color Wheel Basics
1 simple trick makes choosing colors easier: use the color wheel. Start by picking a base hue you love. Then try these steps to mix confidently.
1) Complementary: choose the color opposite your base for bold contrast that still feels balanced—this plays on basic color harmony.
2) Analogous: pick neighboring hues for a softer, harmonious band that’s easy on the eye.
3) Triadic: select three evenly spaced colors for lively, balanced combos without chaos.
Also consider color psychology: warm tones feel energetic, cool tones calm. Test small samples on scrap thread to see emotional effect and brightness together. Keep the number of colors small at first—two to four—to maintain clarity. You’ll learn which mixes suit your style.
Pattern Contrast Tips
When you want your bracelet’s design to pop, pair contrasting patterns and colors so each element reads clearly—use high-contrast combos (dark vs. light, saturated vs. muted) for bold motifs and low-contrast blends for subtler, textured looks. First, choose a dominant pattern and pick a contrasting background color to make it stand out. Second, apply simple contrast techniques: alternate light and dark strands, or place a single saturated stripe beside muted bands. Third, test small swatches to check pattern balance; adjust stripe width or repeat frequency until the eye rests where you want. Fourth, limit your palette to three or four colors so motifs don’t compete. Finally, step back and refine: tweak one color or spacing rather than overhauling the whole design.
Yarn Texture Choices
Pick yarn textures that match the look and feel you want: smooth, tightly twisted strands give crisp patterns and easy knotting, while fluffy or loosely spun yarns soften edges and add volume but can blur fine details. Step 1: decide function—durability favors cotton vs. acrylic choices; cotton feels natural and grips knots, acrylic resists moisture and keeps bright colors. Step 2: test a short sample to see texture impact on pattern contrast and knot definition. Step 3: match texture to pattern complexity—use smooth yarns for intricate chevrons, fluffier yarns for chunky, cozy bracelets. Step 4: consider hand feel and wear—softer yarns suit comfort, firmer yarns hold shape. Final tip: mix textures sparingly to avoid muddled designs.
Preparing and Measuring Your Thread
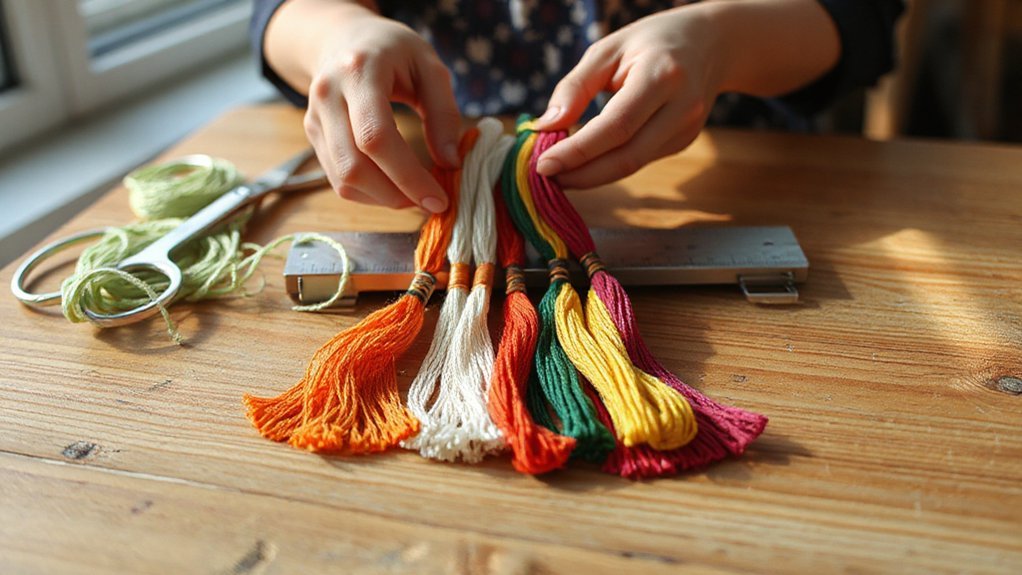
Now that you’ve picked colors and a pattern, you’ll choose a thread type—embroidery floss, pearl cotton, or hemp—based on durability and texture. Next measure each strand to the right length (usually wrist size plus a generous allowance for knots and fringe). I’ll show simple rules for calculating how much thread each pattern needs so you don’t run short.
Choosing Thread Types
Start by deciding which thread type fits your design and skill level — cotton embroidery floss for crisp knots, nylon or polyester for extra strength and shine, or waxed cord for simple, durable styles — then measure and cut each strand with a few extra inches for finishing. Next, pick fiber based on texture: cotton thread and embroidery floss give matte, easy-to-knot results; silk thread feels luxurious and slides smoothly for intricate patterns; nylon cord holds bright colors and resists fraying. Test a small sample knot to see tension and sheen. Choose thickness: thinner strands suit detailed chevrons, thicker cords work for bold braids. Finally, match your closure method to the material—slidable knots for slippery silk or nylon, and glued ends for waxed cord—to guarantee a tidy finish.
Measuring Strand Lengths
With your thread chosen, figure out how long each strand should be so your bracelet fits and you don’t run out mid-pattern. First, measure your wrist and add 3–4 inches for tying and movement. For simple patterns, cut each strand to about 2.5 times wrist circumference; for complex patterns or long twists, use 3–4 times. Mark lengths on a ruler or tape to keep measuring lengths consistent. Second, account for clasps or loops by adding extra inches where needed. Third, lay strands out and test a short sample knot sequence to confirm you have enough. Finally, plan strand adjustments before you start: trim, add, or splice strands if you miscalculated, and keep spare thread handy for fixes.
Basic Knots: Forward, Backward, and Forward-Backward
Before you make a full bracelet, learn three simple knots you’ll use over and over: the forward knot, the backward knot, and the forward-backward knot. Start with the forward knot technique: hold the working strand over its neighbor to form a 4-shape, loop under and through, then tighten twice to make one knot. For the backward knot technique: mirror that motion—form a backward 4-shape, loop under and through, tighten twice toward the left. For the forward-backward knot: make a forward knot once, then a backward knot once with the same strands; it locks color direction. Practice each on scrap strands until your knots sit evenly. Keep tension consistent and check alignment as you work row by row for neat, long-lasting bracelets.
Simple Patterns: Candy Stripe and Chevron
Once you’ve got the basic knots down, you can make two classic, easy patterns: the diagonal candy stripe and the V-shaped chevron. First, pick 4–8 colors for candy stripe; arrange strands in a repeating sequence. Secure the top, then use forward knots with the leftmost strand across each neighbor, moving right. Repeat rows until the length’s right — the stripes form naturally.
For the chevron pattern, split strands into mirrored halves; work outward-in from each outermost strand. Make forward knots toward the center on the left side and backward knots toward the center on the right. Tie a center knot to join rows. Keep tension even and check symmetry often. Both patterns scale well and teach knot control.
Adding Beads, Charms, and Embellishments
If you want to dress up your bracelets, start by planning where beads or charms will go so they sit balanced and don’t tangle the pattern. First, consider bead selection: pick sizes that match your thread and pattern, testing holes on spare strands. Use lightweight beads for knotted designs and larger ones for spaced accents. Second, plan charm placement: decide whether charms hang from knots, sit along the braid, or attach with jump rings. Mark positions with clips or washable markers so you don’t disrupt symmetry. Third, string beads on working strands as you knot, checking tension so the pattern stays even. Finally, trim stray threads and gently smooth beads; check that embellishments move freely without pulling the weave.
Making Secure Closures and Finishing Touches
While you’re wrapping up your bracelet, focus on closures that stay secure and look neat—pick a method that suits the style and thickness of your work. First, trim ends evenly and decide between knot-based or hardware closure options. For knot closures, use a surgeon’s knot or sliding knot: make tight throws, add a dab of glue if threads are slippery, then hide excess under a bead or trim close. For hardware, attach crimp beads or lobster clasps with jump rings; flatten crimps firmly and test strength. Consider braided or twisted ties for adjustable bracelets. As finishing techniques, burn nylon ends lightly or use clear nail polish on cotton to prevent fraying. Finally, tug gently to test the closure and tidy any stray fibers for a polished result.
Tips for Caring for and Gifting Your Bracelets
After you’ve secured the closure and tidied stray fibers, think about how to keep your bracelet looking great and how to present it when giving it away. You’ll want simple bracelet care steps: avoid soaking, trim loose ends, and store flat or rolled to prevent kinks. When gifting, choose a clean presentation that matches the recipient’s style.
- Clean gently with a damp cloth and let air dry.
- Store in a small pouch or jewelry box to avoid dust and tangles.
- Add a handwritten note with care instructions and why you made it.
- Use a ribbon or kraft card for attractive, eco-friendly wrapping.
Follow these gifting tips and care steps to keep your bracelets beautiful and meaningful.
Conclusion
You’ve got the basics, so now put them to work: pick colors that speak to you, measure threads long enough for comfortable knotting, and practice forward and backward knots until they feel natural. Start with candy stripes or a chevron to build confidence, add beads or charms if you like, and finish with a secure closure. Keep bracelets dry and store them flat. Gift them with care — handmade bracelets show thoughtfulness and skill.