

You can fix drywall holes yourself with the right approach, tools, and patience. Start by assessing the size and any hidden damage, then pick spackle for small dings, a California patch for medium holes, or replace large sections with new drywall and blocking. I’ll walk you through each method step by step so you get a seamless finish—here’s what to do first.
Tools and Materials You’ll Need

You’ll need a few basic tools and materials to repair drywall holes: a utility knife or drywall saw, a putty knife (2–6 inch), joint compound, drywall tape or mesh patch, replacement drywall or a patch kit, drywall screws and a drill or screwdriver, sandpaper or sanding block, primer and paint, plus safety gear like goggles and a dust mask.
Gather quality joint compound (all‑purpose or setting), a rigid 6-inch knife for feathering, and both paper tape and self‑adhesive mesh so you can choose based on preference.
Pick sandpaper grits 120 and 220 for smoothing.
Use coarse screws rated for drywall when fastening patches.
Keep a mixing pan and clean water handy.
Protect floors and ventilate the room.
Store leftover compound sealed to prevent drying.
Assessing Hole Size and Damage
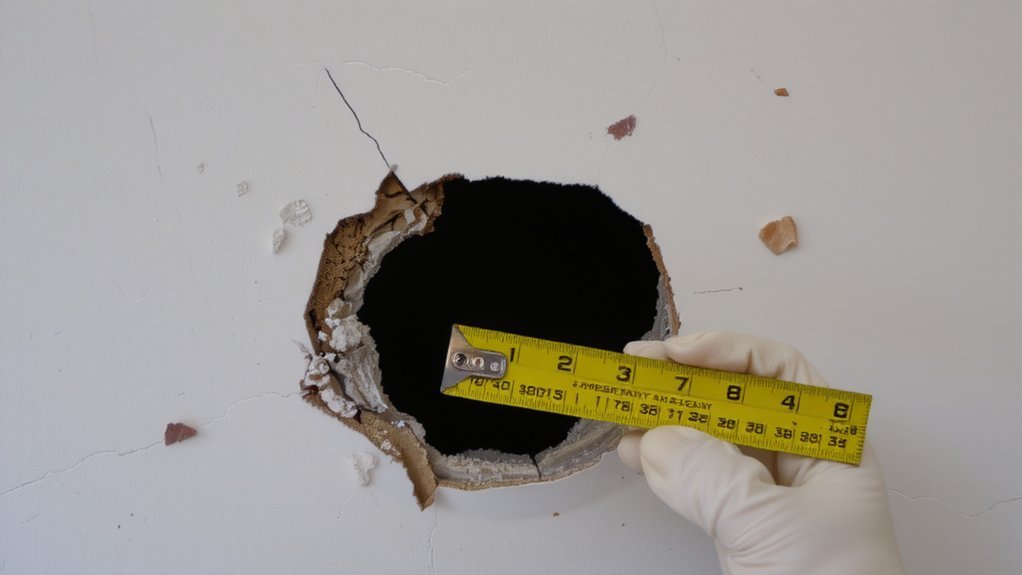
How big is the hole and what’s around it?
First, measure the hole’s diameter or approximate dimensions and note whether it’s clean-cut, jagged, or crumbled.
Check for broken drywall paper, loose gypsum, or loose tape that will affect prep.
Inspect adjacent paint, texture, and baseboard or trim for matching needs.
Look behind the hole—use a flashlight to spot electrical wires, plumbing, insulation, or a stud edge.
Press gently to see if surrounding drywall is soft from moisture or mold; discoloration implies water damage and a larger repair.
Determine whether the hole’s location—near doors, counters, or high-traffic areas—requires reinforcement or a larger patch.
Record details and photos before you start so you choose the right repair method.
Estimate material and labor time accordingly for budgeting.
Repairing Small Nail Holes and Tacks
When small nail holes or tack marks mar your wall, they’re quick fixes you can handle in minutes with minimal tools.
You’ll need lightweight spackle, a putty knife or fingertip, sandpaper (220-grit), and matching paint.
For shallow holes, squeeze a bit of spackle into the depression and smooth it flush with the surface; wipe away excess.
For slightly deeper holes, insert a toothpick or match, break it off, then cover with spackle to give backing.
Let the repair dry fully, usually 30–60 minutes, then sand lightly until smooth.
Wipe away dust, prime if the wall is glossy or repairs are large, and touch up paint.
These small repairs disappear when you take care to smooth and match finish.
They last when you prepare surfaces.
Fixing Medium Holes Using a California Patch
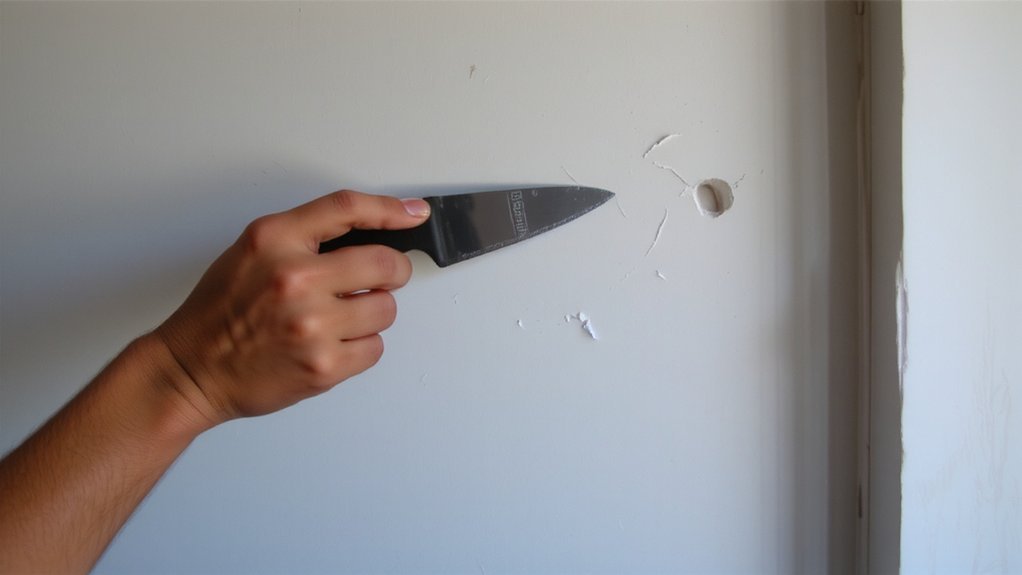
Small nail holes are easy to fill, but medium-sized holes from doorknobs or accidental knocks need a stronger fix, so you’ll use a California patch to create a solid, paint-ready surface without removing large sections of drywall.
Start by squaring the hole with a utility knife so the patch sits against solid paper-faced drywall. Cut a patch from scrap drywall slightly larger than the opening, bevel its edges so it nests flush, and test-fit.
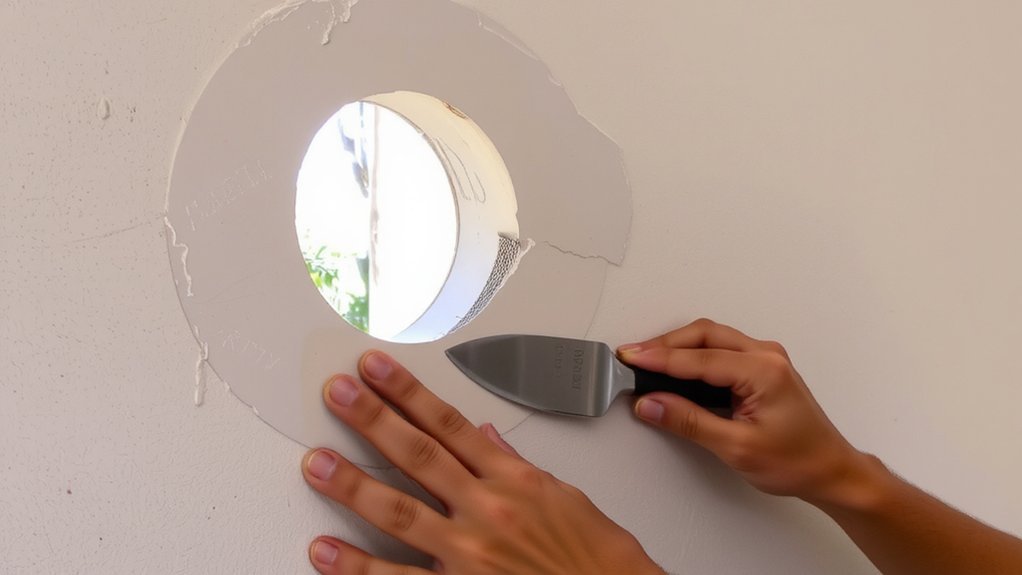
Apply thin joint compound around the opening, press the patch in, and bed it so paper faces align. Feather compound out in thin coats, letting each dry, then sand smooth and prime before painting for an invisible repair.
Use a flexible putty knife and wear a dust mask while sanding.
Replacing Large Sections of Drywall
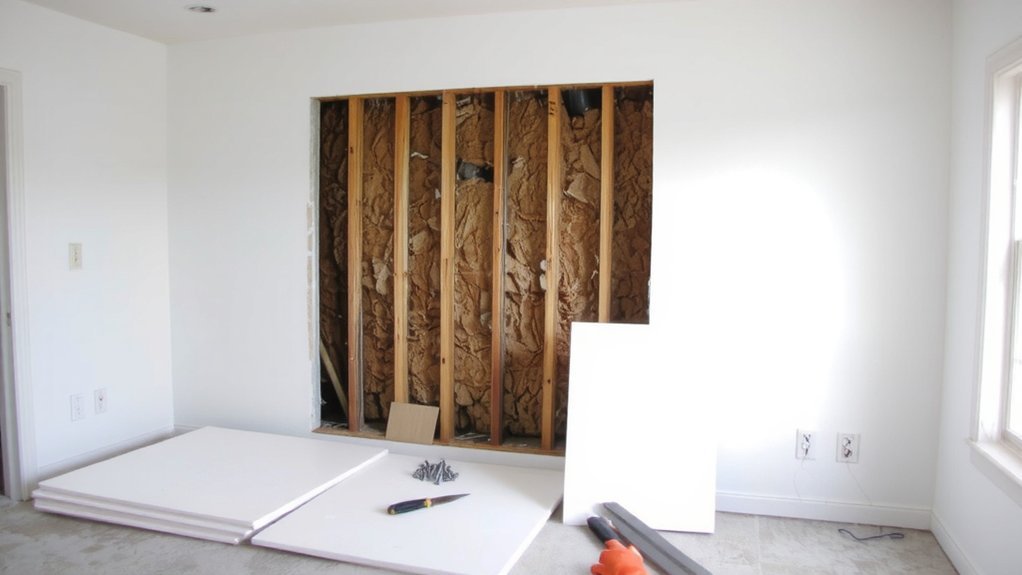
If a hole’s too large or the surrounding drywall is crumbling, you’ll need to replace the entire section to restore structural integrity and a seamless surface.
Start by marking a rectangular area that spans to solid studs, then cut out damaged drywall. Measure the opening and cut a new drywall piece to fit, matching thickness.
If studs aren’t aligned, add blocking or furring strips behind the opening for secure fastening. Lift the replacement into place and drive drywall screws into studs or backing every 12 inches.
Reinstall or protect any insulation and wiring you encounter; turn power off before touching electrical boxes.
Tape the seams with paper or mesh tape and apply your finishing system until smooth. Prime and paint to match surrounding walls.
Step-by-Step Joint Compound Application Techniques
With your replacement secured and seams taped, you’re ready to apply joint compound for a smooth finish. Begin by mixing compound to a lump-free, spreadable consistency; avoid excess water.
Use a 6-inch knife for the first coat, pressing compound into seams and over tape, feathering edges. Let the first coat dry completely.
Apply a slightly wider second coat with a 10- to 12-inch knife, building up thin layers to minimize shrinkage. Use light, even pressure and keep strokes parallel.
For corners or inside angles, use a corner trowel or fold a knife to maintain crisp lines. Check for hollows and fill sparingly.
After final drying, inspect for a smooth surface, ensuring an even, seamless repair. If needed, add a thin touch-up coat to perfect.
Sanding, Priming, and Preparing for Paint
Once the compound’s fully dry, sand the area smooth using a fine-grit (120–180) sanding block or pole sander and keep your strokes light to avoid gouging. Feather the repair edges so the compound blends with surrounding drywall, checking for ridges and low spots.
Remove dust thoroughly with a brush and vacuum, then wipe with a slightly damp cloth or tack cloth to ensure a clean surface. Mask adjacent areas and protect floors.
Apply a stain-blocking primer or drywall sealer over the repaired spot to equalize porosity and improve adhesion; use a brush for corners and a roller for flats. Let primer dry fully, inspect for imperfections, and sand lightly if needed before final priming.
Ensure good ventilation and follow product drying times. Take precautions.
Matching Texture and Paint for a Seamless Finish
How do you make the repair disappear so it blends with the surrounding wall? Match texture first: identify whether wall is smooth, orange peel, knockdown, or heavy stipple, then replicate it using skim coat techniques, texture spray, or a sponge/trowel.
Practice on scrapboard until pattern, thickness, and drying create the same shadow and sheen.
After texture cures, prime the repair to seal joint compound. Use the original paint or a matched sample—get a color match at a store if needed, and feather the paint beyond the patch to avoid hard edges.
For gloss consistency, match sheen (flat, eggshell, satin). Finish with light blending strokes and let multiple thin coats dry before assessing the result. Touch up spots after full cure for the best invisibility.
Common Problems and How to Troubleshoot Them
Why isn’t the repair blending in? Check for several causes: insufficient feathering, different joint compound layers, or mismatched texture.
If edges show, sand the surrounding area lightly and feather more compound so edges taper smoothly.
If the patch dips or bulges, remove loose material, reapply thin, even coats, and press mesh or backing flush.
Visible seams often mean tape wasn’t embedded; recess, apply fresh compound, then tape and embed properly.
Texture still stands out? Match tool motion and compound consistency; practice on scrapboard.
Paint looks off if primer’s skipped—prime patched spots to equalize absorption and sheen.
If compound cracks later, it’s from movement or over-thick application; use flexible tape and thinner layers to prevent recurrence.
Inspect your work between coats and correct issues promptly.
Estimated Timeframes and Drying Guidelines
Because drying times depend on the compound, coat thickness, temperature, and humidity, plan your work so each layer has adequate time to set before you sand or add the next one.
For joint compound, allow 24 hours for each full-thickness coat in normal conditions; lightweight and quick-setting compounds dry faster—setting types can dry in 20–90 minutes depending on the formula.
Thin skim coats may need only a few hours.
In cool or damp environments, add drying time or use low heat and ventilation to speed drying without cracking.
Check dryness by touch: it should be firm, not tacky.
When in doubt, don’t rush; wait, as sanding or painting over partially dry compound causes poor adhesion and visible defects.
Adjust your schedule for multiple repairs.
Conclusion
By matching the repair method to the hole size, you’ll save time and get a smooth result. For tiny nail holes use spackle; for medium openings use a California patch; for large damage cut and replace drywall with blocking and screws. Clean edges, embed tape, and apply thin feathered coats, sanding between layers. Prime to equalize sheen, replicate texture if needed, then paint. Follow drying times and troubleshoot common issues for a seamless finish always.