

You can keep your garbage disposal working well and smelling fresh with a few simple, safe steps you’ll do regularly. Start by powering it down and protecting your hands, then scrub the splash guard, grind ice and salt to remove buildup, and use citrus or baking soda and vinegar to neutralize odors. Follow the basic maintenance and deeper cleaning tips below to avoid jams and slow drains.
Key Takeaways
- Turn off and unplug the disposal and confirm the power switch is off before doing any cleaning or removal of debris.
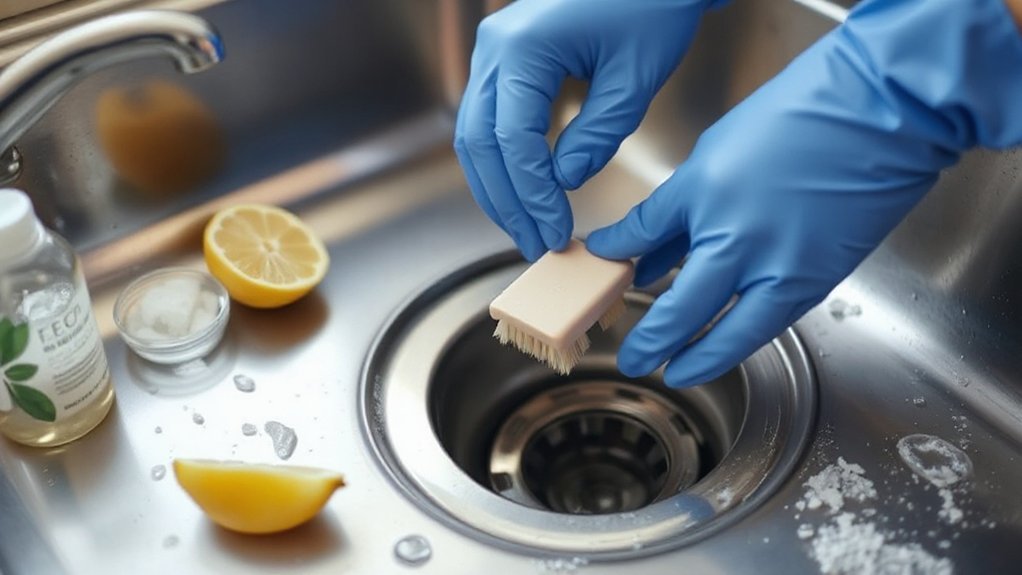
- Scrub the rubber splash guard and flange with dish soap and a long-handled brush to remove trapped grime.
- Grind a handful of ice cubes and 1/2 cup coarse salt to dislodge debris and sharpen the impellers.
- Freshen odors by grinding citrus peels or pouring 1/2 cup baking soda then 1/2 cup vinegar, wait 10 minutes, then flush with hot water.
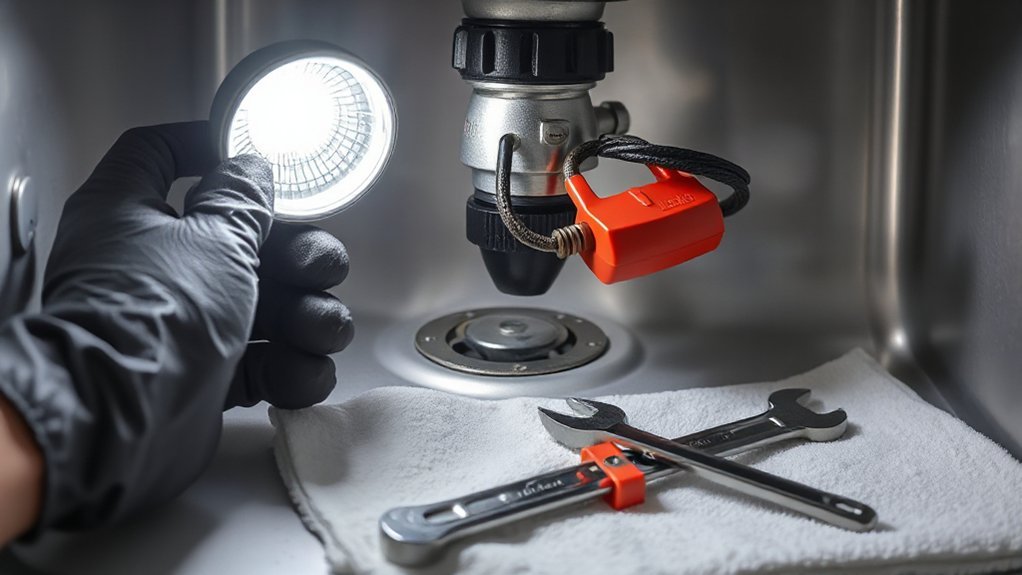
- For jams, cut power, use the reset button and a hex key in the bottom socket to free impellers, and remove obstructions with pliers, not hands.
Why Regular Garbage Disposal Cleaning Matters
Because food particles and grease build up quickly, you should clean your garbage disposal regularly to prevent clogs, odors, and reduced performance. You’ll protect your plumbing and extend the unit’s life by removing trapped debris and cutting residue that causes wear. Regular cleaning also delivers health benefits: it reduces bacterial growth and unpleasant smells that can affect kitchen air quality. You can follow simple maintenance tips like flushing with hot water, using ice and citrus to scour surfaces, and wiping the rubber splash guard. Consistent care keeps the blades sharper, minimizes jams, and lowers repair costs. Treat cleaning as quick routine maintenance so your disposal stays efficient, odor-free, and less likely to require professional service.
Safety First: How to Power Down and Protect Yourself
Before you touch anything, turn off and unplug the disposal to remove the risk of accidental activation. Confirm the switch is off, then pull the plug or flip the breaker for added power safety. Never rely solely on the wall switch—treat electricity as if it’s still live until proven otherwise.
Put on protective gear: cut-resistant gloves to shield your hands and safety glasses to block debris. Remove jewelry and secure loose clothing or long hair so nothing can get caught. If you need to reach inside, use a wooden or plastic tool rather than your fingers.
Keep a phone nearby in case you need help, and work with steady lighting so you can see clearly. Follow these steps every time before cleaning.
Tools and Household Items You’Ll Need
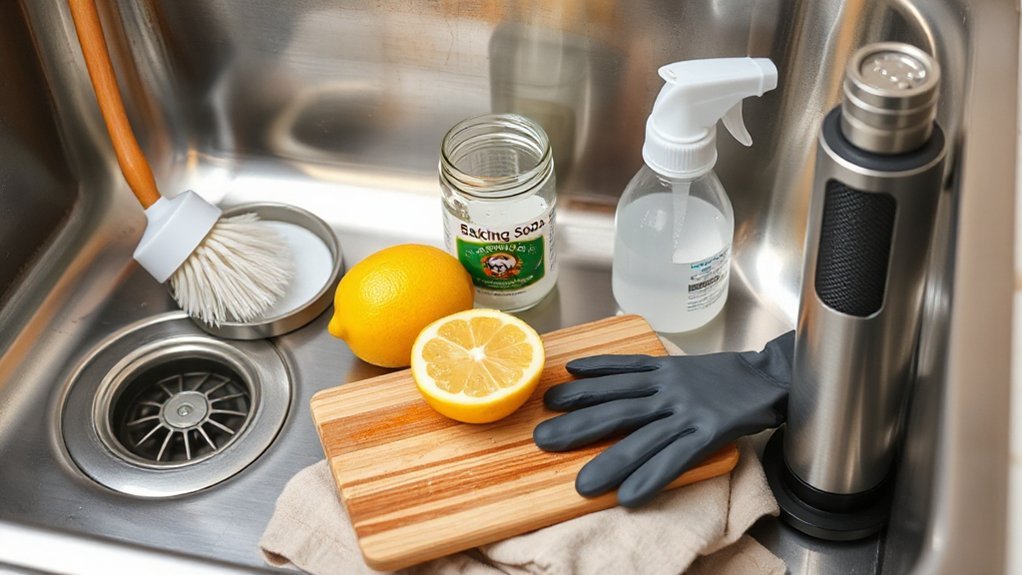
Before you start cleaning, gather the basic tools (screwdriver, pliers, and a flashlight) and the cleaning supplies (dish soap, baking soda, vinegar, and a scrub brush). Don’t forget safety gear like gloves and eye protection. Having everything ready will make the job faster and safer.
Basic Tools Required
When you tackle a garbage disposal cleaning, having the right tools makes the job faster and safer: basic items include rubber gloves, a flashlight, a long-handled brush or old toothbrush, a hex key (usually 1/4″ or 3/8″) for the manual crank, pliers or an adjustable wrench, a bucket or bowl to catch water, and a few household cleaners like dish soap, baking soda, and white vinegar. You’ll use these basic tools to follow simple cleaning techniques and avoid injury. Prepare a clear workspace, disconnect power, and keep the tools handy. Typical kit:
- Rubber gloves for grip and hygiene
- Flashlight to inspect the chamber
- Long-handled brush or old toothbrush for scrubbing
- Hex key and pliers for unjamming and manual crank
- Bucket or bowl to catch leaks and rinse debris
Cleaning Supplies List
You’ll want a short, focused kit of tools and household cleaners to tackle the disposal safely and effectively: gloves, a flashlight, a stiff brush or old toothbrush, a hex key for the manual crank, pliers or an adjustable wrench, a bucket or bowl, dish soap, baking soda, white vinegar, and ice or citrus peels for freshening. Add a mild all-purpose cleaner or a disposal-specific cleaning product for stubborn grime. Keep a small container for degreasing pads or paste if needed. For scent control, toss in lemon or orange peels and a few ice cubes to sharpen blades. Choose cleaning products with clear labels and consider eco friendly options like baking soda and vinegar to avoid harsh chemicals. Store everything near the sink for quick access.
Safety Gear Needed
Gather a few essential safety items and keep them within reach so you can work confidently at the sink. Before you touch the disposal, unplug it or switch off the circuit and make sure the unit is fully powered down. Put on safety goggles to protect your eyes from splashes and small debris, and wear rubber gloves to shield your hands from grime and sharp edges.
- Safety goggles for splash protection
- Rubber gloves, preferably heavy-duty
- Long-handled brush for reaching inside safely
- Flashlight to inspect the chamber
- Adjustable wrench or hex key for manual cranking
Keep the area dry and well-lit, and never put your hand into the disposal unless power is confirmed off. Follow these precautions every time.
Basic Daily and Weekly Maintenance Routine
Because keeping your disposal running smoothly only takes a few minutes each day and a short weekly check, make these simple tasks part of your routine: wipe the splash guard and rim with a damp cloth after use, run cold water while and for 15 seconds after grinding, and avoid putting fibrous or starchy scraps down the drain. For daily upkeep, flush the unit with cold water plus a small amount of dish soap to remove grease. Weekly maintenance tips: inspect the splash guard for trapped debris, check for leaks under the sink, and run the disposal with a citrus peel to freshen the drain. If you hear unusual noises or notice slow draining, stop use and troubleshoot before continuing to prevent damage.
Deep-Cleaning Method With Ice and Rock Salt
If your weekly rinse and citrus freshen haven’t removed stuck-on grime, try a simple deep clean with ice and rock salt to knock loose residue and sharpen the grind chamber. You’ll use cold abrasion and mineral grit to dislodge particles without chemicals. Run cold water, add ice and a handful of rock salt, then run the disposal briefly in short bursts. The ice benefits include contracting stuck grease and scouring surfaces; rock salt effectiveness comes from its abrasive action. After grinding, flush with a strong water stream.
- Gather ice, rock salt, and a sturdy cup
- Run cold water before and during operation
- Add a cup of ice, then sprinkle salt
- Turn on disposal in short pulses
- Flush thoroughly with hot water afterward
Natural Deodorizing Techniques (Citrus, Baking Soda, Vinegar)
When your disposal starts to smell, reach for natural ingredients like citrus, baking soda, and vinegar to neutralize odors without harsh chemicals. Drop small citrus peels into the unit, run cold water, and turn the disposal on for 10–15 seconds; the peels release oils that freshen and help dislodge light residue. For a deeper deodorize, sprinkle a generous layer of baking soda into the chamber, then pour in about half a cup of white vinegar. Let the fizzing sit for 5–10 minutes, then flush with hot water while running the disposal briefly to clear loosened grime. Repeat monthly or as needed. These simple steps use common pantry items to keep odors away without abrasive cleaners or toxic fumes.
Cleaning the Splash Guard and Drain Flange
While you’re working on the disposal, pull back the rubber splash guard and clean both sides and the drain flange thoroughly to remove trapped grime and bacteria. Use gloves and a flashlight so you can see inside; loosen debris with an old toothbrush or small scrub brush. Remove the flange if your model allows, rinse it, and scrub the underside where gunk hides. Wipe the rubber guard, paying attention to folds and the seal.
- Lift the splash guard and inspect for stuck food
- Scrub the drain flange rim and underside
- Use a mild detergent or baking soda paste
- Rinse thoroughly and dry before reassembly
- Replace any cracked splash guard to maintain a proper seal
Regular cleaning prevents buildup and keeps the drain flange hygienic.
Troubleshooting Odors, Jams, and Slow Drains
If your disposal smells bad, jams, or drains slowly, you can usually fix it with a few simple steps. Start by cutting power, removing trapped food, and checking the splash guard and drain flange for buildup. Then use safe odor-fighting cleansers and run cold water while testing the unit to make sure clogs are cleared and odors gone.
Eliminating Persistent Odors
Persistent odors usually come from trapped food particles and bacterial buildup inside the disposal or its drain lines, and you can remove most smells with a few targeted steps. You’ll prevent odorous buildup by doing basic disposal maintenance regularly and by treating problem spots directly. Run cold water, flip the switch, then:
- Scrub the rubber splash guard with a brush and mild detergent.
- Grind ice cubes and a handful of coarse salt to dislodge debris.
- Toss citrus peels (lemon or orange) while running cold water to freshen.
- Pour baking soda, then vinegar into the drain; wait 10 minutes and flush with hot water.
- Use a long-handled brush or tongs to remove visible trapped bits from the mouth.
If odors persist, repeat steps and check the P-trap or call a plumber.
Clearing Jams & Clogs
A few simple checks will get most jams and clogs moving again: first cut power to the disposal, then look and listen to pinpoint the problem—grinding noises, humming without rotation, or slow drainage each tell you different things. If it hums, use the reset button and try the hex key in the bottom socket to free the impellers; that’s often the quickest fix and clarifies jams causes. For visible debris, use tongs or pliers—never your hand—to remove obstructions from the chamber. For slow drains, clear the P-trap and use a plunger or plumbing snake for clog removal. After clearing, restore power, run cold water, and test. If problems persist, call a pro to avoid damage or injury.
When to Call a Plumber or Replace the Unit
When your disposal keeps clanging, won’t spin, or smells bad despite basic troubleshooting, it’s time to decide whether to call a plumber or replace the unit. Watch for signs unit failure: persistent leaks, humming without rotation, visible corrosion, or repeated jams. Weigh repair costs against age and performance — repairs on units over 8–10 years often aren’t worth it.
- Frequent clogs after simple fixes
- Loud grinding or metal-on-metal noise
- Water pooling under the sink
- Reset button trips repeatedly
- Unit older than a decade
If problems match several bullets, call a plumber for diagnosis. If the tech recommends major internal work or the unit is old, replace it. Replacing is usually faster, more reliable, and cost-effective long term.
Conclusion
Keeping your disposal clean is simple and worth it. Always unplug or switch off power, wear gloves and goggles, and remove visible debris from the splash guard. Use ice and rock salt to knock off buildup, then grind citrus peels or toss in baking soda and vinegar for freshening. Run hot water after treatments. Do routine weekly checks and address slow drains or persistent smells promptly—call a plumber if jams, leaks, or electrical issues persist.