You can keep your car seats looking and smelling fresh without expensive services, but the right approach depends on the material and the mess. Start by vacuuming loose dirt, treat stains quickly, and use cleaners made for fabric, leather, or vinyl to avoid damage. Small habits prevent big jobs, and a few targeted techniques will save time — here’s what to do next to get each seat type clean and protected.
Key Takeaways
- Identify your seat material (cloth, leather, vinyl, or suede) to choose the correct cleaner and tools.
- Vacuum seats and seams thoroughly to remove loose dirt and crumbs before treating stains.
- Blot fresh spills immediately and test cleaners on a hidden area before full application.
- Use a soft brush and fabric cleaner for cloth, and a pH-balanced leather cleaner plus conditioner for leather.
- Absorb oil stains with baking soda/cornstarch, dab ink with isopropyl alcohol, and consult a pro for stubborn stains.
Choosing the Right Tools and Cleaners for Your Seat Material
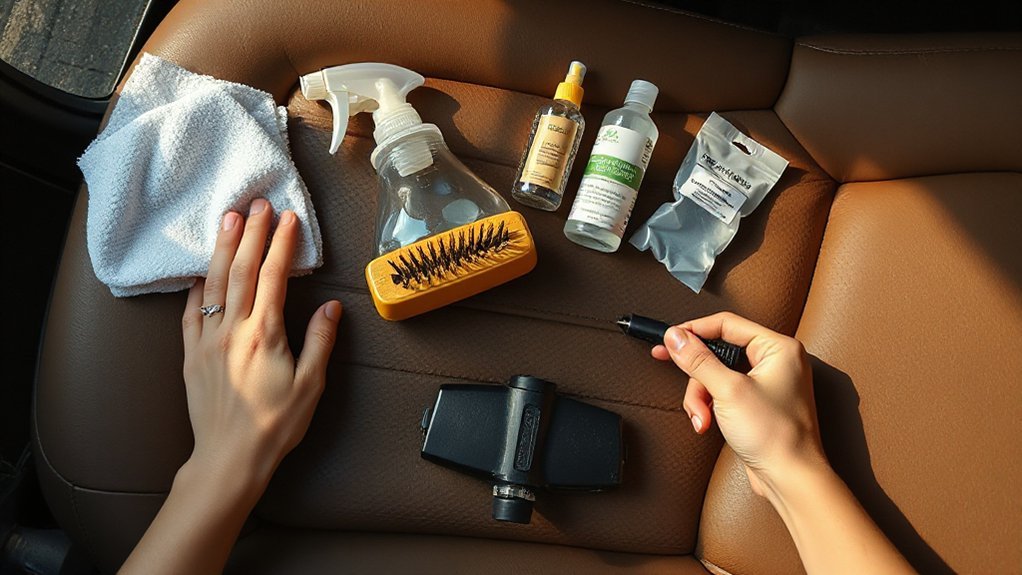
Start by identifying your seat material—cloth, leather, vinyl, or suede—because each needs different cleaners and tools. You’ll choose soft brushes and a fabric cleaner for cloth, a pH-balanced leather cleaner and conditioner for leather, mild soap or vinyl-specific spray for vinyl, and solvent-free suede cleaners with a nubuck brush for suede. Match tools to stains and texture: a microfiber cloth, soft-bristled brush, vacuum with crevice tool, and a gentle applicator pad. Look for the best cleaning products labeled for your material and test in an unseen spot. Note seat material differences affect drying time and risk of discoloration, so work gently, follow product instructions, and rinse or blot thoroughly to avoid residue or watermarks.
Quick Daily Maintenance to Prevent Build-Up
A few minutes each day can keep dirt, crumbs, and spills from turning into stubborn stains, so make quick maintenance part of your routine: vacuum the seats and seams, wipe smooth surfaces with a damp microfiber cloth, and blot any fresh spills immediately. Keep a small hand vacuum and microfiber cloths in the trunk so you’ll act fast. Use a soft brush attachment to reach creases; empty the vacuum after each use to avoid redepositing debris. For leather or vinyl, condition lightly once a month to prevent drying. Don’t let food or liquids sit; blot, then air-dry with windows cracked. These daily cleaning tips and seat maintenance tricks take little time but prevent costly deep cleaning later.
Cleaning Fabric Seats: Step-by-Step
Start by removing loose crumbs and dirt with a vacuum, paying special attention to seams and crevices so you don’t grind debris into the fabric. Treat stains next with a targeted spot-cleaning method—blot, apply a suitable cleaner sparingly, then rinse and blot again to lift the stain without overwetting. Work systematically across the seat so you catch hidden debris and prevent watermarks or uneven drying.
Vacuuming and Debris Removal
1. Start by removing loose items and floor mats so you can access seat crevices. For debris removal, use a stiff-bristled brush to dislodge crumbs and dirt from seams and stitching before you vacuum. Choose a vacuum with strong suction and a variety of attachments: a crevice tool for seams, a brush attachment for fabric, and a wide nozzle for larger surfaces.
Work methodically from top to bottom and from back to front so you don’t reintroduce dirt. Press the crevice tool into seams, lift seat edges where possible, and vacuum under the seat and between cushions. Empty the vacuum canister or change the bag frequently to maintain suction. Finish with a quick wipe of plastic trim to remove settled dust.
Spot Cleaning Technique
Blot fresh spills immediately with a clean microfiber towel to lift liquid without rubbing it deeper into the fabric. Next, test your chosen cleaner on an inconspicuous area to check colorfastness. For spot cleaning methods, start with a mild solution—warm water plus a few drops of dish soap—or a commercial upholstery spray. Apply sparingly, agitate gently with a soft brush or cloth, then blot to lift soil; repeat until the stain fades. For oily or set-in stains, use effective spot treatments like enzyme-based formulas or a solvent recommended for fabric seats, following product instructions. Always rinse residue with a damp cloth and blot dry. Finish by air-drying fully and vacuuming once more to restore nap and remove loosened particles.
Cleaning Leather Seats Safely and Effectively
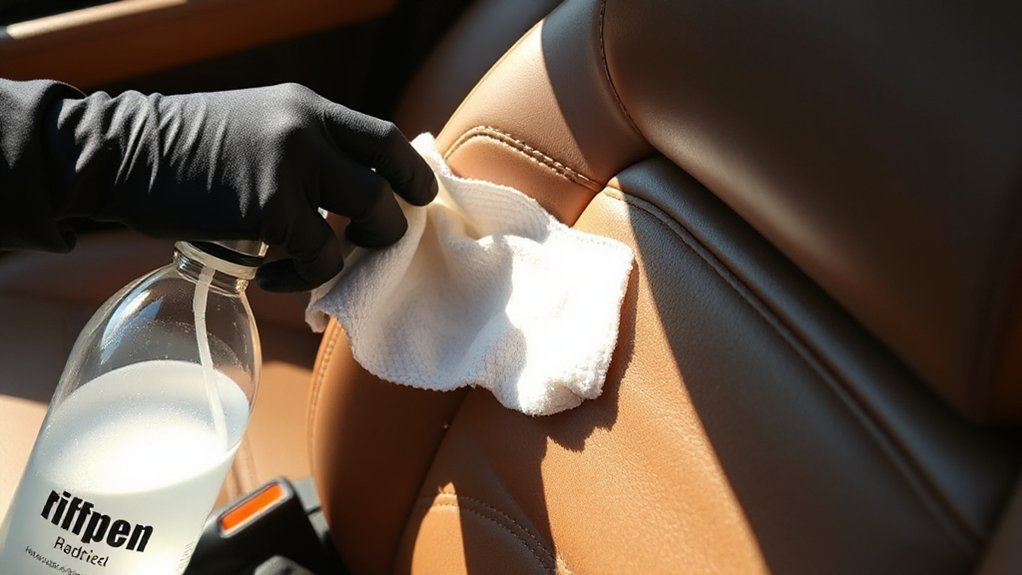
When cleaning leather seats, you’ll want to use a gentle leather cleaner so you don’t strip oils or damage the finish. Work in small sections with a soft cloth or brush, wiping away residue and letting the leather dry completely. Finish by applying a quality conditioner to restore suppleness and a protectant to help repel stains and UV damage.
Gentle Leather Cleaner
A gentle leather cleaner removes dirt and oils without stripping the hide or drying the surface, so choose a pH-balanced product labeled for automotive leather. You’ll see gentle leather cleaner benefits immediately: lifted grime, maintained suppleness, and reduced risk of cracks. Test the cleaner on an inconspicuous spot for colorfastness first. Apply a small amount to a soft microfiber or lambswool brush, work in gentle circular motions, and blot away loosened dirt with a clean microfiber — don’t soak the leather. Use minimal product; repeat only if needed. Rinse residue by lightly dampening a cloth and wiping again, then dry with a soft towel. For guidance, look for best leather cleaners with clear labels, neutral pH, and positive user reviews.
Conditioning and Protection
Now that you’ve cleaned and dried the leather, condition it to restore oils, keep the hide supple, and help repel spills and UV damage. Choose a pH-balanced leather conditioner and test it on a hidden seam. Apply a dime-sized amount to a microfiber cloth, then work into the seat in small, overlapping circles for even conditioner application. Don’t saturate seams or electronics; less is better than more. Let the conditioner absorb for the time the product recommends, then buff with a clean cloth to remove residue and restore sheen. For ongoing seat protection, repeat every three to six months or sooner in hot, sunny climates. Store products sealed and out of sunlight to maintain effectiveness.
Cleaning Vinyl and Synthetic Upholstery
Because vinyl and synthetic fabrics resist stains and water better than cloth, you can clean them more aggressively without damaging the surface—but you should still avoid harsh solvents and abrasive scrubbing. Use a soft brush or microfiber cloth, a mild soap solution, and warm water for routine vinyl cleaning techniques; work in small sections and rinse frequently to prevent residue. For synthetic upholstery care, choose pH-neutral cleaners recommended by the manufacturer or a diluted all-purpose cleaner; always test in an inconspicuous spot first. Wring cloths so surfaces get damp, not soaked, to protect seams and foam. Dry with a clean towel and allow ventilation. Finish by applying a protectant formulated for vinyl/synthetics to restore suppleness and repel dirt.
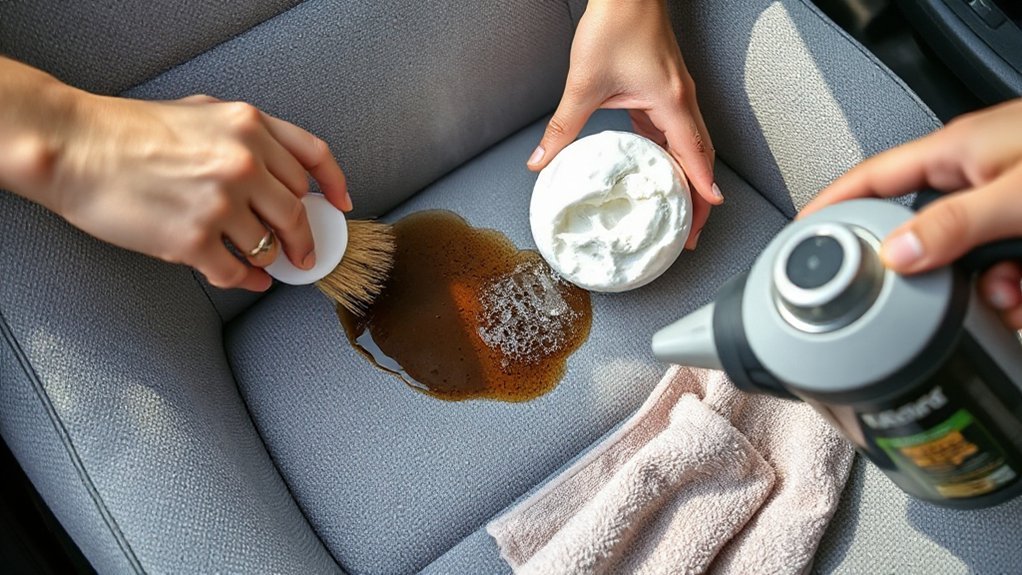
Removing Common Stains: Food, Drink, Oil and Ink
Having finished basic vinyl and synthetic care, you’ll next want to tackle common stains like food, drinks, oil, and ink before they set. For fresh food stains, scrape solids gently, blot liquids with a microfiber, then apply a mild detergent solution and rinse; repeat until residue’s gone. For drink spills, blot immediately, avoid rubbing, and use an upholstery cleaner suited to your fabric; test first in an inconspicuous spot. For oil marks, sprinkle baking soda or cornstarch to absorb oil for 15–30 minutes, brush off, then treat with a degreasing cleaner formulated for car interiors. For ink stains, dab (don’t rub) with isopropyl alcohol on a cloth and blot from the outside in; if stubborn, consult a professional to avoid fabric damage.
Tackling Pet Hair and Odors
Pet hair and lingering odors are among the most persistent issues car owners face, but you can remove both without harsh chemicals or expensive detailing. Start by vacuuming seats with a brush attachment, working against the grain to lift embedded fur. For stubborn clumps, use a rubber glove or a dampened squeegee to gather hair into piles for easy pickup. Apply a fabric-safe baking soda sprinkle, let it sit 15–30 minutes, then vacuum to assist odor neutralization. For fabric seats, use an enzyme-based spray on areas where pets sit; blot, don’t saturate. For leather, wipe with a mild leather cleaner and condition afterward to prevent drying. Finish by airing the car with windows open and using a charcoal pouch for ongoing odor control.
Deep-Cleaning Techniques and Steam Cleaning
When you’re ready to go beyond spot-cleaning, deep-cleaning and steam cleaning are the best ways to lift embedded dirt, stains, and bacteria without harming upholstery. Begin by vacuuming seams and crevices, then test any cleaner on an inconspicuous area. For fabric seats, use a low-foaming upholstery shampoo and a soft brush to agitate fibers; extract with a wet-dry vacuum to reduce moisture. Leather needs a pH-balanced cleaner and gentle scrubbing followed by conditioning once dry. Consider professional deep cleaning methods like hot-water extraction for heavy soil or enzymatic treatments for organic stains. Steam cleaning benefits include sanitizing without chemicals, loosening grime, and faster drying when combined with extraction. Work in sections, avoid over-wetting, and let seats dry fully before use.
Protecting and Preserving Seats After Cleaning
After cleaning, protect your seats with targeted measures that extend their life and keep them looking fresh: apply a fabric or leather protectant suited to your upholstery, reinstall floor mats and seat covers to shield high-wear areas, and park wisely to reduce sun and moisture exposure. Immediately after treatment, let protectants cure fully and avoid heavy use for the recommended time. Use seat protectors where kids or pets ride, and choose breathable covers for leather to prevent trapping moisture. Schedule simple maintenance: vacuum weekly, wipe spills promptly, and reapply protectant every 3–6 months depending on use and climate. Inspect seams and foam for wear and address small tears right away. These maintenance tips minimize staining, fading, and costly repairs.
Conclusion
You’ve got the right tools and routine to keep seats looking and smelling great. Vacuum weekly, blot spills right away, and use cleaners that match your seat material—stiff brush for fabric, gentle pH-balanced products for leather, and mild solutions for vinyl. Treat stains quickly, tackle pet hair and odors with brushes and baking soda, and consider steam or professional deep-cleaning as needed. Finish with protectants to preserve appearance and extend seat life.