

You can cook bacon in the oven for even browning and easier cleanup. Pick the thickness, preheat the oven, and arrange slices on foil or a rack. Timing depends on thickness, so you’ll watch for color and crispness. Keep going for exact temps, times, and pro tricks.
Key Takeaways
- Preheat the oven to 400°F (200°C) for optimal rendering and crisp edges.
- Line a baking sheet with foil or parchment, or place bacon on a wire rack for even cooking.
- Bake thin bacon 12–15 minutes, standard 15–20 minutes, and thick or slab 20–25 minutes, watching closely.
- Remove when edges are caramelized and color is even, then drain on paper towels to crisp.
- Cool and store leftovers in airtight containers refrigerated up to four days, or freeze for up to two months.
Why Bake Bacon in the Oven?


If you want evenly cooked, crisp bacon with less splatter and hands-on time, bake it in the oven. You’ll get reliable results: heat circulates, rendering fat uniformly so slices crisp without constant turning. That reduces airborne grease and cleanup, which supports health benefits by limiting smoke and flare-ups that can create off-flavors and irritants. You’ll also free the stovetop and reclaim time for prep or plating, boosting kitchen efficiency and creativity. Oven roasting delivers consistent Maillard reaction across the strip, a clear flavor enhancement that’s harder to achieve with pan crowding. You can scale production easily—single strips to full sheets—while maintaining texture and appearance. Use a rimmed sheet and rack to optimize drip and crispness; foil makes cleanup faster. Overall, baking aligns with innovative cooks who want predictable, repeatable outcomes, less mess, and a controlled route to superior taste and presentation. Try variations to refine your process today.
Choosing the Right Bacon Cut and Thickness
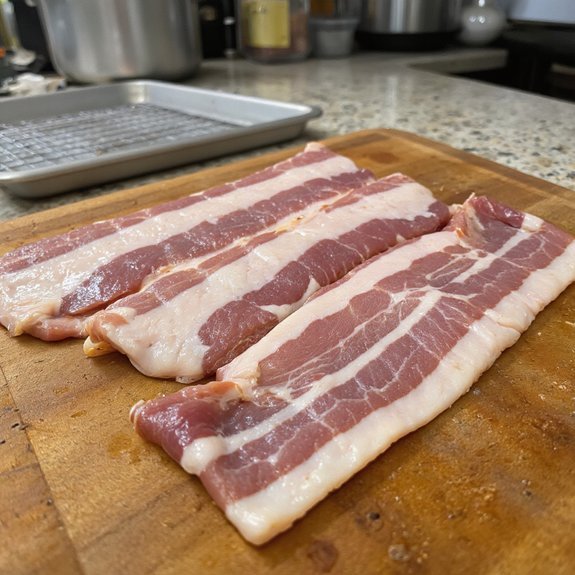
Now that you’ve chosen the oven method for consistent results, pick the cut and thickness that match the dish and texture you want. First decide between traditional streaky, center-cut, or slab bacon; these bacon varieties differ in lean-to-fat ratios and yield distinct crispness and chew. If you want crisp, choose thinner slices or streaky with higher fat content; they render faster and caramelize. For chewy strips or sandwiches, pick center-cut or thicker-sliced cuts that keep structure under a bite. Slab bacon lets you slice custom thickness for charred edges or bite. Consider leaner options if you’re topping delicate salads or innovating with quick-cure flavors; they’ll crisp without overpowering. Also think about fat content when pairing: fattier bacon complements bitter greens and sweet glazes, leaner bacon suits creamy or spicy elements. Buy a sample pack or trim a slab to experiment—small trials teach you which cut and thickness best elevate each recipe.
Oven Temperature and Timing Guidelines
Set your oven to 400°F (200°C) for a reliable balance of rendered fat and crisp edges. From here, adjust time by cut and thickness: thin-sliced bacon needs about 12–15 minutes, standard-cut 15–20 minutes, and thick-cut or slab-style 20–25 minutes. Watch for visual cues rather than rigid minutes; caramelized edges and even color indicate doneness.
If you prefer chewier results, drop temperature to 375°F (190°C) and extend cooking by 3–6 minutes; for ultra-crisp, you’ll nudge to 425°F (220°C) but reduce time and monitor closely to avoid burning. Rotate the pan halfway through for even cooking when cooking multiple batches or mixed bacon varieties. Use reliable cooking tools — a thermometer for oven accuracy and tongs for consistent handling. Rest cooked bacon briefly on a paper towel or rack to let fat settle before serving. These guidelines let you innovate confidently while achieving repeatable results. Adjust as needed daily now.
Lining Your Pan: Foil, Parchment, or a Wire Rack
After you’ve chosen oven temp and timing, pick how you’ll line the pan: aluminum foil gives the easiest cleanup, parchment prevents sticking and handles moderate drips, and a wire rack lets fat drain so bacon crisps evenly. Consider pan protection and the cooking surface you want: foil reflects heat slightly and collects grease for fast cleanup; parchment creates a nonstick barrier but won’t hold heavy pools of fat; a wire rack elevates slices above rendered fat for maximal crisping and airflow. Choose based on texture, cleanup, and equipment. For innovation, try hybrid setups.
- Aluminum foil: best for easy pan protection and grease containment.
- Parchment paper: nonstick cooking surface, ideal for minimal sticking.
- Wire rack: elevates bacon to drain fat and improve crisp.
- Hybrid (foil + rack): combines cleanup ease with airflow.
Match choice to your goals: texture, cleanup time, and equipment availability. Experiment boldly.
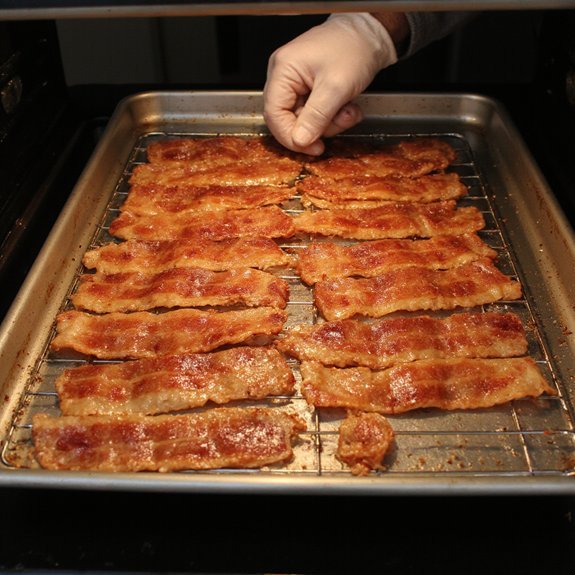
Step-by-Step Oven Cooking Method
Preheat your oven to 400°F (200°C) and arrange a foil- or parchment-lined baking sheet, optionally placing a wire rack above it. Lay the bacon strips in a single layer without overlap so they cook evenly. Bake 12–20 minutes depending on thickness and desired crispness, checking at the lower end and adding time as needed.
Preparing the Baking Sheet
One rimmed baking sheet works best—line it with foil or parchment and crimp the edges so cleanup’s easy. You’ll position racks to allow air circulation, and you’ll choose foil for easier grease disposal or parchment for less sticking. These preparation tips focus on stability and cleanup, not cooking time. Place bacon in a single layer without overlap; leave small gaps for even crisping. If you want innovative results, try folding a strip into small spirals or using clips to elevate sections for texture variation.
- Use a rimmed baking sheet for grease containment.
- Line with foil for disposal or parchment for reduced sticking.
- Crimp edges to prevent spills.
- Arrange strips single-layer, spaced slightly.
You’ll monitor pan stability and adjust as needed.
Timing and Temperature
Set your oven to 400°F for a reliable baseline: you’ll cook regular-cut bacon about 15–20 minutes, thick-cut about 20–25 minutes, and extra-thick up to 30 minutes, checking at the early end of each range. Use radiant heat to crisp evenly; adjust ±25°F for faster or gentler results. For innovation, try a convection roast to shorten time and boost consistency. Monitor color and firmness; remove when fat renders and edges brown.
| Cut | Time |
|---|---|
| Regular | 15–20 min |
| Thick | 20–25 min |
| Extra-thick | Up to 30 min |
These timing and temperature choices optimize bacon cooking while showcasing oven benefits: predictable texture, less splatter, and hands-off control. You can experiment with glazing, pepper, or chopped herbs near the end to innovate flavors without compromising crispness or workflow and timing.
How to Tell When Bacon Is Perfectly Cooked
Watch the color and edge curling: perfectly cooked bacon is evenly browned with no raw pink in the center and slightly darker, crisped edges. Lift a strip to test texture—you’ll feel firm, crisp sections that snap and fattier parts that stay a bit bendable if you want chew. Use those visual and tactile checks to pull the bacon at your preferred doneness before it overcooks.
Visual Doneness Cues
How do you tell when oven bacon is done? You rely on clear visual cues and doneness indicators to decide without probing. Watch for uniform color change, rendered fat appearance, reduced translucency, and consistent edge browning. Use these markers while the bacon rests on the tray; they signal readiness more reliably than time alone.
- Even mahogany or golden-brown hue across strips
- Fat looks glossy and mostly rendered, not milky
- Meat loses translucent sheen and appears opaque
- Edges show steady browning without burning
When those visual cues align, you can remove the tray and let residual heat finish final subtle changes. You’ll develop a quick eye for repeatable results. Practice across different bacon styles and oven calibrations to refine your visual judgment and timing soon.
Texture and Crispness
Texture gives you the clearest cue: gently lift and bend a strip with tongs—crispy bacon will snap or crack and feel rigid, while undercooked bacon bends, springs back, and feels pliant; fully rendered fat will be firm and slightly brittle at the edges but still tender where the meat is thicker. Use tongs to test strips across the rack because bacon thickness varies; thicker cuts need more time to crisp. When you hear a snap, remove those pieces; if strips flex, return them and check every one to two minutes. Aim for brittle edges with slightly tender centers on thick slices, and uniform rigidity on thin slices. Remember oven temperature and tray setup—they’re cooking methods altering rendering. Iterate: lift, bend, listen, taste each time.
Techniques for Extra-Crispy or Chewy Bacon
Want extra-crispy bacon, go hot and elevated; for chewier strips, keep it lower and flatter. Use extra crispy techniques by raising the rack, increasing temperature, and finishing under the broiler for targeted crunch. For chewy variations, lower the oven to 325°F, lay strips flat on foil, and extend cook time while monitoring texture. You’ll control fat rendering and bite.
- Raise rack, roast at 425–450°F for crisp; broil briefly to accentuate crunch.
- Bake at 325°F on a flat tray for chewy, flexible strips.
- Use a wire rack to separate fat from meat for consistent extra crispy techniques.
- Reserve rendered fat for flavor; don’t overcook if you want chewy variations.
Adjust time in 2–3 minute increments. Test one strip before committing a full sheet. You’ll innovate textures reliably with small tweaks. Rotate trays halfway, swap pans to control airflow, and experiment with thickness to craft signature textures for modern breakfast projects.
Cleanup and Storage Best Practices
Cleanup starts while the oven cools: carefully pour rendered bacon fat into a heatproof container or jar (don’t pour down the drain), wipe the baking sheet with paper towels, then wash with hot, soapy water or run through the dishwasher if it’s dishwasher-safe. You’ll strain excess grease into the jar, label it for reuse. Use non-abrasive sponges and silicone brushes as your cleaning tools; metal scrapers handle stubborn spots. For spills, sprinkle baking soda, let sit, then wipe with warm water. Cool pans fully before stacking to avoid warping. Store leftover bacon in airtight storage containers; press out air, date the container, refrigerate up to four days or freeze up to two months. Thaw bacon in the fridge and re-crisp in the oven. Rotate jars to use the oldest fat first. Keep a compact kit of cleaning tools and reusable storage containers to streamline cleanup and cut waste.
Serving Suggestions and Recipe Ideas
After you’ve jarred the rendered fat and tucked away leftovers, use the bacon and fat to boost flavor across breakfast, lunch, and dinner: crumble crisp bacon over salads or baked potatoes, layer it in sandwiches and BLTs, fold into scrambled eggs or omelets, or stir into mac and cheese for smoky depth. For bacon breakfast, crisp strips make a transformative texture contrast; reserve drippings for sautéing greens. Treat bacon as a seasoning—chop and sprinkle or weave into dough for savory focaccia. For bacon appetizers, wrap dates with almonds and bacon, or make candied bacon lollipops for parties. Use rendered fat judiciously; it concentrates flavor. Try these focused ideas:
- Bacon-wrapped dates with blue cheese and toasted almonds
- Shredded bacon folded into herb ricotta for crostini
- Crisp bacon and chive compound butter for grilled steak
- Bacon-studded scallion pancakes with soy-citrus dip
Cook intentionally; adapt to balance smoke, salt, and texture.