A dripping faucet wastes water and often signals worn parts you can replace yourself. You’ll start by shutting off the supply, identifying the faucet type, and inspecting seals, washers, and cartridges. With the right tools and parts you can usually repair it in under an hour. Follow the step-by-step diagnostic and repair procedures that follow to stop the leak and avoid common mistakes.
Key Takeaways
- Identify the faucet type (compression, cartridge, ball, or ceramic-disk) to know which internal parts commonly fail.
- Shut off the water supply, open the faucet to relieve pressure, and lay down cloths to catch residual water.
- Remove the handle, inspect O-rings, seals, springs, and the cartridge or ball for wear, scoring, or mineral buildup.
- Clean mating surfaces, replace damaged seals or the cartridge/ball assembly, lubricate O-rings, and reassemble per manufacturer alignment.
- Turn water on slowly, check for leaks, test hot/cold function, and call a professional if leaks persist or pipes are corroded.
Common Causes of a Leaky Faucet
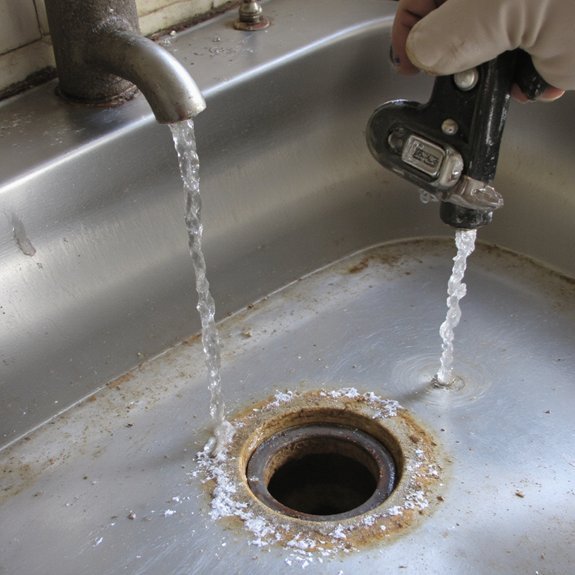
Because most leaks stem from worn or misaligned internal parts, you’ll want to inspect a few specific components first. Start with the O-rings and seat; rubber degrades and hardens, so seals fail. Check cartridge or ball assemblies for scoring or mineral buildup that impedes alignment. Examine valve seats and washers—metal fatigue or compressed rubber causes intermittent drips. Note corrosion on inlet fittings and aerator threads; differing common materials (brass, stainless, polymers) interact and can gall or corrode at joins. Look for loose retainers, snap rings, and mounting hardware that let components shift under pressure. Also assess stem and spout interfaces for erosion where water flow accelerates. If you find pitting or warped faces, replacement is preferable to patching. You’ll prioritize parts that directly control shutoff and pressure; those are the usual failure points. Diagnosing with this component-focused approach keeps your repair targeted and efficient. Expect measured, repeatable results.
Tools and Materials You’Ll Need
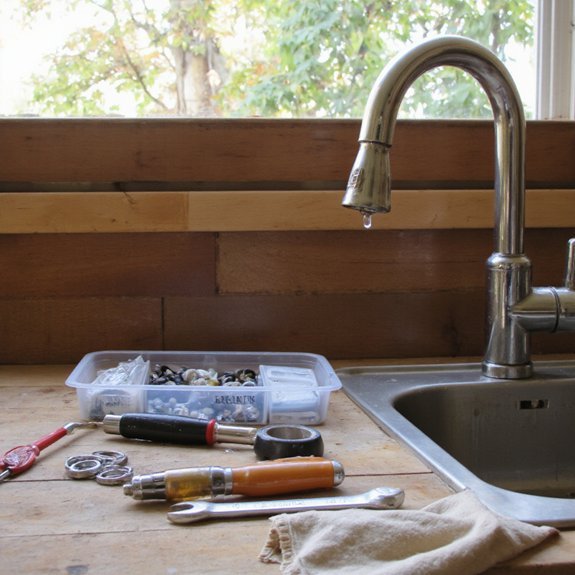
When prepping to repair a leaky faucet, assemble a small, purpose-driven kit so you won’t interrupt the job hunting parts or tools. Start with adjustable wrench, basin wrench, slip-joint pliers, and a set of hex keys; these cover most faucet types and tight spaces. Add cartridge puller or screwdriver set for handle removal, and a pick or dental-style tool for seal extraction. Bring replacement cartridges, O-rings, seats, and springs matched to faucet materials—brass, stainless, or composite—so you replace with compatible alloys. Include plumber’s grease, thread seal tape, and a small parts tray to prevent loss. Have a flashlight and magnifier for inspection, plus a small wire brush and fine emery cloth for cleaning contact surfaces. If you want innovation, carry a portable phone camera to document disassembly for guided reassembly. Label each component as you remove it to guarantee precise, efficient repair. Keep a basic spare-parts inventory ready.
Turning off Water and Preparing the Area
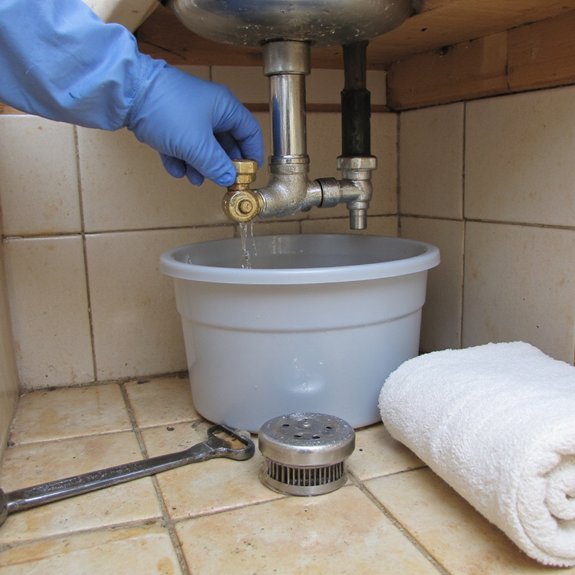
Before you start, shut off the faucet’s water supply at the shutoff valves or main line so you don’t risk flooding. Open the faucet to relieve residual pressure and confirm the water is off. Clear the area under the sink, lay down a towel or drip tray, and arrange your tools within easy reach for efficient, safe work.
Shut off Water Supply
1. You’ll begin by locating the nearest valve and performing a controlled water shutoff; this is essential for precise faucet maintenance. Verify hot and cold stops under the sink or use the house main if needed. Close valves slowly to avoid pressure spikes and open the faucet to relieve residual pressure.
- Feel reassured: you’re preventing damage and gaining control.
- Stay focused: small steps now save system integrity later.
- Be methodical: label valves for future efficiency.
- Innovate: consider a smart shutoff for remote monitoring.
Confirm zero flow and inspect valve condition; replace corroded valves before proceeding. Record valve positions and note anomalies for diagnostics and future optimization. Document date, time, and test results to inform iterative faucet maintenance improvements and scalability.
Clear Workspace and Tools
Workspace clearance and proper tooling let you work safely and efficiently once the water is off. You’ll clear the area around the sink, remove clutter, and lay down absorbent cloths to contain residual water. Establish workspace organization by setting a dedicated zone for removed components and fasteners, labeling parts if needed. For tool selection, choose adjustable wrenches, basin wrench, cartridge puller, and a magnetic tray; add torque-limited pliers for delicate fittings. Verify lighting, ventilation, and access to shutoff valves and drain. Keep a small bucket and towels within reach. You’ll test tools for function before disassembly and secure electronic devices away from splash zones. This systematic setup reduces errors, speeds diagnostics, and protects components during innovative repairs. Document changes for future iterative maintenance cycles.
Disassembling Different Faucet Types
First, identify whether you have a compression, cartridge, ball, or ceramic-disk faucet so you can plan the correct disassembly sequence. Shut off the water, cover the drain, and note any set screws or decorative caps before you try to remove handles. Use the right-size screwdriver or hex key, apply steady counterclockwise force, and lubricate seized fittings so you can remove handles safely without damaging the trim.
Identify Faucet Type
Before you start taking anything apart, identify the faucet type—compression, cartridge, ball, or ceramic-disc—because each uses different fasteners, seals, and removal sequences. You’ll inspect visible components and note faucet styles and faucet features: single- or double-handle, spout type, and aerator access. Check for retaining clips, bonnet nuts, or cam assemblies; these signal the mechanism inside. Photograph each step for reference. Use a small inspection mirror and flashlight to confirm internal geometry before touching hardware. The goal is precise diagnosis so you order correct seals and tools. If you document model numbers, you’ll streamline parts sourcing and reduce trial-and-error. Follow this methodical approach to minimize downtime and preserve innovative upgrades.
- Visualize
- Catalog
- Photograph
- Confirm
This identification saves time and avoids errors.
Remove Handles Safely
Shut off the water supply, open a nearby tap to relieve pressure, and gather the right tools—Phillips and flathead screwdrivers, Allen wrenches, needle-nose pliers, and a soft-jaw wrench—so you can remove handles cleanly and without damage. Identify handle types: screw-on caps, set-screw levers, and splined cartridges. For screw-on caps, pry decorative caps with a flathead, then unscrew retaining screws. For set-screw levers, insert the correct Allen key, loosen counterclockwise, and lift. For splined cartridges, remove mounting nut with the soft-jaw wrench, pull straight to avoid damaging the cartridge. Keep parts organized and photograph orientation for reassembly. Use calibrated torque on fasteners; avoid excessive force. Safe removal preserves seals and surfaces, lets you innovate repairs, and reduces time spent diagnosing leaks. Maintain efficient, documented workflows.
Repairing Compression Faucets (Worn Washers)
One common cause of a drip in a compression faucet is a worn rubber washer at the valve seat; you’ll need to disassemble the handle, remove the bonnet nut and stem, and inspect the washer and seat for wear. Begin by identifying washer types and follow maintenance tips: neoprene and rubber differ in durability and compressibility.
- Shut water and isolate supply
- Remove handle, bonnet nut, stem
- Inspect washer and valve seat
- Install correct washer; torque correctly
Use a seat dresser or replace seat if scored. Match diameter and thickness precisely; install with the washer’s beveled side facing the seat. Test at low pressure, watch for hairline leaks, then cycle the valve. If leaks persist, verify stem packing and recheck seat finish. Document parts and date for future proactive servicing. Adopt innovative materials and precision measurement to improve longevity and reduce repeat interventions over time. Measure twice; install once.
Fixing Cartridge, Ball, and Ceramic-Disk Faucets
Compression-style faucets wear washers and seats; cartridge, ball, and ceramic-disk designs use different moving parts and need a different diagnostic and repair approach. You’ll identify which faucet types you have, then probe seals, springs, O-rings, and cartridges for wear. For cartridge replacement you’ll shut water, remove the handle, and inspect the cartridge for scoring or buildup; branded variations demand matched parts. Ball faucets use a spherical cam and springs; you’ll check the ball, cam, and seats for pits and replace worn kits. Ceramic-disk units rely on mating ceramic faces; you’ll inspect for chips and abrasive deposits and swap the disk cartridge if damaged.
| Faucet type | Typical failure |
|---|---|
| Cartridge | Worn seals, scoring |
| Ball | Pitted ball, seat leaks |
| Ceramic-disk | Chipped disks, abrasives |
Use precision tools, mineral-appropriate cleaners, and OEM parts to innovate durable repairs. Document model numbers and serials; leverage smart materials and analytics where possible for lasting, efficient outcomes.
Reassembly, Testing, and Preventing Future Leaks
After you’ve replaced worn components and cleaned mating surfaces, reassemble the faucet in reverse order, aligning cartridges, balls, and disks to their index marks and seating O-rings and seals squarely in their grooves. Use precision reassembly techniques: torque fasteners to manufacturer specs, apply plumber’s grease sparingly to O-rings, and center moving parts to avoid binding. Turn the water on slowly while monitoring for weeps; test both hot and cold and operate the handle through full travel. If you detect any drip, stop, depressurize, and reseat the offending seal.
- Feel confident — you restored control.
- Be proud — you prevented waste.
- Stay curious — refine your method.
- Stay vigilant — catch micro-leaks early.
Document torque values and parts used so you can iterate. These practical, technical steps reduce failure modes and advance leak prevention through repeatable, innovative practice. Measure results and update your maintenance schedule.
Signs It’s Time to Call a Professional
If a faucet keeps leaking after you’ve replaced seals and cartridges, call a professional — persistent leakage often means worn valve bodies, damaged seats, or hidden supply-line failures that require specialized tools and part replacement. You should recognize clear indicators that signal when to consult a service technician: continuous drip despite correct reassembly, sudden pressure loss, water hammering, mineral-crusted components, or corrosion visible inside the spout. Also call if leaks appear behind walls, ceilings, or under cabinets — those suggest concealed pipe failure and potential structural damage. A professional assessment will diagnose remaining failure points with pressure gauges, borescopes, and flow meters, and recommend targeted replacement or retrofit solutions, including modular valve assemblies or smart shutoff integrations. If you want durable, modernized outcomes and minimal downtime, don’t delay. Contacting a licensed plumber early preserves fixtures, prevents costly secondary damage, and lets you adopt innovative upgrades with confidence and guarantee system longevity.