

You can make a fitted sheet look tidy without wrestling it for half an hour. Start on a flat surface, tuck corners into each other, smooth the fabric, and fold it down to a neat rectangle that fits on a shelf. It’s a small skill that saves space and frustration—keep going and you’ll have a dependable method you’ll actually use.
Key Takeaways
- Start with the sheet inside out and place your hands in two adjacent corners to nest one corner into the other.
- Turn the nested corners right-side-out, repeat with the other two corners, and flatten to form a rectangle.
- Smooth the fabric from center to edges, tucking any loose elastic into the rectangle for a flat profile.
- Fold the rectangle into thirds lengthwise, then fold the resulting strip into thirds or quarters widthwise for a compact bundle.
- Store folded sheets upright or in clear bins, keeping like sizes together to save space and prevent toppling.
Why Folding a Fitted Sheet Matters
Order matters. When you fold a fitted sheet well, you get practical benefits that show immediately: a compact bundle that stacks neatly, saves shelf space, and stays wrinkle-free. You’ll see the difference visually — crisp edges, a flat rectangle instead of a lumpy ball — so you can grab the right set at a glance. Folding also protects elastic and fabric, extending lifespan by preventing overstretching and snagging. Guests notice the aesthetic appeal of tidy linens, which elevates any room without extra effort. You’ll spend less time hunting and more time using your linens. Practice a simple routine and it becomes muscle memory: efficient, consistent, and satisfying every time you open your cupboard.
Gather What You Need

Clear a flat surface like a bed or table so you’ve got room to work. Use clean hands to keep the sheet fresh as you fold. If you’re matching sets, grab the fitted, flat, and pillowcases so everything stacks neatly.
Choose a Flat Space
Pick a sturdy flat surface—a bed, table, or clean floor—large enough to spread the fitted sheet fully so corners lie flat; you’ll work faster and get neater results when you can see and smooth the whole sheet at once. Clear the area of clutter so the sheet won’t snag or pick up lint. If you have multiple sheets, reserve one surface per sheet to keep colors and sizes separate; this helps with sheet organization and avoids mixing up sets. Good lighting matters — natural light or a bright lamp lets you spot twisted seams and mismatched corners. If the surface is textured, lay a thin, smooth cloth beneath the sheet to prevent catching. A roomy, level workspace makes folding precise and efficient.
Use Clean Hands
Before you start folding, wash and dry your hands so the sheet stays fresh and lint-free; clean hands protect fabric from oils, dirt, and stray hair that show up in storage. You’ll notice fingerprints on light fabrics and tiny dark specks on whites if you skip this step. Put lotion, petting, and cooking behind you before you handle linens.
Keep nails trimmed and avoid jewelry that snags. If you’ve been outside, rinse again — pollen clings to fingers. Use a lint roller on your palms if necessary. Clean hands speed the process: you’ll see corners clearly, feel elastic seams, and make crisp folds without redoing them. Treat this as basic hygiene importance for linens; a small routine prevents spots and keeps your folded sheet ready to slide into the closet.
Gather Matching Sheets
Once your hands are clean and your workspace is ready, gather the fitted sheet’s matching pieces so folding looks neat and stays organized. Lay out the fitted sheet, flat sheet, and pillowcases in a small stack. Match by color and pattern first — matching colors make storage look intentional and help you find sets quickly. Sort by sheet materials next; keep cotton, linen, and synthetics grouped so care needs stay consistent. Smooth each piece with your palms to remove obvious wrinkles before folding. If you’ve got multiples, stack identical sets together and label the shelf edge or use clear bins. Visual order saves time: place frequently used sizes at eye level. You’ll fold faster when everything’s prepaired and uniform.
Smooth a Flat Surface
Clear a workspace you can reach all the way around, like a bed or clean table. Remove any obstructions—clothes, shoes, or décor—so you’ve got uninterrupted room to fold. Wipe away lint or pet hair with a damp cloth or lint roller so the sheet lies perfectly smooth.
Clear a Workspace
While you fold, work on a smooth, flat surface so the sheet lays even and the corners line up easily. Clear a workspace by removing clutter and creating a designated folding zone — a bed, table, or large countertop works best. Focus on workspace organization: set aside loose items, empty pockets, and move décor out of the way so nothing catches the fabric. For surface preparation, wipe or shake the area to remove dust and lint that could stick to the sheet. Keep a small bin nearby for things you remove, and leave enough room to spread the sheet fully without bunching. A tidy, prepared surface speeds the process, prevents rework, and helps you produce crisp, neat folds every time.
Remove Obstructions
Now that your workspace is set, scan the surface for anything that could snag or bunch the sheet — coins, buttons, pins, pet hair, or crumbs. You want an even, unobstructed plane so corners will align and seams won’t catch. Walk the perimeter, lift any loose items into a small bowl or laundry basket, and move bulky objects far enough away that they won’t brush the fabric when you fold.
Aim for clear space clearance: a tabletop, bed, or floor section at least as big as the sheet. If pets are nearby, relocate them for a moment to keep fur out of the fold. A tidy environment speeds the process and prevents snags, so take thirty seconds now to remove obstacles before you spread the sheet.
Wipe Away Lint
Grab a lint roller or a damp microfiber cloth and sweep the entire surface so the sheet won’t pick up stray fibers when you spread it out. Work in straight, overlapping strokes from one corner to the opposite, watching for pet hair, threads, and crumbs. If stubborn fuzz remains, press gently with the damp cloth or roll in short, firm passes until the area looks smooth.
Keep a small lint roller handy near your linen closet for quick touch-ups. Avoid overusing fabric softeners before folding; they can leave residue that attracts lint. For textured fabrics, pause and smooth with your palms to flatten nap and prevent new fibers from clinging. A clean, lint-free sheet will fold more crisply and store neater.
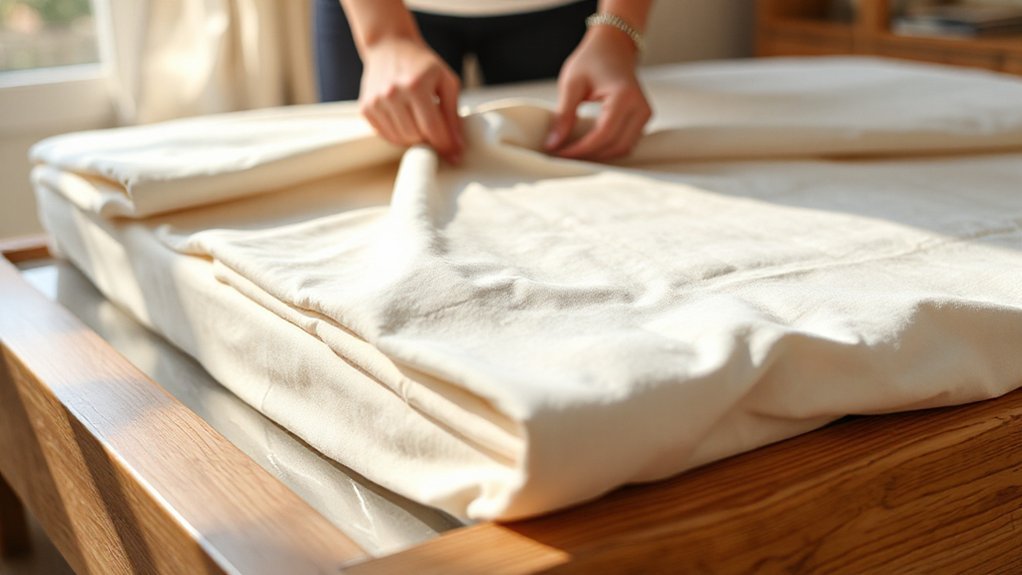
Master the Corner-to-Corner Grip
Start by holding two adjacent corners of the sheet—one in each hand—so the elastic seams face you and the right sides are together; you’ll use this corner-to-corner grip to align the hems and contain the bulk. With thumbs inside the corners, slide one corner over the other so the elastic edges nest neatly. Keep the sheet taut between your hands, letting the body drape down. Use the corner technique to run your fingers along the seam, smoothing folds and forcing excess fabric toward the center. Pivot your wrists to square the top edge into a straight line. Lay the matched corners on a flat surface and press flat, which makes the next folds predictable. This method reduces fumbling and makes sheet storage tidy and compact.
Tuck Corners Into Each Other
Bring the matched corners together and tuck one corner inside the other so the elastic edges nest neatly; you’ll end up with a single, smoother corner instead of two bulky points. Hold that nested corner in one hand, smooth the elastic with the other, and orient the sheet so the second pair of corners faces you. Repeat the same corner techniques on the opposite side, slipping one corner into its mate until both corners form tidy, aligned pockets. Keep tension even so the elastic layers sit flat and predictable. These small moves simplify handling and improve sheet organization, making subsequent folds quicker. Visualize rounded, contained corners rather than loose elastic—this keeps the sheet compact and ready for the next step.
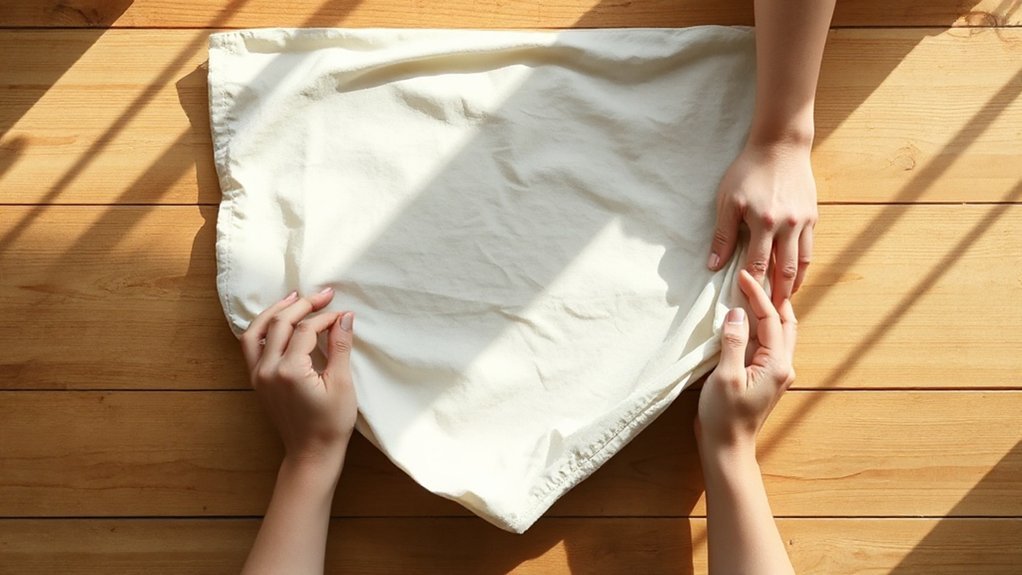
Lay the Sheet Out Flat
1. Lay the sheet out flat on a clean surface with the elastic edges facing up and the tucked corners aligned. Smooth fabric with your hands, working from center toward the edges to remove folds and air pockets. Use short, deliberate strokes so the elastic forms a neat outline rather than a bunched rim. This sheet preparation step sets you up to fold efficiently and keeps corners visible for the next moves.
Place heavier fabrics on a table, lighter ones on a bed to avoid slipping. If the sheet still twists, lift one corner and rotate the sheet 90 degrees, then re-smooth. These laying techniques make the sheet predictable and even, reducing tugging and wasted adjustments when you continue folding.
Fold Into Thirds Lengthwise
Fold the sheet lengthwise into thirds by folding one long side toward the center so the elastic edge forms a smooth line, then fold the opposite side over it to meet the first fold. Keep the elastic edges aligned and tuck any loose corners inside so the profile looks flat and tidy. Use your hands to smooth each fold as you go, pressing out bumps so the sheet stacks neatly. This folding techniques step turns a bulky fitted sheet into a manageable rectangle, making the next folds easier and neater. Focus on straight edges and even thirds; visual checkpoints at the top and bottom help. These space saving tips reduce volume in drawers and closets while keeping sheets ready to stack.
Fold Into Thirds Widthwise
Turn the sheet so the elastic edge faces you and bring the two short ends together, matching each corner so they nest neatly. Smooth out any wrinkles with your hands, then press the bulk flat into a tidy rectangle. Fold that rectangle into thirds widthwise, tucking the final edge under for a clean, compact finish.
Align Corners Together
With the elastic edges facing you, bring the two near corners together so they nest inside one another, then do the same with the far corners—making a long, tidy rectangle. Hold the nested corners at one short end; check corner alignment so the elastic hems line up neatly. You’ll see the sheet’s bulk concentrate into four stacked corners; flatten them with your hand to lock the layers.
Turn the rectangle so its long edge runs away from you. Fold one side toward the center, then fold the other side over it, keeping those nested corners matched. This corner-focused approach speeds sheet organization and prevents lumpy, uneven folds when you finish the full third-wise process.
Smooth and Fold Thirds
Now smooth the rectangle so the stacked corners form a neat, flat block; press out any bumps and pull the elastic edges taut. Lay the block lengthwise away from you, then fold one short side toward the center, keeping edges aligned. Fold the opposite short side over that, creating a tidy third. Keep movements deliberate so the elastic stays hidden and the shape stays rectangular.
Straighten edges after each fold, tapping corners so they sit flush. Use your palms to flatten seams and remove air pockets; this visual check guarantees crispness. These folding techniques make the sheet compact, predictable, and easy to stack. Finish by smoothing the final surface for consistent sheet organization on shelves or in drawers, with no loose elastic showing.
Store Neatly and Save Space
A stack of neatly folded fitted sheets saves closet space and makes mornings faster: fold each sheet into a flat rectangle, tuck corners into one another so the elastic stays contained, then smooth and fold into thirds or quarters to match the size of your linen shelf or storage bin. Use space saving techniques like folding to consistent dimensions so sheets sit flush and don’t topple. Place matching sets together and label edges with fabric-safe tags so you can grab a set at a glance. For neat storage, stand folded bundles on their sides in a cupboard or use clear bins for visibility. Rotate seasonally — heavier sheets lower, lighter ones higher — and leave an aisle for easy access.
Quick Tips for Troubleshooting
If a corner won’t tuck or the elastic keeps popping out, check how the sheet’s stretched — flip it inside out, lay it flat, and work one corner at a time so you can see which seam is misaligned. Next, smooth the fabric from center to edge so you remove bunching before folding. For troubleshooting tips, mark the two longest edges with a quick fold so you consistently find them later. When elastic curls, stretch gently and refold along the elastic line to reset its shape. Common mistakes include forcing corners together and folding over bunched elastic; instead, ease fabric until corners nest neatly. If the sheet still resists, refold using a tabletop as a firm guide to keep lines straight.
Conclusion
Now that you’ve mastered the corner tuck and the thirds fold, you’ll always get a neat, compact fitted sheet. Lay it elastic-side up, pair and tuck corners, smooth lengthwise, then fold into thirds twice — lengthwise and widthwise — to form a tidy rectangle. Adjust edges so the elastic hides inside the layers. Store flat or upright to save space and keep sets together. With practice this takes seconds and looks effortless.