You can hang pictures without nails using adhesive strips, damage-free hooks, picture ledges, or freestanding racks that protect your walls. Match the method to frame weight and wall type, and learn simple leveling and removal tricks to avoid slips or marks. Keep going — you’ll find the right, secure option for your space.
Key Takeaways
- Use removable adhesive picture strips or hooks rated for your frame’s weight, cleaning the wall with isopropyl alcohol first for best adhesion.
- For heavier pieces, install a picture rail or track system that supports multiple frames without drilling into the wall.
- Magnetic mounting uses a thin metal plate on the frame and a strong wall magnet for sleek, damage-free attachment.
- Lean frames on ledges, consoles, or use freestanding easels to display art without touching the wall at all.
- For masonry, tile, or concrete, use construction-grade removable adhesives or museum putty designed for hard surfaces.
Damage-Free Hanging Options
If you want to hang art without damaging walls, you’ve got several reliable options that hold securely and remove cleanly. You can use adhesive strips designed for picture safety; they stick parallel to the frame, bear load, and peel off without residue. Magnetic systems let you mount a thin metal plate on the frame and attach a wall magnet—quick to adjust and sleek for modern spaces. Command hooks and strips are a proven alternative hanging solution for drywall or plaster, offering predictable release. For tile or concrete, use removable mounting putty or specialized construction-grade adhesives rated for masonry; they’re less invasive than drilling. Picture rails and tension rods create a reusable, low-impact display that’s ideal in rentals or galleries. Whichever method you pick, test on a hidden patch, follow manufacturer load limits, and align frames precisely. That disciplined approach preserves finishes and keeps your displays innovative and secure.
Choosing the Right Method by Frame Weight
Weight determines which non-damaging method will actually hold your frame, so start by weighing or estimating the piece and checking the hanging hardware on its back. Next, categorize by weight ranges: under 2 lbs, 2–8 lbs, 8–20 lbs, over 20 lbs, match to adhesive hooks, Velcro strips, ledges, or anchors. Note frame material—light aluminum, thin wood, glass-fronted—because bulk and fragility affect support and stress points. Read product specs to confirm each option’s weight limit and choose multiple fasteners for heavier pieces to distribute load. For fragile frames, use wider contact adhesives or rail system that clamps the frame edge. If you plan rotation, pick systems rated above your weight to allow margin. Test a small area with adhesives. Keep documentation of manufacturer weight limit and removal instructions to protect your artwork and wall. Innovate by combining discreet supports instead of pushing a single solution to its threshold.
Matching Techniques to Wall Surfaces
You’ll match the hanging method to the wall surface to avoid damage and guarantee a secure hold. For drywall and plaster, use heavy-duty removable strips, picture rails, or drywall anchors rather than relying on surface glues alone. For brick, concrete, and tile, choose masonry-rated hooks or anchors, adhesive products rated for porous or glazed surfaces, or suction systems made for tile.
Drywall and Plaster
Because drywall and plaster behave differently, match your hanging hardware to the wall type: drywall’s hollow core accepts self-drilling anchors and picture-strip adhesives, while solid plaster (often over lath) needs expansion anchors, toggle bolts, or screws set into studs. Assess wall: identify drywall types, check for hairline cracks from plaster repairs, and probe for studs.
- Adhesive strips for lightweight frames.
- Self-drilling anchors for medium loads.
- Toggle or molly anchors for plaster.
- Screws into studs for heavy pieces.
Innovate with low-impact rails or French cleats that distribute load without many penetrations. Test each solution with the actual picture, follow load ratings, and keep a compact repair kit for future plaster repairs. You’ll avoid surprise failures easily and refine your method regularly.
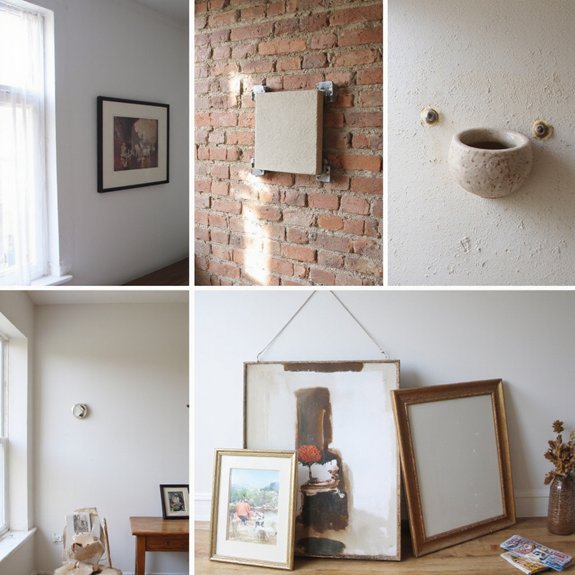
Brick, Concrete, Tile
When hanging on brick, concrete, or tile, pick anchors and fasteners that match the surface’s hardness, thickness, and finish. You’ll assess substrate: smooth glazed tile needs non-penetrating tile options like heavy-duty adhesive strips or specialized tile hooks; porous brick accepts masonry fasteners or strong brick adhesive for direct bond. For concrete, use concrete hooks or sleeve anchors installed with a hammer drill and proper bit; you can also use high-strength epoxy adhesives where drilling isn’t possible. Measure load, gap, and environmental factors—humidity and temperature alter adhesives. Test small samples and follow manufacturer weight limits. Use protective pads to prevent stress concentrations. If you want innovative solutions, combine low-profile mechanical fasteners with engineered adhesives for redundancy and cleaner aesthetics. Apply consistent curing time per recommendations.
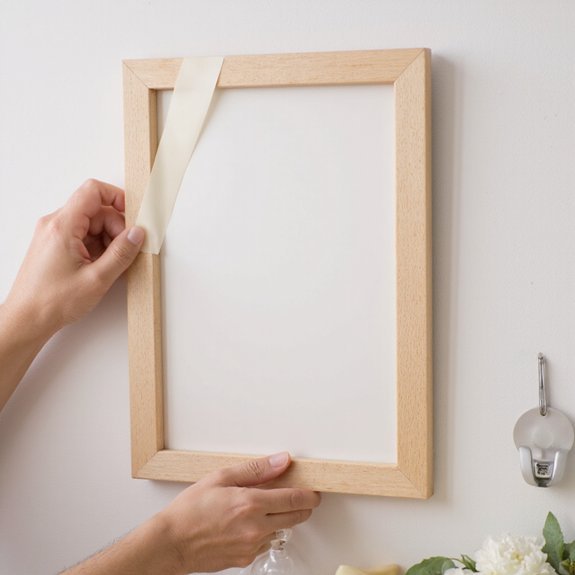
Using Adhesive Strips and Hooks Safely
If you use adhesive strips and hooks, check the weight limits and surface compatibility before applying them. You’ll extend adhesive safety and strip longevity by prepping surfaces: clean with isopropyl alcohol and let them dry. Test a small area on painted drywall or wallpaper to confirm adherence without damage. Choose strips rated above your frame’s weight and pair hooks with strips for extra support on textured surfaces.
- Measure and mark placement; align level.
- Clean surface; wait for full evaporation.
- Apply strip per manufacturer; press firmly for 30 seconds.
- Remove slowly, following instructions to avoid paint lift.
Inspect attachments weekly for signs of creep or edge peeling. In humid rooms pick products labeled for moisture resistance. For valuable artwork, combine strips with a secondary catch or safety tether. Document product specs and removal technique so you can replicate success and innovate safely and reduce risk.
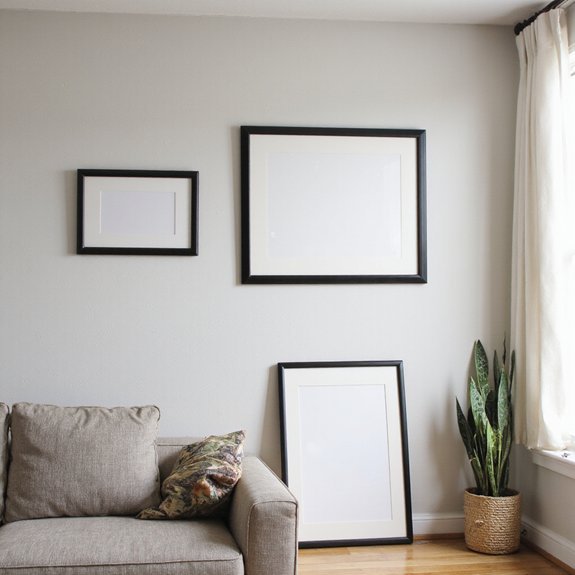
Creative No-Drill Displays: Ledges, Rails, and Freestanding Solutions
After mastering adhesive strips and hooks, you’ll likely want options that let you display larger or heavier pieces and rearrange frequently without touching the wall. Consider picture ledges: they combine ledge benefits with clean lines, letting you layer frames, swap art quickly, and rest sculptures or books. Choose sturdy, wall-mounted shelves rated for weight you plan to display; floating-profile ledges keep hardware subtle while supporting substantial pieces. Rails and hanging systems offer modularity—think slim metal rails with adjustable cords for friction-free changes and striking rail aesthetics that complement modern interiors. For renters, freestanding solutions avoid any wall alteration: leaning frames on tall bookcases, easels, or dedicated room dividers create gallery effects and add depth. Mix elements—a low console with a long ledge above, paired with a discreet rail—to build dynamic arrangements that evolve. Plan attachment points and weight distribution, and prioritize stability and longevity when selecting each piece.
Leveling, Spacing, and Safe Removal Tips
Although leveling seems minor, it makes or breaks a display, so start by measuring and marking the wall: find the room’s focal height (commonly 57–60 inches to the center of artwork), mark centers, and transfer hanger positions using a tape measure and a level or laser. Next, plan spacing and grouping before you commit: map frames on paper, use kraft paper templates, and aim for consistent gaps (2–4 inches for clustered pieces). Consider weight limits of adhesives and rails, and stagger supports to preserve visual balance and aesthetic harmony. When removing strips or hooks, follow manufacturer heat-and-peel instructions and pull slowly along the wall to avoid paint damage.
- Measure twice: confirm center and edge clearances.
- Template test: tape paper cutouts to preview composition.
- Load check: verify adhesive or rail rating vs frame weight.
- Removal protocol: warm, stretch, and peel parallel to the wall carefully.