

Want to make slime but don’t have glue? You can try several easy, safe swaps using things around the house—cornstarch, shampoo, gelatin, even marshmallows—to get gooey, stretchy, or squishy textures. I’ll walk you through quick recipes and tips for each method so you can pick the feel you want and avoid common mistakes, but first let’s match the texture you’re after and gather a few simple ingredients.
Key Takeaways
- Use cornstarch and water (about 2:1 cornstarch:water) to make oobleck, a non-Newtonian, squishy slime alternative.
- Mix shampoo with cornstarch gradually (start with 1/2 cup shampoo) until a pliable, scented slime forms.
- Combine thick conditioner and cornstarch (try 2:1 cornstarch:conditioner) and adjust for stretchiness and stickiness.
- Heat psyllium husk with water (1–2 tsp per cup), stir until thickened, cool, and store refrigerated for glossy slime.
- Melt marshmallows with butter, then knead in powdered sugar to create an edible, moldable slime.
Cornstarch and Water Slime (Oobleck)
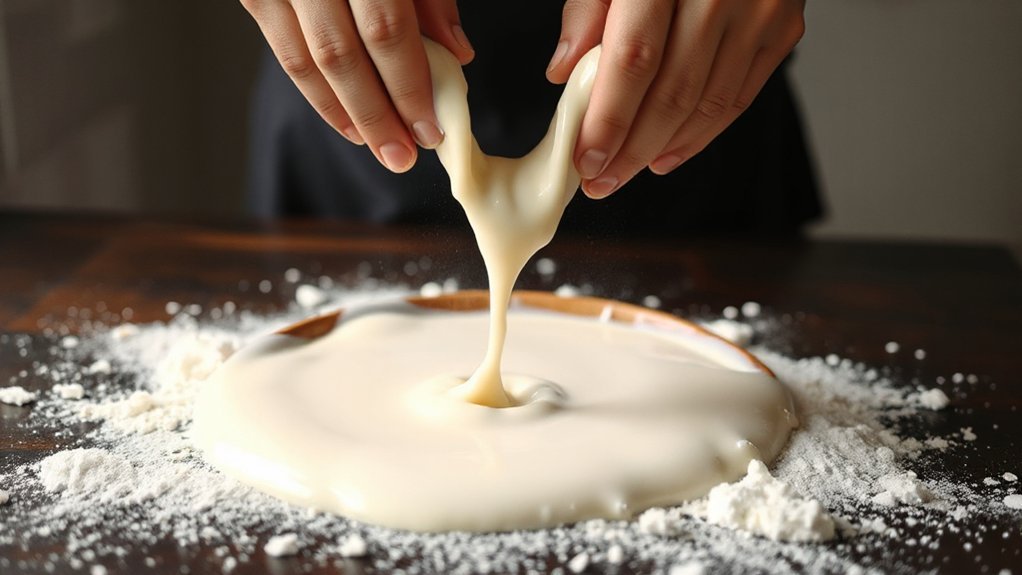
Think of oobleck as a magic potion you can make with two pantry staples: cornstarch and water. You’ll mix about two parts cornstarch to one part water, adjusting until the texture flips between liquid and solid under pressure. This playful, hands-on recipe teaches you cornstarch properties—it’s a non-Newtonian fluid that resists quick force but flows when relaxed. You’ll squeeze, tap, and let the mixture ooze to explore behavior safely. Clean-up’s easy: let it dry, then scrape or wash away with warm water. For oobleck applications, use it for sensory play, simple science demos, or messy art that rinses out. You’ll avoid glue, keep ingredients edible, and learn real physics while having fun.
Shampoo and Cornstarch Slime
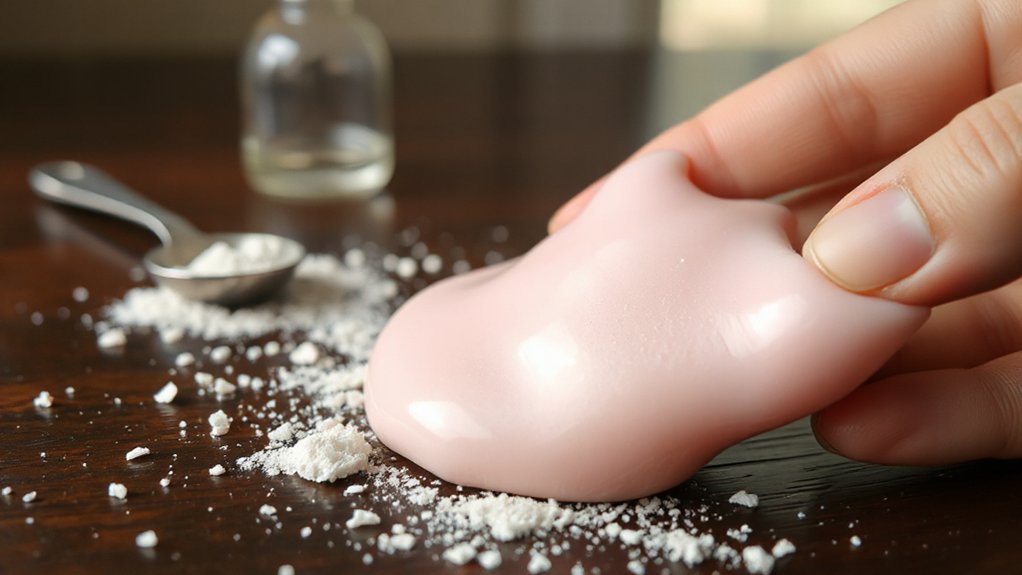
Try a small batch first — shampoo and cornstarch make a silky, squeezable slime that’s perfect for sensory play and quick experiments. Pick a thick shampoo type (creamy or moisturizing works best) and scoop about 1/2 cup into a bowl. Add cornstarch a tablespoon at a time — different cornstarch brands vary in texture, so you’ll tune the ratio until it feels right. Mix, knead, and if it’s too sticky add more cornstarch; if it’s crumbly add tiny splashes of shampoo. You can scent or color it with drops of food coloring or essential oil, but mix well. Store in an airtight container to keep it pliable. Always wash hands after playing and discard if it smells off or separates.
Liquid Starch and Laundry Detergent Slime
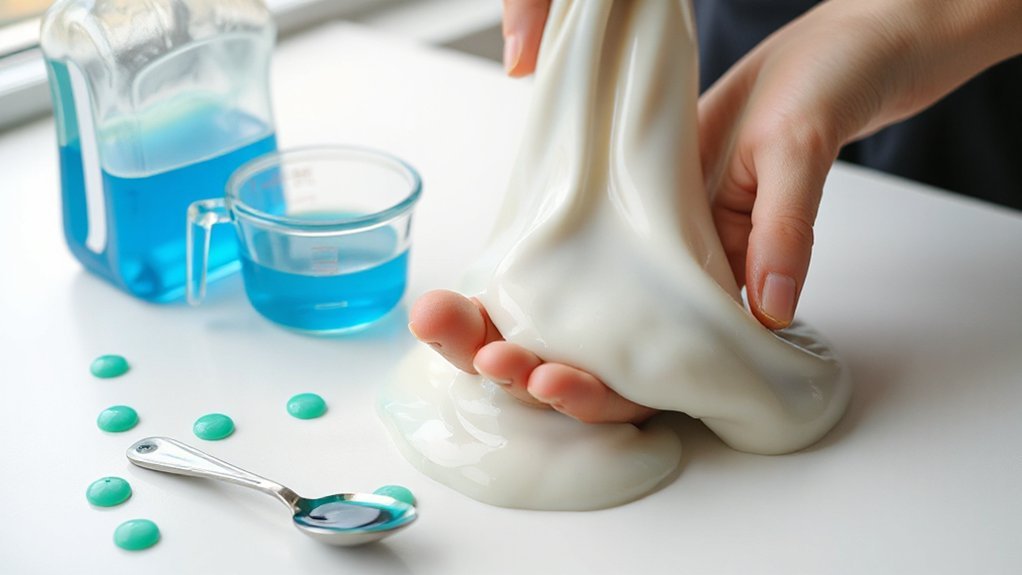
If you liked the silky feel of shampoo-and-cornstarch slime, you’ll enjoy how liquid starch and laundry detergent make a bouncier, more elastic batch. You’ll mix a cup of liquid starch with a squirt of laundry detergent and a bit of water, then knead until the texture springs back. It’s fast, forgiving, and great for stretch-and-squeeze play.
- Measure: 1 cup liquid starch, 1–2 tsp laundry detergent, 2–3 tbsp water.
- Mix: Combine, stir, then pull into a ball as it firms.
- Knead: Work for 3–5 minutes; add tiny detergent if too sticky.
Keep hands clean, play on a washable surface, and store in an airtight container to keep it bouncy.
Hair Conditioner and Cornstarch Slime
Grab a creamy conditioner (the thicker the better) and keep a measured cup of cornstarch nearby so you can test ratios quickly. Start with about 2 parts conditioner to 1 part cornstarch and knead, adding small pinches of cornstarch until the texture stops sticking. If it’s too wet, add more cornstarch; if it’s crumbly, warm and knead or add a dab more conditioner to smooth it out.
Choosing the Right Conditioner
When you’re picking a conditioner for cornstarch slime, look for thick, silicone-free formulas that say “moisturizing” or “smoothing” on the label—they’ll give you the best stretch and less stick. You’ll test conditioner types by feel: creamier ones usually yield elastic slime, while lightweight gels can be too slippery. Think about scent preferences—pick a fragrance you won’t mind handling or choose unscented if you’re sensitive. Patch-test small amounts so you don’t waste product.
- Try a thick, moisturizing conditioner for elastic, less-sticky results.
- Avoid heavy silicones that make slime greasy or limp.
- Consider scent preferences and skin sensitivity; unscented is safest.
Handle ingredients confidently, adjust as you go, and have fun experimenting.
Ratio: Conditioner to Cornstarch
Start with a simple 2:1 cornstarch-to-conditioner guideline—two parts cornstarch to one part thick conditioner—and you’ll have a reliable baseline to tweak from. You’ll measure with spoons or cups, keeping cornstarch measurements consistent so texture is predictable. Mix the dry cornstarch into a bowl, add conditioner slowly, and fold until it behaves like soft dough. If you want stretchier slime, try slightly more conditioner; for firmer, add a touch more cornstarch. Jot down your conditioner ratios each time so you can repeat successes. Work in small batches while you experiment — that way you won’t waste product. This hands-on approach helps you learn how tiny cornstarch measurement changes shift feel and stretch without guesswork.
Fixing Texture Problems
If your slime turns out too sticky, crumbly, or limp, don’t panic—you can fix most problems with a couple quick adjustments and a little kneading. You’ll learn simple texture adjustments for hair conditioner and cornstarch slime so common issues disappear fast. Test small tweaks, then knead fully to feel the change. Try these fixes in order and stop when the feel is right:
- Sticky: sprinkle a pinch more cornstarch, knead until tackiness subsides; add tiny amounts—too much makes it crumbly.
- Crumbly: add a drop of conditioner and warm it between your hands, then knead until cohesive; repeat sparingly.
- Limp: chill briefly or add a bit more cornstarch, then stretch and fold to firm it up.
Gelatin (Jelly) Slime
You’ll start by learning the basics of gelatin—what types work best and how their texture affects your slime. Then you’ll make a simple jelly slime recipe, mixing gelatin with hot water, optional color, and a little cornstarch for stretch. Finally, you’ll get quick tips on storing your creation and keeping it safe and mold-free.
Gelatin Basics and Types
Gelatin gives jelly slime its bouncy, squishy texture—it’s a protein derived from collagen that sets liquids into a wobble-ready gel when cooled. You’ll love exploring gelatin properties: bloom strength (firmness), solubility (how it dissolves in warm water), and gelling temperature (when it firms). Knowing gelatin types helps you choose: powdered vs. leaf, culinary vs. unflavored, and hydrolyzed variants.
- Powdered gelatin: easy to measure, common in stores, decent bloom for jelly slime.
- Leaf (sheet) gelatin: cleaner clarity, often stronger gelling, pricier but reliable for consistent texture.
- Hydrolyzed gelatin/collagen: won’t gel well—useful for texture tweaks, not for setting.
Handle gently, dissolve fully, and chill to let the gel form before playing.
Making Jelly Slime
Now that you know how different gelatins behave, let’s turn that wobble into jelly slime you can squish and stretch. Start with flavored or unflavored gelatin, dissolve in hot water, then chill until tacky but not set. Knead gently; heat from your hands loosens it, cold firms it. Add cornstarch or a drop of oil to adjust stickiness—small tweaks give big texture shifts. For color or scent, mix in food coloring or extracts while warm. Explore jelly slime variations by swapping gelatin types, sugar-free mixes, or adding glitter and tiny beads for sensory bounce. The jelly slime benefits include edible-safe play (if using food-grade ingredients), easy cleanup, and quick resets between batches for endless hands-on experimentation.
Storage and Safety
1 simple rule makes gelatin slime safer and longer-lasting: treat it like perishable food. You’ll keep it fresh by cooling, sealing, and checking it often. Use clean hands and tools, and follow basic safety precautions to avoid mold or bacterial growth.
- Store in airtight containers and refrigerate; label with date so you know when to toss.
- Keep small play portions out and discard after a few days; don’t leave jelly slime at room temperature for long.
- Clean surfaces and wash hands before and after play; avoid contact with mouths, cuts, or pets.
These storage methods and safety precautions help your jelly slime stay squishy, fun, and worry-free.
Psyllium Husk (Fiber) Slime
Psyllium husk slime gives you a squishy, translucent goo using a pantry fiber instead of glue, and it’s surprisingly easy to make: you mix psyllium with boiling water and a little salt or baking soda, stir until it thickens, then let it cool to a bouncy, stretchy consistency you can knead and play with. You’ll see psyllium benefits right away: natural fiber creates elasticity and a glossy finish without synthetic polymers. To make it, measure 1–2 teaspoons psyllium per cup water, heat, stir until thick, then cool; add food coloring or glitter for fun slime variations. Work quickly—hot mixture sets as it cools. Store in an airtight container in the fridge and discard if it smells off or molds.
Salt and Flour Playdough-Style Slime
Mix a simple batch of salt-and-flour playdough-style slime with just pantry staples and a few minutes of stirring, and you’ll get a soft, moldable putty that’s perfect for sensory play. You’ll notice a pleasant salt texture that gives slight grip while flour binding creates the doughy body. Start with basic ratios, warm water to help combine, and knead until it’s smooth.
- Combine 1 cup flour, 1/2 cup fine salt, and 1/2 cup warm water; mix until crumbly.
- Knead 2–3 minutes; add tiny water or flour pinch to adjust moisture and salt texture.
- Store airtight; press, squish, and mold—wash hands after play.
This method’s tactile, safe, and fridge-stable for a few days.
Baking Soda and Contact Lens Solution Slime (Glue-Free Variant)
If you’re curious about a glue-free slime that actually stretches and holds together, baking soda and contact lens solution make a surprisingly satisfying combo — no PVA glue required. You’ll mix 1 cup water with 1–2 tablespoons baking soda until dissolved, then stir in food coloring if you want. Add contact solution containing boric acid a little at a time, kneading as the mixture firms; the solution cross-links the polymers in the soda mixture and creates that stretchy texture. Work quickly: add only enough contact solution to remove stickiness. If it’s too stiff, soften with a few drops of water or a tiny dab of lotion. Store your slime in an airtight container to keep it playable and fresh.
Edible Marshmallow Slime
Want a sweet, safe slime you can actually taste? You’ll melt marshmallows with a little butter, stir in powdered sugar, and knead until you get that bouncy marshmallow texture. Use only edible ingredients so kids can play and snack—no glue, no toxins. Work on a clean surface, oil your hands lightly, and pull gently to test stretch.
- Microwave 1 cup marshmallows + 1 tbsp butter 20–30s, stir until smooth.
- Add 1/2–1 cup powdered sugar gradually, mixing until pliable.
- Knead on powdered-sugar-dusted board; store in an airtight container.
You can tint with food coloring or fold in sprinkles. If it’s too sticky, add more powdered sugar; too stiff, warm briefly. Have fun and supervise small children.
Conclusion
You’ve got tons of glue-free slime options to try—oobleck, shampoo blends, gelatin jiggly slime, psyllium fiber goo, playdough-style salt and flour, baking soda with contact solution, and tasty marshmallow slime. Pick a recipe, measure, mix, and tweak textures until it’s just right. Play with colors, scents, and add-ins, but supervise kids with edible or heated recipes. Have fun, get messy, and enjoy stretchy, squishy experiments that teach and delight.