You’ll get pro results when you plan, prep, and apply paint like a tradesperson. Measure precisely, choose the right primer and finish, repair surfaces, and use the correct tools and techniques for cutting in and rolling. Follow a clear sequence and you’ll avoid costly mistakes — here’s how to do each step correctly.
Key Takeaways
- Measure and calculate surface area, choose paint amount, primer, and tools before buying.
- Thoroughly prep surfaces: clean, remove loose paint, fill holes, sand, and prime stained areas.
- Use quality brushes and rollers, load properly, cut in with steady strokes, and maintain a wet edge when rolling.
- Select paint type and sheen for durability and room function; test swatches under real lighting.
- Mask carefully with low-tack tape, remove tape promptly after final coat dries, and inspect touch-ups under bright light.
Planning Your Paint Project
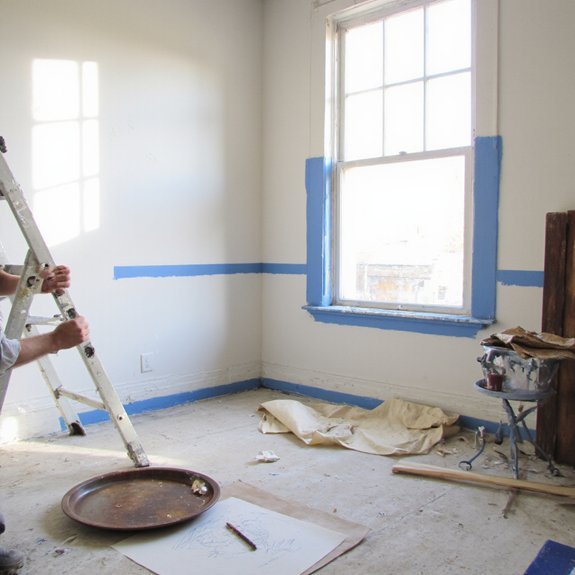
Before you pick a color, measure the room and define the scope: calculate wall and ceiling square footage to estimate paint and primer, list the tools and prep materials you’ll need, choose the finish and set a realistic timeline, and account for ventilation and drying times so you can budget labor and avoid delays. Start by mapping surfaces, noting trim, doors, windows and imperfections that affect prep. Prioritize tasks: repair, fill, sand, mask, protect floors. Create a precise shopping list and order materials accounting for deliveries. Use measured quantities to refine your color selection and contingency stock for touch-ups. Build a project timeline with milestones for prep, coats, inspections and final cleanup; assign durations and responsible parties. Factor in ventilation windows, climate-driven drying variability and electrical access for lighting. You’ll minimize downtime, control costs and foster innovation by testing small samples, documenting choices and iterating before full-scale application.
Choosing Paint Types and Finishes
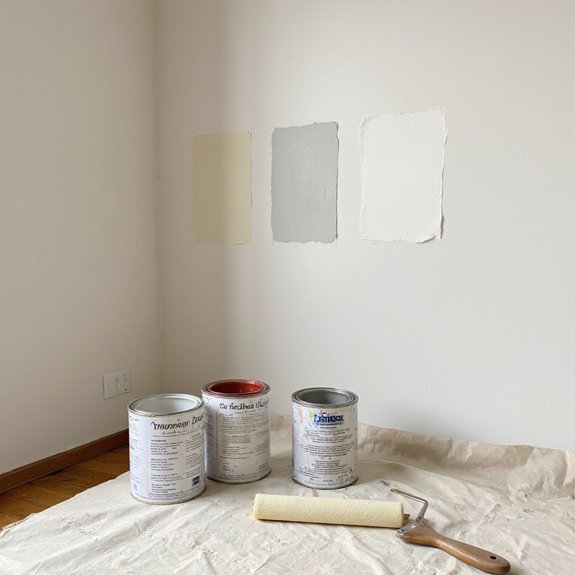
How durable, washable and reflective you need the surface to be will drive your choice of paint type and finish. You’ll choose between latex, acrylic, oil and specialty coatings based on room use and desired longevity. Start with color selection: pick pigments that work with light and architecture, then balance them against sheen for tactile and visual effect. Think regarding finish types—flat for hiding flaws, eggshell for low-traffic warmth, satin for washability, semi-gloss for trim and moisture-prone zones. Use innovative blends or low-VOC formulas when you want performance without compromise. Apply a test swatch, view it at different times, and evaluate durability under realistic conditions. Make decisions that prioritize maintenance, reflectivity, and the atmosphere you want to create. Visualize results with these cues:
Choose paint by durability, sheen and pigment; test swatches, favor low‑VOC blends, and balance washability with desired atmosphere.
- flat — matte, conceals imperfections
- eggshell — subtle warmth
- satin — easy-clean resilience
- semi-gloss — crisp, moisture-resistant and modern appeal.
Assembling Professional Tools and Supplies

Start with a compact checklist of quality tools and supplies you’ll actually use: a set of angled and trim brushes, roller frames and nap lengths matched to your finish, sturdy trays, extension poles, a reliable ladder, drop cloths, painter’s tape, spackle and putty knives, caulk and a caulking gun, sandpaper in multiple grits, stirring sticks, mixed buckets, respirator or mask, nitrile gloves and rags. Next, prioritize tool organization: modular caddies, labeled bins, pegboards and magnetic strips keep workflow efficient. Plan paint storage for opened cans—airtight lids, cool dry shelving, stacked crates and clear labeling. Choose durable core tools to reduce rework. Assemble compact, mobile kits for each room to accelerate cycles and enable iterative innovation. Keep safety and accessibility central; that’s professional efficiency. Table below maps core items.
| Item | Purpose |
|---|---|
| Brushes | Precision |
| Rollers | Coverage |
| Tape Trays | Protection |
| Safety | Health |
Surface Preparation and Repairs
With your kit organized and core tools at hand, you’ll get far cleaner results by preparing and repairing surfaces thoroughly. Begin with a disciplined surface assessment: inspect for cracks, peeling paint, mildew, and uneven texture. Remove loose paint, sand feathered edges, and clean with TSP or mild detergent so primers bond. Choose repair techniques based on defect size: patch small holes with spackle, larger gaps with joint compound, and damaged drywall with a short section replacement. Prime stains and repaired spots before finishing.
- Crack: widen slightly, fill, sand smooth.
- Hole: backer if deep, compound in layers.
- Flaking paint: scrape, sand to sound substrate.
- Mildew: clean, rinse, dry, apply mold-resistant primer.
Work methodically, allowing proper dry times and inspecting after each repair. That discipline yields a flawless, durable finish. Document your progress, use quality materials, and embrace incremental testing to innovate durable solutions for challenging surfaces with confidence, consistently.
Cutting In Like a Pro
Cutting in is the precise brushwork you use to create clean lines where walls meet trim, ceilings, and corners, and you’ll rely on a quality angled sash brush, steady wrist, and a repeatable sequence to get professional results. You start by loading the brush, tapping off excess, and using small controlled strokes. Focus on cutting angles at corners and along trim; let the brush lead, not the arm. Practice these brush techniques: tip control, angle consistency, and limited paint per stroke. Work in sections, keep an edge wet, and overlap slightly for seamless joins. If you need reference, use the table below for a concise checklist.
| Task | Tip |
|---|---|
| Load brush | Dip one-third, tap off |
| Establish edge | Start with a steady anchor stroke |
| Corners | Use short feathered strokes |
| Trim lines | Maintain consistent angle |
Mastering these steps builds speed and accuracy; repeatable technique yields innovative, pro-grade edges. Practice, refine, innovate.
Rolling Techniques for Smooth Coverage
Choose the right roller for your paint and surface—nap length and roller quality determine texture and coverage. Load the roller properly by rolling it in the tray well and removing excess so you won’t get drips or thick spots. Work in sections and maintain a wet edge so each pass blends seamlessly before the paint skins over.
Choose the Right Roller
For smooth coverage, match roller nap and material to your wall texture and paint: use a 1/4″–3/16″ synthetic nap for smooth plaster or doors, 3/8″–1/2″ for lightly textured drywall, and 3/4″ or thicker for rough surfaces. Choose roller materials and roller sizes deliberately: short synthetic nap for sheen finishes, medium nap for standard latex, long nap for masonry. Opt for 9″ frames for large walls, 4″ for tight spots. Visualize how the nap hugs texture and how the core balances weight.
- Smooth plaster — fine nap, precise strokes.
- Light drywall — medium nap, even laydown.
- Rough brick — thick nap, heavy coverage.
- Trim and doors — small roller, controlled edges.
Select quality covers and cores to innovate efficiency and achieve consistent professional results now.
Load the Roller Properly
Dip the roller into the paint well and roll it up the tray’s slope until the nap is evenly saturated—not dripping—so you get steady coverage without splatter. You should use measured strokes and test the roller on cardboard to gauge paint absorption and avoid overloading. Use deliberate wrist control and repeatable pressure to standardize roller loading.
| Nap | Stroke | Result |
|---|---|---|
| 1/4″ | Short | Light coverage |
| 3/8″ | Medium | Balanced load |
| 1/2″ | Long | High hold |
Work methodically: reload before the roller feels dry, clear drips, and keep your rhythm for innovative, consistent finishes. You’ll achieve flawless walls when you respect roller loading and paint absorption.
Maintain Wet Edge
When you keep a wet edge, you’ll avoid lap marks and get a uniform finish: work one wall at a time in 3–4 foot sections, overlapping each pass by about 50% and rolling into the still-wet paint to blend seams. You plan every stroke: load the roller, start at the top, lay down an even rectangle, then finish with light cross-rolls to erase lines. The wet edge importance is practical — it lets you merge sections without rework. Focus on maintaining consistency of pressure and speed. If you pause, feather the edge rather than restarting. Visualize the pattern as you move:
- Wet, even rectangle
- Overlap at 50%
- Cross-roll blend
- Feather paused edges
This method gives smooth, progressive coverage. Deliver superior results with confident technique.
Painting Trim, Doors, and Windows
You’ll start by thoroughly prepping and cleaning trim, doors, and windows—remove dust, grease, and loose paint, then sand where needed for proper adhesion. Masking and taping must be precise: use quality painter’s tape, seal edges, and protect glass and hardware. When cutting in, use an angled sash brush and steady strokes, feathering the paint for crisp, professional lines.
Prep and Cleaning
First, clear and protect the area around trim, doors, and windows: remove hardware, hang drop cloths, and tape adjacent surfaces for crisp lines.
- vacuum crevices
- wipe with degreaser
- sand glossy paint
- inspect and fill gaps
Next, prioritize surface cleaning and dust removal—wash trim and sills with mild detergent, rinse, and let dry so primer adheres. Use a vacuum and microfiber cloths; compressed air dislodges hidden dust. Sand rough spots smooth, remove loose paint, and fill dents with appropriate filler. Prime bare wood or stained areas for uniform absorption. Work top to bottom so debris won’t contaminate finished sections. Keep tools organized and labeled. These disciplined prep steps reduce defects, speed application, and produce crisp, innovative results professionals expect and demand.
Masking and Taping
After cleaning and priming, mask and tape trim, doors, and windows to protect surfaces and guarantee crisp lines: apply low‑tack painter’s tape along the edge of trim and glass, press the tape down firmly with a putty knife or your fingernail, and overlap strips by about 1/8 inch to prevent gaps. Use quality masking tape for uneven surfaces and switch to painter’s tape on delicate paint. Remove tape within an hour of the final coat drying to avoid peeling. Work systematically: tape edges, cover hardware, and shield floors with drop cloths. Below is a quick reference to streamline your process.
| Task | Recommendation |
|---|---|
| Trim | Use painter’s tape; press firmly |
| Glass | Masking tape; protect with plastic |
Cutting-In Techniques
A steady brush makes the difference when cutting in trim, doors, and windows. You’ll work methodically: load minimal paint, maintain consistent brush angles for control, and move deliberately to preserve edge alignment. Use a sash brush for tight profiles, rest your wrist on the surface for steadiness, and feather each stroke to blend with rolled areas. Practice a confident wrist motion rather than frantic corrections.
- Visualize a clean corner, paint like a scalpel.
- Anchor your hand, let bristles fan then straighten.
- Lay a thin bead along the joint, smooth inward.
- Step back, inspect edge alignment, touch up.
Execute each pass with intent; design-forward results follow. Iterate rapidly, measure your progress, and adopt new tools to push precision and speed in every cut daily now.
Touch-Ups, Cleanup, and Maintenance
When the paint’s dry, inspect the room systematically—work top to bottom, marking chips, drips, and thin spots so you don’t miss anything. Use a bright light and a small mirror for corners, then group issues by severity. For minor blemishes, employ touch up techniques: thin the original paint slightly, feather edges with a small brush, and stipple to match texture. For larger flaws, sand, prime, and recoat in measured passes.
When you tidy, remove tape slowly at a 45° angle, clean tools immediately with appropriate solvent, and store partial paint in airtight containers labeled with date and color. Create a maintenance routine: spot-clean walls with a mild detergent, address scuffs with a magic eraser, and retouch high-traffic areas yearly.
Document products and techniques in a concise log so future work is repeatable and scalable. You’ll finish with a professional, durable result that’s easy to maintain. Expect lasting quality.