

You’ll first determine whether the scratch is superficial or a deeper gouge, because that decides if you can polish it out or need professional repair. Start by cleaning the area and evaluating depth under good light, then pick an appropriate abrasive or polish and test it on a small spot. Follow a cautious, stepwise approach so you don’t worsen the damage — and keep going to learn the exact methods and tools for each scratch type.
Key Takeaways
- Clean the glass thoroughly with isopropyl alcohol and a lint-free cloth to remove grit before any repair attempts.
- Determine scratch depth by fingertip and light inspection: surface (polishable), deep (may catch a nail), or edge (professional).
- For light surface scratches, gently polish with non-gel toothpaste, baking soda paste, or cerium oxide using circular motions.
- Use a low-speed rotary polisher with soft pads and light pressure for stubborn micro-scratches, monitoring heat and progress.
- For deep gouges or edge damage, get a professional assessment—resin filling or pane replacement may be required.
Assessing Scratch Type and Depth
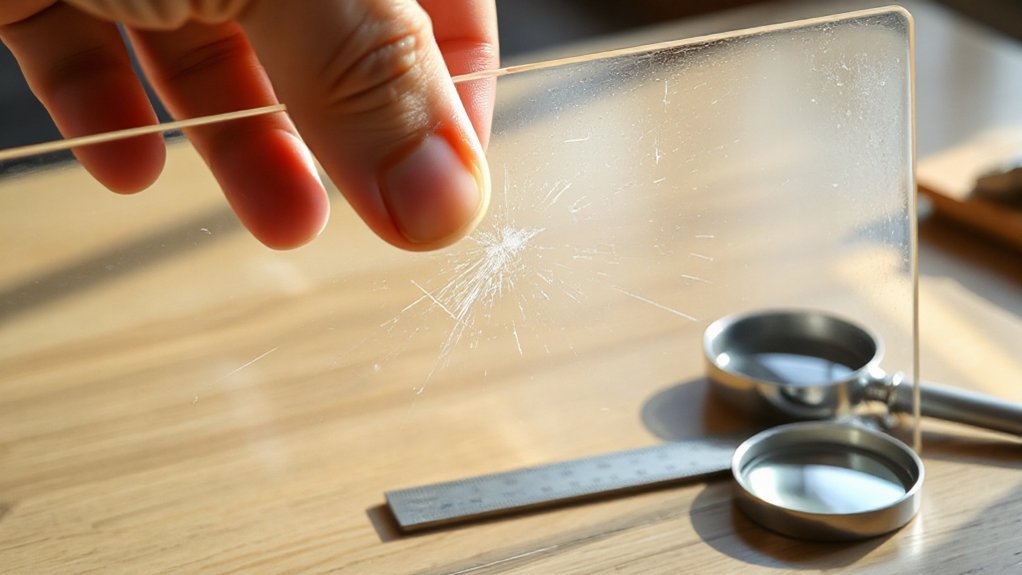
Before you reach for a polish, inspect the scratch to determine its type and depth. You’ll use scratch identification to classify it as a surface, deep, or edge scratch. For surface scratches, light scattering and fingertip feel indicate shallow damage; these usually respond to polishing. Deep scratches catch a fingernail or show a visible groove; they may need filling or professional repair. Edge scratches compromise structural integrity and require immediate specialist assessment. Conduct a systematic surface assessment under direct light and at oblique angles, wiping the area first to remove debris. Measure length and depth visually or with a loupe for precision. Document findings and decide whether DIY polishing is appropriate or if you must escalate to repair services.
Safe Preparations and Tools Needed
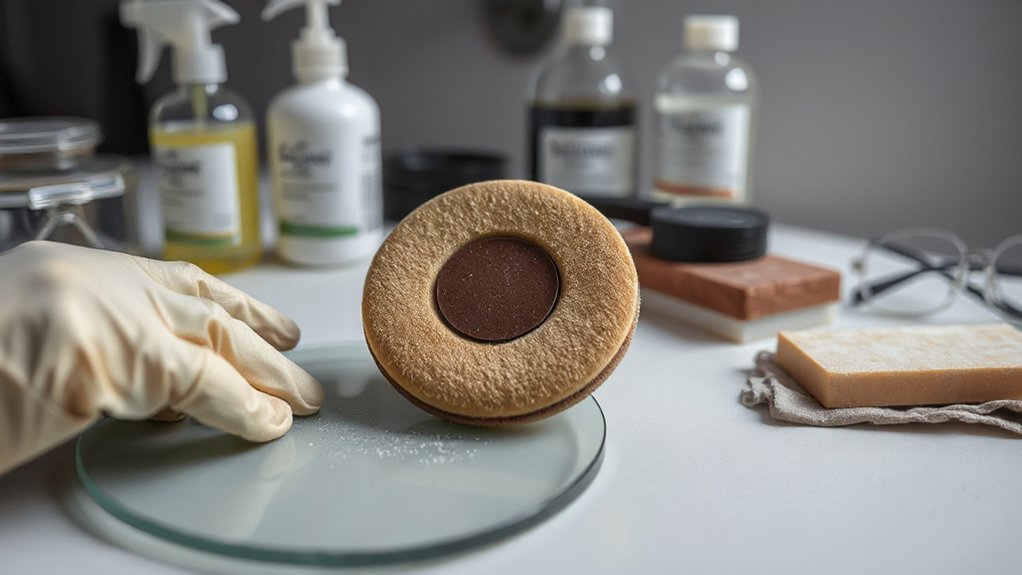
When you’re ready to work, set up a clean, well-lit area and gather the right safety gear and tools to prevent further damage or injury. Wear nitrile gloves, safety glasses, and a dust mask; lay down microfiber cloths to protect the glass and catch debris. Keep the workspace free of loose grit that causes new scratches.
Assemble: isopropyl alcohol for glass cleaning, distilled water, lint-free wipes, painter’s tape, a magnifier or bright LED inspection lamp, and a selection of polishing abrasives (cerium oxide or oxalic polishing pads) sized for the scratch. Use a variable-speed rotary tool with soft backing pads only if trained. Have a small vacuum and canned air to remove particles between steps. Label and isolate cleaned pieces to guarantee scratch prevention during handling.
DIY Methods for Light Surface Scratches
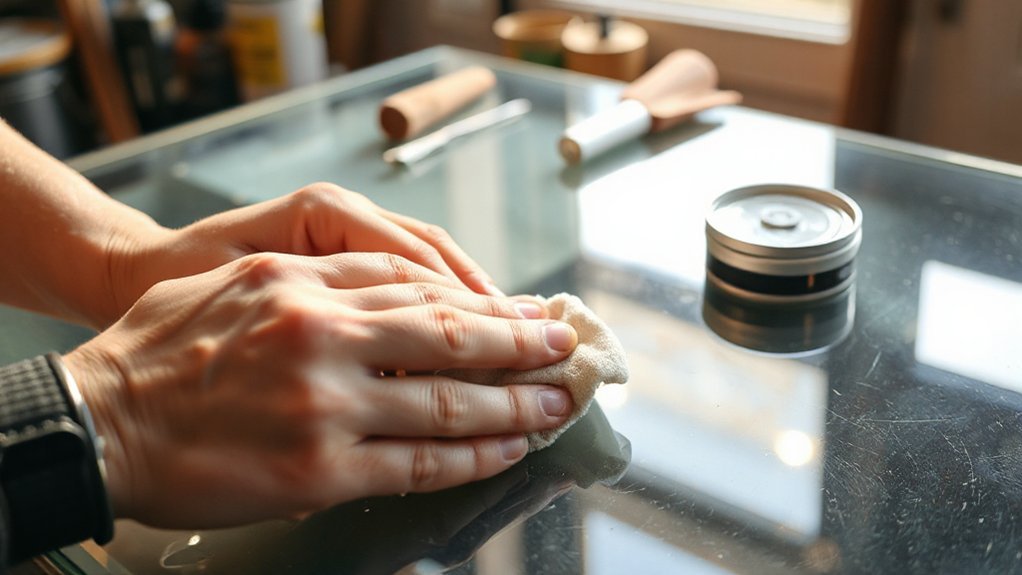
If the scratch is shallow and only affects the surface coating or very top layer, you can often remove or minimize it with simple, low-risk DIY methods using items you already have; these techniques focus on gentle abrasion, polishing, and cleaning to restore clarity without removing glass material. Start by cleaning the area with lint-free cloth and isopropyl alcohol to remove grit. Use toothpaste (non-gel) or a baking soda paste as mild abrasives for light scratch removal; rub in small circular motions with low pressure for 30–60 seconds, then rinse. For micro-scratches, try a jeweler’s rouge alternative like cerium oxide substituted by household polishes only if needed. Always test an inconspicuous spot first.
- You’ll feel confident restoring clarity.
- Small wins boost care pride.
- Calm, precise motions reduce risk.
- Success saves money and time.
- You’ll protect the glass’s appearance.
Using Commercial Glass Polishing Products
When choosing a commercial glass polish, you’ll pick a compound matched to scratch depth and glass type and check abrasiveness ratings and manufacturer guidance. Apply polish with a clean, soft pad or microfiber on a variable-speed polisher at low RPMs, using light, even pressure and short passes to avoid heat buildup. Finish with a fine polish and inspect under good light, repeating only if the scratch visibly improves.
Choosing the Right Polish
Because scratch depth and glass type determine the polish you need, start by measuring scratch severity and identifying the glass (tempered, laminated, coated), then match those to product specifications. You’ll choose among glass polish types that list abrasive grade, compatibility, and intended use. Look for manufacturers’ R‑ratings for depth removal, and verify chemical compatibility with coatings. Consider whether a paste, liquid, or compound suits your access and tool setup. Read technical datasheets for particle size, recommended pad hardness, and safety data. Avoid polishes that exceed what the glass can tolerate.
- You want confidence that the product won’t worsen the damage.
- You deserve a clear specification, not vague claims.
- You’ll feel relief using industry‑rated materials.
- You need predictable, verifiable results.
- You’ll appreciate straightforward, tested polish application techniques.
Proper Application Technique
Start by securing the work area and confirming the polish, pad, and machine match the scratch severity and glass type you identified earlier. Fit the correct pad, apply a pea‑to‑nickel amount of polish, and spread it by hand to avoid sling. Set the machine to low speed, place the pad flat, and engage power — you’ll increase RPMs only if the polish manufacturer allows. Use overlapping passes (30–50% overlap), maintain consistent pressure, and keep the pad flush; lift periodically to inspect progress and reapply compound sparingly. Flush with water or wipe residue per product guidelines to prevent heat buildup. These proper technique application tips minimize haze, prevent overcutting, and let you restore clarity efficiently while preserving surrounding seals and coatings.
Repair Options for Deep Gouges and Cracks
First, inspect the scratch to determine depth and whether it penetrates the surface or the substrate. If the gouge is shallow you can often polish or fill it; if it reaches the substrate or forms a crack, you’ll need a professional assessment. Weigh repair cost and structural risk—professionals can resin-fill or replace the pane when integrity is compromised.
Assess Damage Depth
If you see deep gouges or spidering cracks, don’t assume a simple polish will fix them — you need to assess depth and structural risk before choosing a repair. You’ll perform a glass surface analysis to quantify scratch visibility factors: measure depth with a loupe or profilometer, check through-light transmission, and test for stress concentrators near edges. Note whether cracks penetrate the full thickness or remain superficial. Document dimensions, orientation, and any delamination. Use tactile and optical tests; don’t rely on sight alone.
- You’ll feel worry when a crack runs to the edge.
- You’ll want certainty before acting.
- You may be frustrated by unclear depth.
- You’ll gain confidence with measured data.
- You’ll prefer a documented decision path.
Professional Repair vs. Replacement
Now that you’ve quantified scratch depth and mapped crack paths, decide whether a professional repair will restore structural integrity or if full panel replacement is safer. For deep gouges and cracks, consider glass types: tempered, laminated, or annealed respond differently to repair. Tempered glass usually requires replacement; laminated glass may accept resin injection if interlayer damage is minimal. Ask the technician for documented strength restoration percentages and failure-mode analysis. Evaluate repair costs against replacement — include labor, materials, matching, and downtime. Request examples of similar repairs and warranties that cover propagation or delamination. If optical clarity, load-bearing function, or safety glazing standards are compromised, prioritize replacement. Use a licensed specialist and get multiple quotes to confirm the most reliable, code-compliant solution.
When to Seek Professional Repair or Replacement
When scratches penetrate the surface coating, span a large area, or affect visibility and structural integrity, you should consult a professional for repair or replacement; minor surface marks you can often polish out, but deep gouges, chips at the edge, or multiple intersecting scratches usually need specialist tools or glass replacement to restore safety and function. You should get a professional assessment to confirm whether repair preserves strength or whether replacement is safer. Ask for a written cost evaluation and expected lifespan after repair. Professionals will test laminate adhesion, edge integrity, and optical distortion; they’ll document risks and remediation limits. Use their report to compare repair timelines, warranties, and long-term value before committing.
If scratches cut coating, are widespread, or impair visibility, get a professional assessment with written costs, risks, and warranty.
- You want certainty, not guesswork.
- You deserve documented safety.
- You shouldn’t accept temporary fixes.
- You’ll save time with expert judgment.
- You’ll avoid hidden costs later.
Conclusion
You’ve learned to identify scratch depth, clean and prep the glass, and choose the right tools—mild abrasives or commercial polishes—for light surface marks. Work small areas with soft pads, inspect progress under good lighting, and stop if scratches don’t improve. For deep gouges or structural cracks, don’t attempt DIY fixes; contact a professional for repair or replacement to avoid safety risks. Test methods first and prioritize safety and material compatibility.