You can fix many car scratches yourself if you first figure out how deep they are and where they sit on the panel. Start by cleaning the area, then use the right abrasive grade, rubbing compound, or touch-up paint depending on severity. I’ll outline simple steps for surface scratches and tougher options for deeper damage so you can decide what to try next.
Key Takeaways
- Inspect the scratch under good light and run a fingernail across it to determine if it’s clear coat, primer, or metal.
- Thoroughly wash and degrease the area with car soap and isopropyl alcohol before any repair.
- Use rubbing compound or fine (2000–3000 grit) wet sanding and polish for light, surface-level scratches.
- For deeper scratches, apply matched touch-up paint in thin layers, wet-sand edges, then polish and seal.
- Seek a professional for scratches through primer/metal, extensive damage, or difficult color-matching.
Assessing Scratch Depth and Location
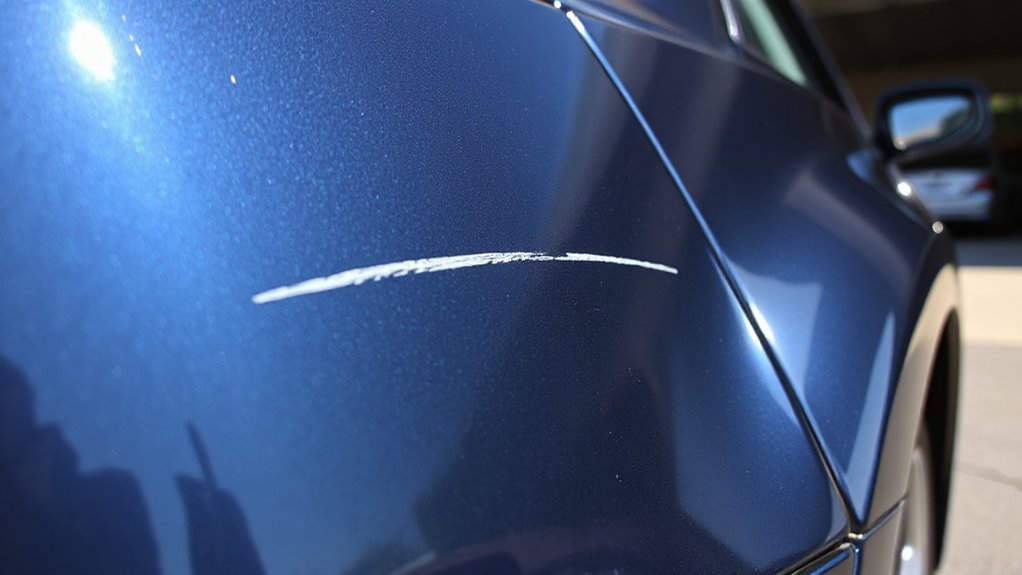
Before you try any repair, inspect each scratch closely to determine how deep it goes and where it sits on the panel. You’ll perform a quick location analysis: note whether the mark crosses paint lines, sits on a curved edge, or lies over primer. Run your fingernail lightly across the groove to gauge scratch severity—if it catches, you’re likely past clear coat. Photograph and map scratches so you don’t miss spots when you work. Check surrounding paint for chips or rust that change your approach. Distinguish surface scuffs from penetrating cuts; surface scuffs often polish out, deeper cuts need filling or professional attention. This initial assessment saves time and prevents unnecessary repairs or further damage to painted surfaces.
Tools and Materials You’ll Need

Before you start fixing scratches, gather the right cleaning supplies—car soap, microfiber towels, and isopropyl alcohol—to remove dirt and wax. You’ll also need polishing products like compound, polish, and a dual-action polisher (or foam pads for hand work) plus a good quality wax or sealant for protection. Having the correct items on hand saves time and helps you get professional-looking results.
Essential Cleaning Supplies
Gathering the right supplies makes scratch repair faster and prevents further damage; you’ll need a few specific tools and materials so you can work cleanly and confidently. Start with basic cleaning techniques and clear supply recommendations: wash the area thoroughly, remove wax and grease, and dry completely to see the true extent of the scratch. Use gentle, non-abrasive products first to avoid worsening the mark.
- A pH-balanced car wash soap, soft mitt, and two-bucket setup for grit-free cleaning.
- Isopropyl alcohol (70–90%) and microfiber towels to decontaminate and strip residues.
- Soft-bristled detailing brush and foam applicators to clean crevices around the scratch.
These essentials set a proper foundation before any repair or polishing step.
Polishing and Protection Products
Start with a small kit of targeted polishes, pads, and protective coatings so you can match the product to the scratch depth and paint type. Choose a compound for deeper scratches and a finishing polish for light swirls; microfiber or foam pads work best depending on whether you’ll use a dual-action polisher or hand-apply. Include a clay bar to remove embedded contaminants before polishing—clean surface equals better bond and fewer holograms. For protection products, pick a high-quality sealant or ceramic spray to lock in gloss and repel contaminants after polishing. Keep lint-free towels, applicator pads, and masking tape on hand to protect trim. Follow recommended polishing techniques: low pressure, steady passes, and gradual product progression for safe, predictable results.
Preparing the Surface for Repair

1 simple step you can’t skip is thoroughly cleaning and evaluating the damaged area so your repair products will bond properly. You’ll focus on surface preparation and a careful scratch assessment: wash with mild detergent, dry, and remove wax or grease with isopropyl alcohol. Inspect under good light and run your fingernail over the scratch to judge depth.
- Sunlit close-up reveals paint chips, primer exposure, or just clearcoat marks.
- A fingernail drag helps you picture whether the scratch catches or feels smooth.
- Tape off surrounding panels to imagine repair boundaries and protect adjacent paint.
Prep the workspace: lay soft cloths, use plastic clips, and keep appropriate grit sandpaper, rubbing compound, and tack cloths handy before you move to actual repair.
Fixes for Light Surface Scratches
If the scratch only affects the clearcoat and doesn’t catch your fingernail, you can usually restore the finish yourself with minimal tools and time. First wash and dry the area to remove grit. Use fine 2000–3000 grit wet sandpaper only if the scratch is visible but shallow; keep the pad wet and sand very lightly across the scratch, not through the paint. Apply a quality rubbing compound with a microfiber pad, working in small circles until the scratch diminishes. Follow with a polishing compound to refine the sheen, then seal with wax or ceramic spray. For tiny surface marks, a dedicated scratch removal pen or mild abrasive polish often suffices. These DIY techniques save time and keep the finish uniform when done carefully.
Repairing Moderate Scratches and Paint Chips
Start by running your fingernail over the scratch to assess its depth—if it catches, the clear coat or paint is likely damaged. Clean and prep the area thoroughly so dirt and wax won’t interfere with adhesion. Then match and apply touch-up paint carefully, building thin layers and finishing with clear coat for a smooth, protective result.
Assess Scratch Depth
Before you grab any tools, determine how deep the damage goes: light surface scratches only affect clear coat, moderate scratches penetrate into the color coat, and chips expose primer or bare metal. You’ll use visual scratch identification and simple depth measurement to decide fixes. Run a fingernail over the mark: it’ll catch on deeper gouges but glide over clear-coat blemishes. Use bright light and a magnifier to inspect edges for exposed substrate. Note corrosion or primer showing — that needs more urgent repair.
- Imagine a shallow hairline that your nail doesn’t catch, glossy and superficial.
- Picture a dull, colored groove where paint has been displaced.
- See an abrupt bright spot revealing gray primer or bare metal.
Clean and Prep
Preparation matters: clean the damaged area thoroughly so repair materials bond properly. Start by rinsing loose dirt with water, then use a mild automotive detergent and a soft microfiber to remove grease and wax. Dry completely with a lint-free cloth. For stubborn contaminants, use a clay bar or an automotive solvent designed for surface prep; follow product instructions and ventilate the area.
Mask surrounding paint with automotive masking tape to protect undamaged panels. Lightly sand rough edges of the chip with fine-grit sandpaper (1000–2000 grit) to feather the perimeter; keep the motion even and gentle. Wipe the sanding dust away with an alcohol-based wipe or tack cloth. These cleaning techniques and careful surface preparation guarantee adhesion and a cleaner final repair.
Use Touch-Up Paint
With the area clean and sanded, you’re ready to apply touch-up paint to repair moderate scratches and chips. Match the factory color code, shake the bottle, and test on plastic first. Use steady, thin layers—don’t overload the brush—building color until the chip is level with surrounding paint. Let each layer dry fully, then lightly wet-sand with fine grit and finish with a polishing compound. These touch up techniques focus on careful paint application and drying times to avoid runs and noticeable texture differences.
- A tiny brush filling a shallow chip, paint pooling then leveling
- Wet-sanding smoothing a raised edge into the surrounding finish
- A final polish bringing back consistent gloss across the repair
Addressing Deep Scratches and Exposed Metal
If you’ve got a deep scratch that exposes bare metal, act quickly to stop rust and restore protection; untreated metal will corrode and worsen the damage. Start by cleaning the area with soap and water, then remove rust with fine-grit sandpaper or a rust remover. Use a rust converter if corrosion has begun. Apply primer designed for automotive use, feathering edges to bond paint. For deep scratch remedies, use color-matched touch-up paint in thin layers, allowing full drying between coats. After paint cures, apply clear coat to seal. For exposed metal protection, finish with a quality automotive wax or paint sealant once cured. If the damage is structural or large, consult a body shop to avoid further issues.
Preventive Care to Avoid Future Scratches
Repairing a deep scratch and protecting exposed metal will keep your car sound, but preventing future damage saves time and money. You can adopt simple preventive measures to minimize chips and surface scratches: park away from tight lots, use covers when parked outdoors, and wash with proper mitts and two-bucket technique. Regular wax or paint sealant adds a sacrificial layer, and ceramic coatings offer longer-term protection if you want investment-grade scratch prevention.
- Park with buffer space to avoid door dings and shopping carts.
- Use a soft car cover or shaded parking to reduce environmental wear.
- Wash with a clean microfiber mitt and two buckets to prevent swirl marks.
Follow these steps consistently and you’ll cut down touch-ups and preserve finish value.
When to Seek Professional Repair
When a scratch cuts through the clear coat into primer or metal, you should see a pro—trying DIY fixes on deep damage can make rust and corrosion worse or leave uneven paint. You’ll want a professional evaluation if the scratch is deep, extensive, over body lines, or on blended panels. A tech will assess substrate damage, corrosion risk, and color-matching difficulty, then outline repair options: spot repainting, panel respray, filler and block sanding, or replacement. Get written estimates and compare warranties, timelines, and paint codes. If the car’s value or safety could be affected, don’t delay. Choosing a reputable shop saves time and money versus repeated DIY attempts that can escalate issues or reduce resale value.
Conclusion
You can tackle most scratches yourself if you assess depth, prep the surface, and pick the right method—clean, wet-sand and compound for light marks; touch-up paint and clear coat for moderate chips; fill, prime and let pros handle exposed metal or structural damage. Finish with polish and wax or a ceramic spray to seal. Take preventive steps like cautious parking and paint protection film. When in doubt, get a pro to avoid costly mistakes.