You can unclog most household drains yourself if you correctly identify the obstruction, use the right tools, and follow a methodical sequence. Start with visual inspection and a plunger, then advance to a snake or P‑trap removal for deeper blockages. You’ll get exact steps, tools, and decision points so you avoid damage and know when to stop.
Key Takeaways
- Identify the clog type by noting smell, gurgling, slow vs complete backup, and which fixtures are affected.
- Use the correct plunger (cup for sinks, flange for toilets), seal overflow, and apply rhythmic thrusts to dislodge the blockage.
- Feed a hand auger or drain snake past the trap, rotate while pushing, then retrieve and dispose of extracted debris.
- For soft organic clogs, pour 1 cup baking soda and 1 cup vinegar, wait 20–30 minutes, then flush with hot water or use boiling water plus dish soap.
- Remove and clean the P-trap with a bucket underneath; call a licensed plumber if multiple fixtures drain slowly or camera inspection is needed.
How to Diagnose the Type of Clog
How can you tell what kind of clog you’re dealing with? You inspect flow behavior, listen for gurgles, and note smell profiles to distinguish clog types. You classify blockages as soft organic, hair-and-grease, mineral scale, or mechanical obstruction. Symptom identification relies on measurable indicators: slow drain rate, complete backup, localized versus systemic slowdowns, and intermittent air escape. You’ll correlate symptoms to likely causes—fatty residues with slow kitchen drains, hair mats with bathroom sinks, mineral accretion in hard-water areas, and foreign objects in trap zones. Use targeted diagnostic steps: isolate fixtures, observe response to water pulses, and test vent performance by running upstream fixtures. Your analysis should be methodical: record baseline flow, alter variables, and note reproducible changes. That lets you select an efficient, minimally invasive remediation pathway rooted in accurate symptom identification and a clear taxonomy of clog types. You’ll optimize outcomes by prioritizing data-driven, measurable interventions consistently.
Tools You Need Before You Start
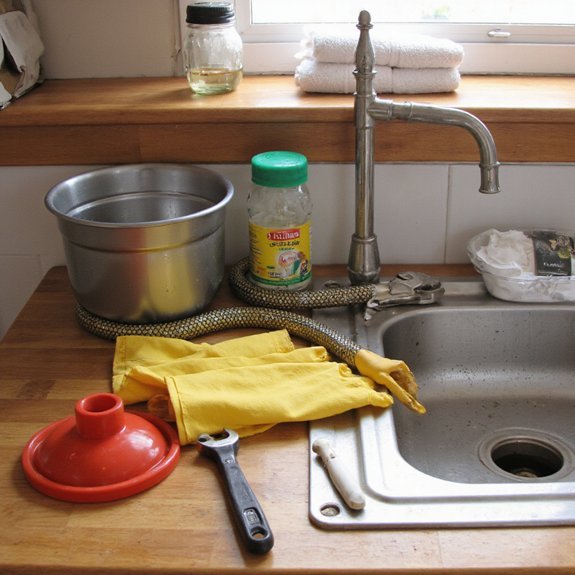
Once you’ve identified the clog type, assemble a compact set of targeted tools that let you address each category safely and efficiently. You’ll want a flexible drain snake (manual or powered) with interchangeable heads for hair, scale, and debris; a hand auger with a small cable for sinks and a larger cable for floor drains; a set of high-strength plastic picks for quick hair extraction; a pair of nitrile gloves and splash-resistant safety glasses; a watertight bucket and adjustable basin wrench to access traps; enzyme-based drain cleaning pellets for biological blockages and a neutralizing agent for chemical residues; a wet-dry vacuum rated for liquid pickup with hose adapters; and a compact inspection camera for visual diagnostics. Pick quality, modular unclogging tools that minimize invasive disassembly and let you iterate quickly while following safe drain cleaning protocols. Store components logically and label them to speed future interventions and documentation.
Plunger Technique for Sinks and Toilets
You should select the correct plunger—use a cup plunger for sinks and a flange plunger for toilets to match the drain geometry. You must position the cup or flange to create an airtight seal over the drain and block overflow openings to maintain pressure. Then you apply controlled, rhythmic thrusts with steady force, starting slowly to compress fluid and increasing amplitude until the obstruction clears.
Choose the Right Plunger
The right plunger makes the difference between a quick clear and wasted effort, so pick one by matching design to fixture: use a cup (flat-bottom) plunger or a sink-specific plunger with a shallow bell for flat sink drains and a flange (bell-shaped with an extendable rubber flap) plunger for toilets to form a tight seal inside the bowl. Select materials engineered for durability and compatibility: high-density rubber resists deformation, thermoplastic elastomers combine flexibility and solvent resistance, and wooden or composite handles balance torque and vibration dampening. Consider plunger types by stroke efficiency, cup geometry, and handle length; a longer handle increases leverage, a deeper bell increases displacement per stroke. Choose models with replaceable cups and modular components to support iterative improvement and sustainable maintenance.
Create a Proper Seal
After selecting the correct plunger, create an airtight seal before you apply force: for sinks, block any overflow with a wet rag, add enough water to cover the plunger cup, center the cup over the drain and press down to expel trapped air until you feel a firm vacuum; for toilets, extend and seat the flange fully into the trap opening and submerge the bell so water surrounds the rubber. You’ll confirm seal integrity by testing slight lateral tension and observing no air ingress. Evaluate seal types—flat cup for flat surfaces, flange for toilets—and choose based on flange engagement and material compliance. Guarantee proper placement: align concentrically, maintain full contact across the perimeter, and eliminate peripheral gaps. This precision maximizes force and reduces failure risk.
Use Correct Plunging Motion
Plunge using controlled, rhythmic strokes that generate alternating pressure surges rather than erratic thrusts: for sinks, keep the motion short and vertical—about 1–3 inches—so the cup compresses and rebounds quickly, maintaining the airtight seal for 6–12 consistent strokes before a sharp, sustained pull to dislodge the blockage; for toilets, use longer, more forceful pushes and pulls (3–6 inches) to move water through the trap, keeping the flange fully seated and never breaking the seal mid-cycle. Then adjust cadence based on resistance, pausing to reassess if effectiveness diminishes. You’ll apply progressive force, measuring feedback from water movement and sound. These plunging techniques prioritize seal integrity, stroke length, and stroke count for effective plunging. Maintain posture and grip to sustain energy transfer, repeat until flow restores
Using a Drain Snake or Hand Auger
A hand auger (drain snake) is your best tool for mechanical blockages beyond the trap; you’ll feed a coiled cable into the drain, advance it until you meet resistance, then rotate the handle to either break the obstruction or hook and retrieve it. Use a firm, controlled pace: push until resistance, then apply clockwise rotation while maintaining axial pressure. Learn basic drain auger techniques: choose appropriate diameter and length, protect fixtures with rag, and lock the feed to prevent backlash. For tight bends, retract slightly before re-advancing to negotiate curves. Inspect retrieved debris with gloves and a flashlight; repeat until cable advances freely. Cable snake usage requires attention to torque—stop if the cable kinks or springs; withdraw and straighten to avoid damaging pipes. After clearing, flush with hot water and run cable again. Store dry, lubricate moving parts, and upgrade to an electric auger when manual clearance fails.
Baking Soda and Vinegar Method
When a cable can’t reach the clog or you want a low-risk chemical approach, use baking soda and vinegar to agitate and loosen soft organic buildup. You’ll measure, pour, wait, and flush. Start with one cup baking soda, follow with one cup vinegar, cover the drain to force the vinegar reaction downward, and let sit 20–30 minutes. The fizzing agitates grease and biofilm; repeat once if necessary. After reaction, flush with water to carry residues. For persistent blockages, combine this method with mechanical agitation, not caustic chemicals. You’ll wear gloves and protection; ventilation is advisable. The process is experimental: adjust quantities for drain size and monitor results.
| Step | Quantity | Purpose |
|---|---|---|
| 1 | 1 cup baking soda | Base to break up deposits |
| 2 | 1 cup vinegar | Acid to initiate vinegar reaction |
| 3 | Cover drain | Direct effervescence |
| 4 | Wait 20–30 min | Allow agitation |
| 5 | Flush water | Remove loosened debris |
Boiling Water and Dish Soap Approach
You boil water, mix in a squirt of liquid dish soap, and slowly pour it down the drain to melt and lubricate grease and soap-scum build-up. Apply in stages: pour one to two liters, wait five minutes, then repeat while flushing with hot tap water to verify restored flow. Don’t use this on PVC fittings exposed to very high temperatures, recently solvent-welded joints, or when the blockage is solid (hair, paper, small objects) — use mechanical removal instead.
How to Apply
Step 1: Heat 1–2 liters (about 4–8 cups) of water to a rolling boil on the stove. Step 2: While the water heats, squirt 1–2 tablespoons of concentrated dish soap directly into the drain; when possible choose biodegradable soap to support drain alternatives and eco friendly solutions. Step 3: Pour the boiling water steadily in two or three controlled batches, pausing 30–60 seconds between pours to let heat and surfactant break down grease and organic films. Step 4: Run hot tap water for one minute, then test flow by filling and releasing the sink. Repeat once if needed. Use thermal-resistant gloves to avoid burns. If performance is inconsistent, adjust quantities and timing, and document results so you can refine this innovative, low-impact procedure now.
When Not to Use
After using the hot-water and dish-soap method, recognize situations where it’s inappropriate so you won’t worsen damage or miss a larger problem. Don’t use boiling water on PVC, older ABS, or glued joints — extreme heat softens plastic, deforms seals, and causes leaks. If water pools slowly despite repeated treatments, don’t persist; that indicates a mechanical obstruction or venting issue requiring tools or professional assessment. Avoid this method when chemical cleaners or fat-based clogs are suspected; mixing treatments can create hazardous reactions. If you detect sewage odor, recurrent backups, visible corrosion, or multiple affected fixtures, stop and contact emergency plumbing. When in doubt, switch to mechanical methods or call an expert; that minimizes risk and preserves system integrity during drain cleaning and extends lifespan.
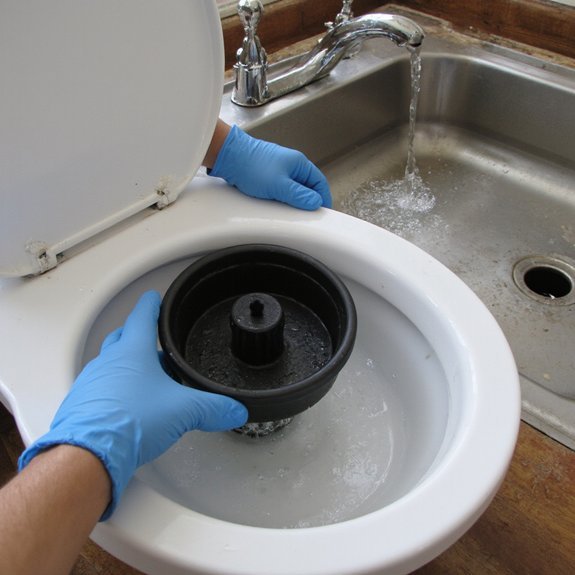
Removing and Cleaning the P‑Trap
Shut off the water supply, position a bucket beneath the trap, and loosen the slip nuts on each end of the P‑trap using adjustable pliers or by hand if they’re free; you’ll catch residual water and avoid a mess. Next, remove the trap and inspect the curvature for blockages, sediment, or corrosion. For effective P trap cleaning, empty solids into the bucket, scrub inner surfaces with a stiff brush and an enzymatic cleaner to preserve finish. Inspect washers and slip nuts for deformation; replace any brittle components to restore seal integrity. While the trap is out, check the Drain assembly tailpiece and wall stub for scale or trapped debris; clean those passages with a bottle brush and air if available. Reassemble using fresh slip washers, hand‑tighten, test, watching for leaks. If flow remains impaired after this targeted procedure, escalate diagnosis to venting or deeper trap seal issues.
Clearing Shower and Bathtub Drains (Hair Removal)
You grab and remove visible hair from the strainer or drain opening with gloves and a pick to immediately restore flow. If hair remains, you feed a 1/4–3/8″ drain snake or disposable plastic hair-removal tool 6–12 inches into the trap, rotate, and withdraw to extract fibers. Finish by installing a hair-catching strainer and scheduling monthly mechanical removal to prevent future clogs.
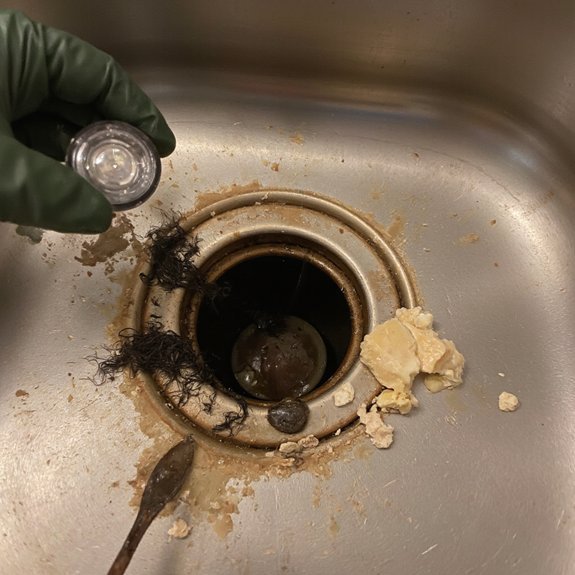
Remove Visible Hair
The quickest effective step is to remove visible hair and debris lodged in the drain cover and trap. You’ll lift the cover or unscrew the strainer, then use targeted hair removal tools—needle picks, rigid hooks, or disposable tweezers—to extract accumulated fibers. Work methodically, pulling along the pipe axis to avoid tearing bundles and pushing debris deeper. Use a flashlight and small mirror to inspect the trap chamber; repeat until you see clear metal or plastic. After extraction, flush with hot water to clear residual soap scum and verify flow. Dispose of collected hair in a sealed bag to prevent re-entry. These effective techniques minimize chemical reliance, speed restoration, and set you up to use preventive innovations like capture screens and extend fixture lifespan considerably.
Use a Drain Snake
One of the most reliable tools is a manual drain snake designed specifically for hair clogs; you’ll want a 1/4–3/8-inch flexible coil or a plastic “zip-it” with barbs for tubs and showers. You insert the snake, rotate, and extract hair manually, using steady pressure and controlled pulls. Choose drain snake types that match diameter and material for ideal reach. Use effective techniques: slow feed, twist to engage, and inspect between passes. Dispose of debris hygienically and test flow. The method is precise, low-tech and scalable to stubborn tangles.
| Sensation | Outcome |
|---|---|
| Frustration | Relief |
| Hesitation | Confidence |
| Mess | Control |
| Effort | Efficiency |
| Risk | Resolution |
Always wear gloves and eye protection; iterate controlled passes until the coil clears the obstruction, then verify full flow and document the procedure safely.
Prevent Future Clogs
After clearing a hair clog with a snake, take targeted steps to keep hair out of the drain and reduce maintenance frequency. Install a low-profile strainer or silicone hair catcher with high capture efficiency; measure drain diameter, select a model with less than 1 mm clearance to block fibers while preserving flow. Clean the catcher weekly—use gloves and a disposable wipe—to prevent biofilm buildup. Flush the line monthly with hot water and a biodegradable enzyme treatment to degrade organic residue without harming pipes. For design-forward bathrooms, consider a linear drain insert that channels hair to a removable trap for inspection. Track drain maintenance in a simple log so you optimize intervals based on observed accumulation and achieve proactive clog prevention. Reduce service calls accordingly.
Preventive Maintenance to Avoid Future Clogs
When you establish a simple, regular maintenance routine—scheduled flushing, strainers on drains, and periodic mechanical or enzymatic treatments—you’ll drastically reduce hair, grease, and mineral buildup that cause most clogs. You should standardize a protocol: weekly hot-water flushes, monthly enzymatic dosing, and quarterly mechanical auger passes for high-use lines. Install calibrated strainers to capture particulates at the source and log inspections with timestamps to quantify performance. For innovation, integrate smart sensors that monitor flow rate deviation and trigger automated flush cycles; this augments traditional drain cleaning and elevates clog prevention to predictive maintenance. Use pH-stable enzymatic formulations to target organic films without damaging seals or finishes. When you inspect, measure flow velocity and visual residue; replace or upgrade components when metrics fall below predefined thresholds. This disciplined, data-driven approach minimizes emergency interventions and extends pipe life, letting you avoid disruptive, reactive repairs while maintaining operational efficiency and reducing costs.
When to Call a Professional Plumber
How do you decide it’s time to call a professional plumber? You evaluate objective evidence: severity, recurrence, and risk. If you notice Signs calling for expert intervention—multiple fixtures backing up, foul sewage odors, or visible pipe damage—don’t DIY. Emergency situations like burst pipes, sewage overflow, or flooding require immediate professional response to limit structural and health hazards. Frequent clogs across the system indicate deeper line obstruction or venting failures that simple snaking won’t resolve. Persistent issues after standard remedies (plunger, snake, enzymatic cleaners) imply compromised traps, tree-root intrusion, or failing seals that need diagnostic tools and licensed remediation.
- Recurrent backups across fixtures
- Sewage smell or discoloration
- Visible leaks or pipe deformation
- Failure after standard repairs
- Rapid water loss or massive flow obstruction
You act decisively: call a licensed plumber with camera inspection and hydraulic diagnostics to implement advanced, durable solutions. Schedule service immediately to prevent systemic infrastructure failure.