

You’ll want to pick paper and tools that match the box size and occasion, then measure and cut with precision so you waste as little as possible. Lay the paper flat, wrap tightly, secure seams with discreet tape, and fold clean corners for a professional look. Finish with a ribbon or label that complements the design — follow a few simple steps and you’ll get a crisp result that’s easy to replicate.
Key Takeaways
- Measure paper so it wraps around the box with a 1–2 inch overlap and enough height for neat end flaps.
- Cut along a straight, pattern-aligned line using a sharp blade and metal ruler for clean edges.
- Anchor one paper edge to the box base with a small strip of tape, then smooth and tape the opposite seam.
- Fold and tuck crisp triangular end flaps, securing with small tape pieces for flat, neat corners.
- Add ribbon or bow centered or off‑center, and hide tape under the ribbon for a polished finish.
Choosing the Right Wrapping Paper and Tools
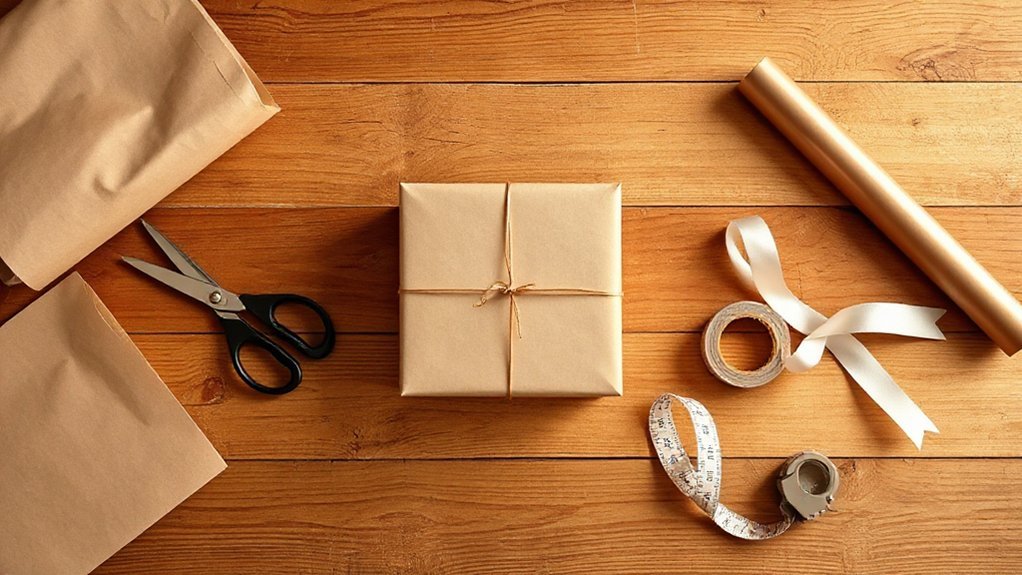
Start by matching paper weight and pattern to the gift and occasion so you get clean folds and a cohesive look: lightweight paper works for delicate items, heavier stock hides imperfections and holds sharp edges, and subtle patterns pair with busy ribbons while bold prints need plain accessories. Choose tools that make precise cuts and secure seams: a sharp craft knife, a metal ruler, double-sided tape, and bone folder or scoring tool for crisp creases. For fast, tidy work, use a cutting mat and clips to hold corners while you finish. Consider eco friendly options like recycled kraft, compostable tissue, or fabric wraps that reduce waste. Maintain clear color coordination between paper, ribbon, and tags so the finished package looks intentional and neat.
Measuring Paper to Minimize Waste
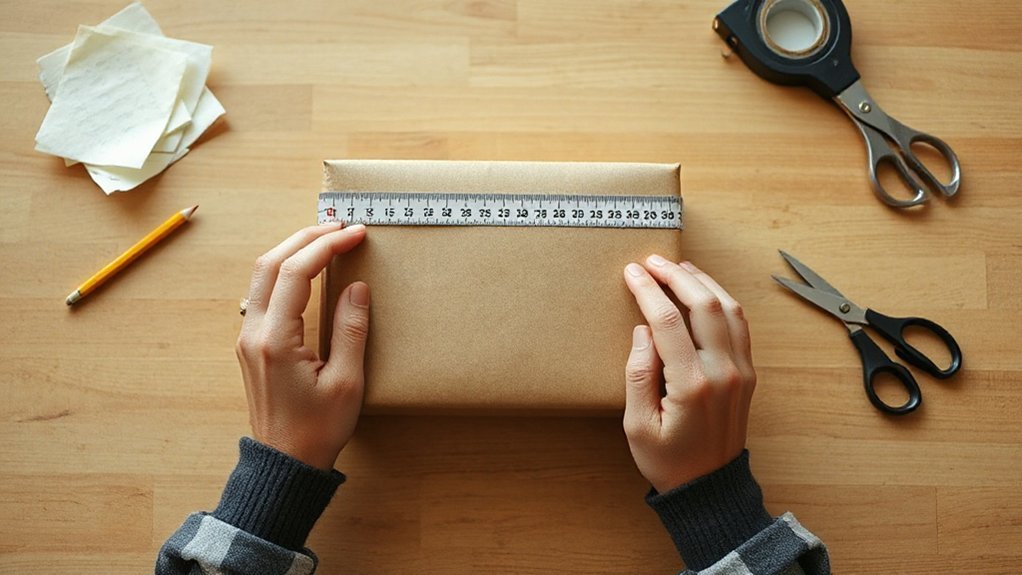
Measure carefully to cut only what you need: place the box on the paper, roll it lengthwise to find the exact wrap circumference plus an overlap for tape (usually 1–2 inches), then measure from top to bottom adding enough for neat end flaps (about half the box height on each side). Use simple measuring techniques: mark the overlap with a pencil, note edge alignment, and double-check dimensions before cutting. Work in inches or centimeters consistently so you don’t miscalculate. For oddly shaped boxes, measure multiple points and use the largest circumference. Position the box squarely on the paper to avoid angle errors. These measuring techniques focus on minimizing waste by ensuring you cut once, accurately, and only what’s necessary for a tidy, secure wrap.
Cutting Straight Lines and Preparing the Paper

With your dimensions confirmed, prepare the paper for clean cuts and crisp edges: lay it flat on a firm surface, smooth out any creases, and align the grain or pattern so it runs parallel to the long edge you’ll be cutting. Choose paper selection that suits the box weight and occasion; heavier stock resists tearing, lighter sheets fold neater. Use a sharp craft knife or rotary cutter with a metal ruler for consistent cutting techniques; scissors risk ragged edges. Mark cut lines lightly with a pencil at measured points, then sever in one smooth pass, keeping the ruler firmly against the paper. Trim slowly, check alignment frequently, and square corners precisely so your prepared sheet wraps accurately without excess or gaps.
Securing the Paper to the Box Base
Start by aligning the paper on the box and taping one edge to hold it steady. Use small, discreet pieces of tape at the underside corners and along seams so the paper lays flat without bulges. Smooth each edge with your fingers or a bone folder before adding final tape to keep the finish crisp.
Tape Placement Tips
A single well-placed strip of tape along the center of the base will anchor the paper and prevent shifting as you fold the sides. You’ll select tape types and apply tape techniques that match the paper weight and finish. Use short strips, not long spines, to avoid puckering.
- Place a central anchor: one strip under the box, paper pulled taut.
- Add corner tabs: small pieces at each corner to hold folds.
- Reinforce seams: thin strips along overlapping edges for clean lines.
Work quickly but precisely: press tape firmly, smooth air bubbles, and keep edges aligned. If you use double-sided tape, hide it beneath folds for a seamless look. These tape placement tips will keep the wrap secure and tidy without extra bulk.
Smooth Paper Edges
When you secure the paper to the box base, pull it taut and align the edges before you apply any tape so the finish stays smooth and flat. Work from the center outward, smoothing with your palm to remove air pockets and follow the paper texture so you don’t stretch patterned paper. Keep edge alignment precise: fold crisp 45-degree corners, crease with your fingernail, then press flat. Use small pieces of tape placed discreetly under the fold, not across the visible face, to avoid lumps. If the paper shifts, lift and reset rather than forcing it; small adjustments preserve straight lines. Finish by running a bone folder or ruler along each seam for a polished result and uniform edge alignment.
Folding Neat Corners and Tucking Edges
Once the paper covers the box snugly, fold the excess at each corner into crisp, triangular flaps and press sharply along the edges so the paper lies flat against the box. You’ll use simple corner folding techniques and deliberate tucking methods to shape neat corners. Work one corner at a time, smoothing as you go. If paper resists, lift slightly and re-align before creasing.
- Fold top flap down, crease toward the box for a sharp triangle.
- Tuck side flap in tightly, aligning edge with the box face.
- Smooth remaining flap over, press seam flat and adjust for symmetry.
Check all corners for uniformity. Repeat adjustments until each corner mirrors the others, producing clean, professional-looking edges without excess bulk.
Finishing the Top With Tape and Smooth Seams
Before you secure the top, smooth any remaining wrinkles and align the paper edges so the seam sits centered and straight; this makes taping quicker and less visible. Press the seam flat with your fingers or a bone folder, then choose tape types based on visibility and strength: clear tape for invisible seams, double-sided for hidden joins, or paper tape for a cleaner finish. Cut short strips to avoid puckering and apply them firmly along the seam, pressing outward to remove air. For corners, add a small reinforcement tab under the flap. Inspect seam finishes for gaps or lifted edges, and add a tiny piece of tape behind them. Trim stray paper and re-press the seam for a crisp, professional top.
Adding Ribbons, Bows, and Decorative Accents
Start with a clear plan for your ribbon and bow placement so every accent looks intentional and balanced. Choose ribbon types that suit the occasion—satin for elegance, grosgrain for structure, or twine for rustic charm. Select bow styles to match: a classic loop, a flat bow, or a pom-pom knot. Position decorative accents to enhance, not clutter.
- Visualize a centered cross wrap for symmetry.
- Picture a single corner cluster for asymmetry.
- Imagine a slim band with a miniature ornament as focal point.
Use neat embellishment techniques: secure knots tightly, hide tails under loops, and trim ends at an angle. Attach accents with removable adhesive so recipients can reuse them. Keep lines clean and elements balanced.
Labeling and Personalizing Your Wrapped Gift
A single well-placed label can make your gift feel thoughtful and complete, so choose clear, readable text and a style that matches your wrap. Place personalized tags where they won’t hide decorative accents; tie one to a ribbon knot or affix it to the box corner. Use sturdy cardstock or a pre-made tag for a polished look.
Write concise, sincere creative messages that reflect your relationship: a short joke, a memory, or a simple wish. Print or handwrite neatly; use a fine-tip pen for control. Include recipient and sender names if needed, and date the gift for keepsakes. Consider small extras—wax seals, stickers, or a tiny charm—to reinforce the theme without cluttering the presentation.
Conclusion
You’ve got the essentials: pick sturdy paper and the right tools, measure to avoid waste, cut straight with a ruler and knife, and wrap snugly with neat folds. Secure the base, tuck and crease corners, then smooth seams on top and finish with discreet tape. Add a ribbon or bow and a personalized label to suit the occasion. With these steps you’ll create a tidy, durable, and attractive package every time.